Showing posts with label art. Show all posts
Showing posts with label art. Show all posts
Thursday, November 29, 2018
Thursday, November 22, 2018
Black Friday Shopping for FREE stuff!
Skip the crowds this Black Friday, and shop from the comfort of your home -- without spending a dime! I have scoured our local Free listings on Craigslist to find all sorts of great stuff.
It is missing veneer in a couple of places, so it's a perfect candidate for a little wood putty and paint, like this dresser, from This and That Life.
This leather sofa is in good condition, structurally, and just needs to have the leather reconditioned to be beautiful, once again.
Here's an easy example of how to create your own wall decor. If you are doing this over an old piece of art, give it a good base coat of paint, first, and let that dry completely before taping a pattern off with painter's tape or masking tape.
If you have someone strong in your life, you might grab this vintage safe. It has a working combination!
So much great patina! I would clean it and seal it and put it in my living room.
I've seen these converted to occasional table and dry bars. Here is one I found on Apartment Therapy.
While a stack of old magazines might seem like a strange thing to get on Craigslist, collage artists, and papier mache artists and crafters can find all sorts of things to do with them.
If you find something as amazing as this mirrored armoire, grab the truck and go get it! It's stunning, just as it is.
It is missing veneer in a couple of places, so it's a perfect candidate for a little wood putty and paint, like this dresser, from This and That Life.
This leather sofa is in good condition, structurally, and just needs to have the leather reconditioned to be beautiful, once again.
These channel back chairs look like they've spent the last sixty years in an unused living room. I might pull the skirts off, to update them, but the off white upholstery is in great shape, and off-white is always classic.
People are often giving away faded or dated framed art. These make great "canvases" to create new art pieces for your walls.
Here's an easy example of how to create your own wall decor. If you are doing this over an old piece of art, give it a good base coat of paint, first, and let that dry completely before taping a pattern off with painter's tape or masking tape.
Two things, in the picture below, caught my attention. First, the vintage metal doll crib is just darling. I might use it like a basket, and store extra lap blankets in it, keeping it under an end table.
Second, that ornate frame is gorgeous! I would clean it up and put a thin piece of plywood in it, painted with chalkboard paint, like this one.
If you have someone strong in your life, you might grab this vintage safe. It has a working combination!
So much great patina! I would clean it and seal it and put it in my living room.
I've seen these converted to occasional table and dry bars. Here is one I found on Apartment Therapy.
While a stack of old magazines might seem like a strange thing to get on Craigslist, collage artists, and papier mache artists and crafters can find all sorts of things to do with them.
This starburst mirror was made from magazine pages!
And then there are the ubiquitous paint listings. You can paint your house, paint your armoire, paint your mirror, and still have paint left over!
And then there are the ubiquitous paint listings. You can paint your house, paint your armoire, paint your mirror, and still have paint left over!
I love wheeled carts. They are great for craft supplies, sewing supplies, party drink stations, etc.
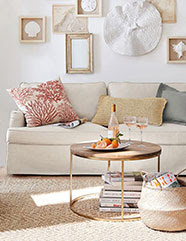
These beige sofas are clean and in good repair, with classic lines.
Add some pretty pillows, like these, from Pottery Barn, and your living room will be a show stopper!
You might also enjoy this post on how to weave a rush seat.

Or you might like this post on mixing paneling styles.

If you enjoyed this tutorial, please subscribe to House Revivals in the sidebar, so you won't miss the fun projects we have scheduled. Find us on Facebook, too, so you can catch all the "in between" stuff, and see what I'm working on daily on Instagram. Feel free to link today's post to your favorite social media sites.
Thanks so much for stopping by!
Amanda
You might also enjoy this post on how to weave a rush seat.

Or you might like this post on mixing paneling styles.

If you enjoyed this tutorial, please subscribe to House Revivals in the sidebar, so you won't miss the fun projects we have scheduled. Find us on Facebook, too, so you can catch all the "in between" stuff, and see what I'm working on daily on Instagram. Feel free to link today's post to your favorite social media sites.
Thanks so much for stopping by!
Amanda
Tuesday, November 20, 2018
Easy Thanksgiving Greeting Card
Sometimes, it's a good idea to pull out old craft supplies, and look at them with new eyes. For this card, I used a decades old Stampin' Up Thanksgiving stamp.
The rubber was still in perfect condition, and it stamped perfectly. I paired the stamp with this adorable fox paper. The paper is from a couple of years ago, but the colors are still a fresh take on Fall.
The rubber was still in perfect condition, and it stamped perfectly. I paired the stamp with this adorable fox paper. The paper is from a couple of years ago, but the colors are still a fresh take on Fall.
Thursday, September 13, 2018
Tuesday, August 14, 2018
How to Draw Fanciful Mushrooms -- Easy!
Sometimes it's fun to sketch something fanciful. A couple of years ago, my granddaughter and I decided to draw each other pictures and mail them to each other.
These little mushrooms were originally drawn to send to her, but then my contractor came by with his little girl, and she loved the mushrooms, so I sent them home with her. Don't worry, my granddaughter got plenty of other pictures.
Labels:
art,
cardmaking,
gifting,
kids,
paper crafts,
tutorials
Thursday, August 9, 2018
Make Your Own Mixed Media Business Cards
I was shopping in a local Seattle thrift shop a few weeks ago and found a package of printable business cards. In my mind, the line between art supplies and office supplies is blurred, so I grabbed the business cards and brought them home.
I shared in this post on how to create your own mixed media master board, that I sometimes use master board to make business cards. I decided to treat the business card sheets as if they were master board substrates, and use them to create... wait for it... business cards!
Thursday, August 2, 2018
Tuesday, July 31, 2018
Make These Impossible Paper Spheres {FREE Printable}!
While doing some random internet research, a few weeks ago, I found some gorgeous paper spheres at the lovely blog Hattifant. The editor of Hattifant also found the form while searching the internet, and suspects it is of Scandinavian origin. I was immediately intrigued by the form, and decided to play around with some paper and figure out how to draft my own templates.
After some trial and error, I figured out the math to make these little paper spheres, first making them from vintage book pages. I shared them on my Instagram account, at the time, but I couldn't get the concept out of my mind. I decided to transfer the measurements into CAD, so that I could print out very accurate templates, and experiment with coloring designs.
After some trial and error, I figured out the math to make these little paper spheres, first making them from vintage book pages. I shared them on my Instagram account, at the time, but I couldn't get the concept out of my mind. I decided to transfer the measurements into CAD, so that I could print out very accurate templates, and experiment with coloring designs.
Thursday, July 26, 2018
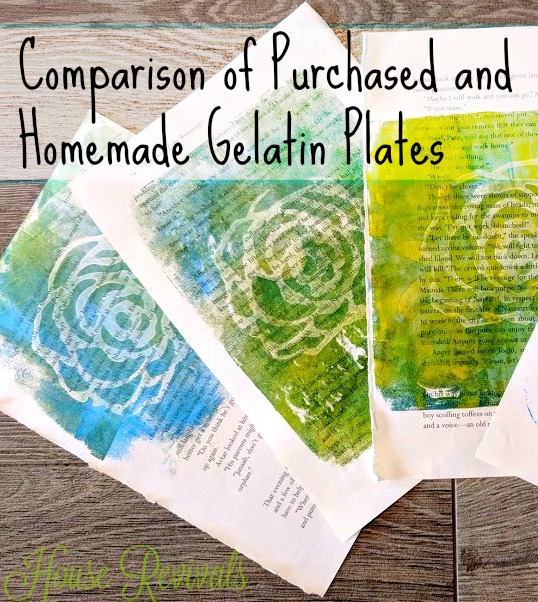
Comparing Purchased and Homemade Gelatin Plates
Last week, I posted about making a permanent gelatin printing plate at home. The project was much easier than imagined.
Today, I'm sharing a comparison of how a homemade gelatin plate stacks up against purchased gel plates. I purchased three gel plates on Amazon to compare.
Labels:
altered art,
art,
crafting,
diy,
diy projects,
folk art,
paper crafts,
tutorials
Tuesday, July 17, 2018
How to Make a Permanent Gelatin Plate
This is one of those projects that I procrastinated trying for several years. Then, I did it and realized how easy it was and felt silly for putting it off all this time.
Do you have projects like that? I love all the cool things folks are doing with gelatin plates, and I've had a small Gelli Arts plate for some time, but I wasn't exploring the gelatin printing process as much as a wanted, mostly because we go back and forth between three different homes, for my husband's job, and the place where we spent the most time was very small and I didn't have space to spread out big projects.
Labels:
altered art,
art,
crafting,
diy,
diy projects,
folk art,
paper crafts,
Recipes,
recycling,
tutorials
Thursday, July 5, 2018
Draw and Color a Peony
On rainy Sunday mornings at the beach house, I like to sit at the dining table and sketch or doodle. I rarely go upstairs to the studio to get "real" art supplies. Instead, I use supplies from a kid's art supply tote. This way, I don't feel pressured to create something special, and I remind myself that you can create pretty stuff from anything (also, sometimes I'm just too lazy to climb the stairs).
On rainy spring days, in the Pacific Northwest, I find myself craving color and flowers, so on this particular morning, I grabbed a silk flower and quickly sketched it out.
Thursday, June 28, 2018
The Art of Meenakshi Temple {a tutorial}
On our recent trip to India, we visited Meenakshi Ammon Temple, in Madurai, Tamil Nadu. Meenakshi Temple is beautiful, with a central pool, intricate carvings, ceiling murals, and Kolam designs on the floor.
The temple is an amazing example of Dravidian architecture, with it's towers encrusted with carvings of gods and goddesses.
The temple is an amazing example of Dravidian architecture, with it's towers encrusted with carvings of gods and goddesses.
I was most enamored with the colorful ceiling medallions. Each medallion is unique and brightly painted.
You can't help but be cheered by the abundant use of joyous color at Meenakshi Temple.
Much as I would have loved to sit down with a sketchbook to record what I saw, I had to satisfy myself with snapping a few pictures at the time.
I've always enjoyed doodling medallions or mandalas, but after the Meenakshi Temple visit, these doodles bring fond memories of a very special time and remind me of the exuberantly painted ceilings we'd admired.
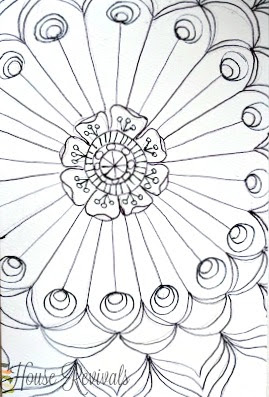
I like to start a doodle using a mechanical pencil with a white eraser. White erasers don't smudge like the red ones do. To create a medallion, I start by creating circles -- these can be freehand or made with templates like lids and cups and bowls. Next, I divide the circles into four segments, then eight segments, and so on. I don't worry about perfection, because, it's just a doodle. Doodling is a creative way to relax, and I don't find seeking perfection to be relaxing. I usually doodle medallions without a plan, making petals or leaves or feathers in concentric patterns.
I like to start a doodle using a mechanical pencil with a white eraser. White erasers don't smudge like the red ones do. To create a medallion, I start by creating circles -- these can be freehand or made with templates like lids and cups and bowls. Next, I divide the circles into four segments, then eight segments, and so on. I don't worry about perfection, because, it's just a doodle. Doodling is a creative way to relax, and I don't find seeking perfection to be relaxing. I usually doodle medallions without a plan, making petals or leaves or feathers in concentric patterns.
After I've sketched the medallion with pencil, I go over my lines with a smear proof pen and erase the pencil lines (sometimes -- other times I leave the pencil lines, because of that perfection thing).
The piece is then colored in layers. In this case, I started out by lightly laying on a base of color with Spectrum Noir markers.
Then more layers were added, to build up color. I changed my mind about the color direction along the way, but didn't stress over it, since the point was to play.
Next, I added some colored pencil on top of the marker layers. That turned out pretty, but I didn't like the texture, so I took the Spectrum Noir blending pen and blended the color out. I was pleasantly surprised by how well this worked, as not all alcohol markers play well on top of colored pencil. My Chartpaks cause waxy colored pencil marks to get gummy and weird.
I hope you try your hand at doodling. I love it, because it's not intimidating -- you don't need any drawing skills or knowledge of perspective or shading (although you may want to try shading to add dimension to your pieces at some point). If you can trace around a bowl, you can draw a decorative medallion.
You might also enjoy this post about India's colorful trucks.
You might also enjoy this post about India's colorful trucks.
You might also enjoy this post about how to draw a spring tulip.
If you enjoyed this tutorial, please subscribe to House Revivals in the sidebar, so you won't miss the fun projects we have scheduled. Find us on Facebook, too, so you can catch all the "in between" stuff, and see what I'm working on daily on Instagram. Feel free to link today's post to your favorite social media sites.
Thanks so much for stopping by!
~Amanda
Labels:
architecture,
art,
cardmaking,
family,
flowers,
folk art,
making flowers,
paper crafts,
travel,
tutorials
Tuesday, June 26, 2018
Tuesday, June 19, 2018
Make a Sweet Fairy Cutaway Card
My sweet granddaughter will be getting a new baby brother pretty soon, and I wanted to make her a card to remind her how special she is to us. She is still at the age where she adores anything with pink or with flowers or with ribbon.
Labels:
art,
baby,
cardmaking,
folk art,
kids,
paper crafts,
tutorials
Thursday, June 14, 2018
Make a Framed Filigree Card
The thing I love best about card making, is that you can create something beautiful in a short amount of time. We are all busy, but we want to be creative.
You can easily create this card while the kids are napping, or in the evening after work. To make this card, you will need a frame die, and a filigree die. You can see that my frame die had a fancy shape.
You can easily create this card while the kids are napping, or in the evening after work. To make this card, you will need a frame die, and a filigree die. You can see that my frame die had a fancy shape.
Labels:
art,
cardmaking,
diy,
diy projects,
folk art,
gifting,
gifts,
paper crafts,
tutorials
Tuesday, June 12, 2018
How to Draw a Spiral Rose
There are lots of ways to draw a stylized rose. Here is a fun little rose that anyone can draw -- even if you don't know how to draw.
Tuesday, June 5, 2018
How to Create the Look of Delft Tile for Card Making
I love the look of deft tile. When my daughter was young, she had a piano teacher who had been a missionary and had traveled a great deal. Each time they flew one of the dutch airlines, they were each given a keepsake tile.
With all their travel, they collected quite a stack of of these beautiful tiles, and when they settled into their retirement home, the used their delft tile for the fireplace surround.
Thursday, May 31, 2018
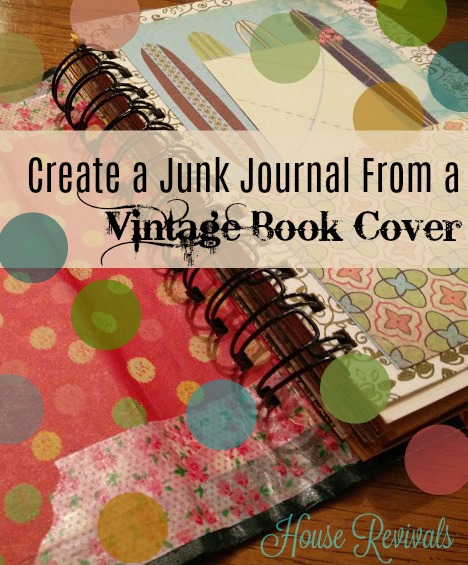
How to Make a Junk Journal From a Vintage Book
Several months ago, my dear friend from Colorado joined me at the beach house for a week of creative fun and beach combing. One of our creative projects was to create junk journals using covers from some old Reader's Digests.
I introduced my friend to the Zutter Bind-It-All, and we watched some YouTube videos for binding inspiration. Then we raided the 'studi-attic' for supplies.
Subscribe to:
Posts (Atom)
