Happy New Year to all my readers. I hope your holidays were joyful. In spite of being taken out for most of the month of December by a nasty flu bug, ours was still a joyous Christmas. Our oldest son proposed to his girlfriend on Christmas Eve, and she said yes!


For the next step, I grabbed a set of round measuring spoons. I carefully formed each petal into a pretty bowl shape, by sandwiching it between two measuring spoons, as shown. You can slightly dampen the paper petal, if desired, if your paper is a bit stiff.

Check back in a couple of days for the tutorial on how the bouquet was assembled, using a battery powered Sonic Screwdriver!

To learn how to make this burnt edge fabric peony, click here.

If you enjoyed this post, please subscribe to House Revivals in the sidebar, so you won't miss the fun projects we have planned. Find us on Facebook, too, so you can catch all the "in between" stuff, and see what I'm working on throughout week on Instagram. Feel free to link today's project to your favorite social media sites.
Thanks so much for stopping by!
Amanda

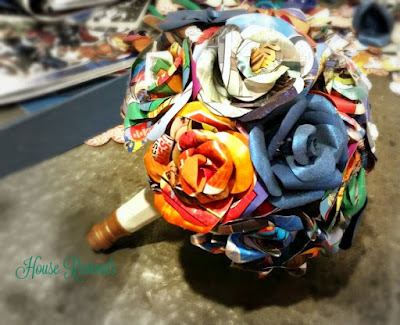
Needless to say, I have weddings on the brain, going into 2019, so I thought I would share a tutorial for paper roses that I used to make a wedding bouquet for the daughter of a dear friend a couple of years ago.
My friend's daughter and her now husband love color and super heroes and Dr. Who and comics, and wanted that reflected in their wedding. They asked me if I could make a bride's bouquet using comic book pages.
My friend's daughter and her now husband love color and super heroes and Dr. Who and comics, and wanted that reflected in their wedding. They asked me if I could make a bride's bouquet using comic book pages.

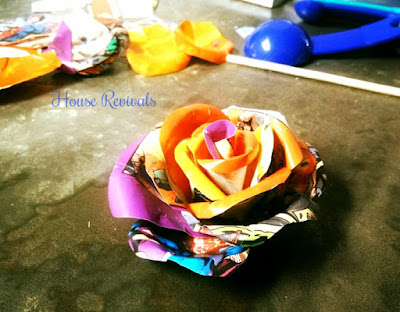
I felt so honored to be asked to create something for their special day, and began experimenting with techniques. I really like the finished look of paper roses when each petal is cut out and shaped individually, before being assembled into a rose. There are quicker methods than doing it this way, but this was for the bride to carry, so I didn't mind a little bit of extra work.
For the comic pages, I decided to splurge on nicer comic books, made with heavier glossy paper. I liked the brightness of the colors on the nicer books, and was also worried that the ink might rub off, if I used cheaper comic pages. The last thing we want, is for ink to rub off on the bride's dress!
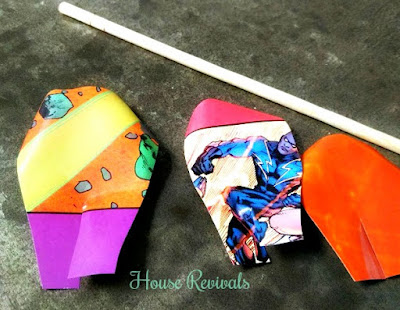
I started by cutting out three different sizes of petals, as shown above. The larger petals were about two and one-half inches long, for context. I did not use a template -- I just free handed the cutting. Each petal was given a half-inch vertical cut on the bottom edge.
For the comic pages, I decided to splurge on nicer comic books, made with heavier glossy paper. I liked the brightness of the colors on the nicer books, and was also worried that the ink might rub off, if I used cheaper comic pages. The last thing we want, is for ink to rub off on the bride's dress!
I started by cutting out three different sizes of petals, as shown above. The larger petals were about two and one-half inches long, for context. I did not use a template -- I just free handed the cutting. Each petal was given a half-inch vertical cut on the bottom edge.

For the next step, I used a round chopstick to curl the tops of the petals slightly.

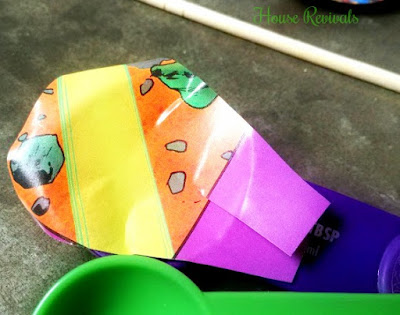
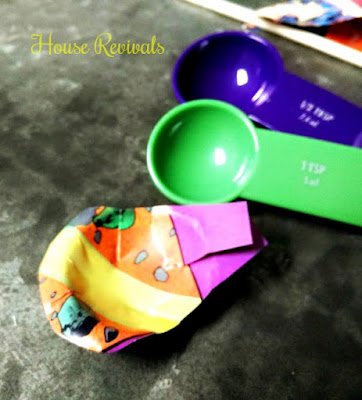
For the next step, I grabbed a set of round measuring spoons. I carefully formed each petal into a pretty bowl shape, by sandwiching it between two measuring spoons, as shown. You can slightly dampen the paper petal, if desired, if your paper is a bit stiff.

The slit you cut will give the paper the ease it needs to form into a bowl shape.

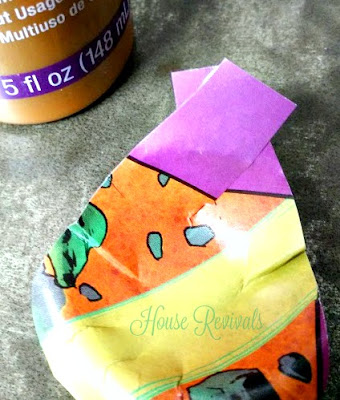
Next, glue the two paper tabs on the bottom of the petal together, as shown.

I prefer to build my roses from the largest petals to the smallest, so I glued four or five large petals together to form the base, then glued a layer of medium petals, then used the smaller petals to form the center.

Check back in a couple of days for the tutorial on how the bouquet was assembled, using a battery powered Sonic Screwdriver!

I you enjoyed this post, you might also enjoy this tutorial for making paper peonies!
To learn how to make this burnt edge fabric peony, click here.

If you enjoyed this post, please subscribe to House Revivals in the sidebar, so you won't miss the fun projects we have planned. Find us on Facebook, too, so you can catch all the "in between" stuff, and see what I'm working on throughout week on Instagram. Feel free to link today's project to your favorite social media sites.
Thanks so much for stopping by!
Amanda