Google+ House Revivals: paper crafts
Showing posts with label paper crafts. Show all posts

Tuesday, January 8, 2019

Make These Comic Book Roses!

Happy New Year to all my readers. I hope your holidays were joyful. In spite of being taken out for most of the month of December by a nasty flu bug, ours was still a joyous Christmas. Our oldest son proposed to his girlfriend on Christmas Eve, and she said yes!


Needless to say, I have weddings on the brain, going into 2019, so I thought I would share a tutorial for paper roses that I used to make a wedding bouquet for the daughter of a dear friend a couple of years ago.

Thursday, November 29, 2018

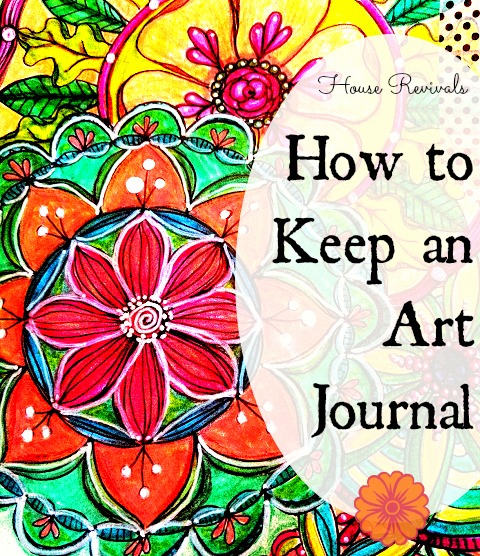
How to Keep an Art Journal

I have several journals. I have prayer journals, planner journals, idea journals, and paste books, but my favorite journals are art journals.


You will usually see me talking about altered book journals, which I make from discarded books -- these are great for mixed media projects.

Tuesday, November 27, 2018

Make This Easy Last Minute Advent Calendar

Here is an easy last minute Advent Calendar that anyone can make. This project uses vintage book pages, but you can use pretty scrap book paper, as well.


It is so easy to create these pretty little advent envelopes.

Tuesday, November 20, 2018

Easy Thanksgiving Greeting Card

Sometimes, it's a good idea to pull out old craft supplies, and look at them with new eyes. For this card, I used a decades old Stampin' Up Thanksgiving stamp.


The rubber was still in perfect condition, and it stamped perfectly. I paired the stamp with this adorable fox paper. The paper is from a couple of years ago, but the colors are still a fresh take on Fall.

Tuesday, November 13, 2018

Make These Book Page Napkin Rings!

Whether you are hosting a large crowd, or just having an intimate dinner, this easy Fall napkin ring DIY is the perfect way to add a finishing touch to your Thanksgiving table.


You can even write guest's names on the leaves and use them as place cards!

Thursday, November 8, 2018

Library Card FREE Printable Template

I love the library.  I have great memories of pouring through the Nancy Drew titles as a girl, making my selections, and checking out. My friends and I liked to read the names on the library cards to see if we knew anyone who had checked out our books before us. Usually, we found each other's names.


Library cards are becoming a thing of the past, but nostalgia keeps me coming back to them. On our trip to India this year, we visited some beautiful places that I wanted to commemorate with some new designs. A series of library cards came out of this. This library card set is named after Kerala -- one of the loveliest places on this earth.

Tuesday, November 6, 2018

Make Special Ornaments From Greeting Cards

My son and his new wife had a sad assortment of Christmas ornaments -- a couple of hand print ornaments from a little niece, and a half dozen plastic spheres. It hurt my heart.


Both my son and his bride are busy software engineers, with a forty-five minute commute to and from work, so they don't have a lot of time to shop for Christmas decorations. After their wedding last September, they brought me all their leftover invitations, thinking I could "do something" with them. I could. I did. I combined them with some of the greeting cards our family had received over the years, and some scraps of card stock to create these pretty paper ornaments for their tree. They were delighted.


These are made using the same "triangle-within-a-square" technique that our grandmothers used to made paper spheres from old greeting cards to decorate their Christmas trees, except these are two sided, instead of spherical. My beautiful daughter-in-law is from India, so I wanted to create something colorful and elegant that had an Asian feel.


To make these ornaments, you need a circle template and a triangle template. Normally, I would have drafted the templates in CAD, and printed them out, but my printer was out of ink, and I am impatient. I decided to use a two inch hole punch that I had in my stash (here's an affiliate link to a two inch punch), and then hand draft an equilateral triangle to fit perfectly inside it. Except, I didn't have access to my drafting tools.

I tried holding a piece of paper to my computer screen and tracing a 60 degree angle, but that was less than perfect. Then, I looked around the house for a triangle. I also began looking around for a flat piece of plastic to cut a sturdy template from. When I found the plastic lid to my dishwasher pod container, I also found my equilateral triangle! As is turns out, that little recycling symbol is an equilateral triangle, so I was able to get my sixty degree angle. I drew two legs of the triangle the exact same length, then connected them.

I made my triangle slightly small -- the points don't quite reach the edge of the two inch circle. This was because I wanted to account for the thickness of the plastic.


Side note: this technique will also work with your scalloped punch. Just make sure the number of scallops is divisible by three. My scallop punch, from Fiskars, has fifteen scallops, so it works perfectly. (Fiskars scallop punch affiliate link)


For each ornament, you will need to punch ten circles. Place your sturdy triangle template on top of the pretty side of your card stock (or upcycled greeting card), centering it. Carefully fold the card stock up, using the edge of the triangle as a guide. Some folks use the triangle as a guide to carefully score a fold line, but I like my method better, because it's so fast.


 Do this on all three sides, being careful to keep the triangle centered.


Fold the sides completely over, to get a nice crease. You will now have a triangle with three rounded tabs. Each tab will be glued to a tab on an adjacent triangle to create your ornament.


Glue five of the triangles together, radiating out from a central point, for the first side. Repeat, for the second side. Glue the front and back together. You can glue a ribbon hanger into the top of the ornament at this time. If desired, punch a hole in the bottom of the ornament and hang some fibers to create a pretty tassel.


I must warn you, these ornaments are addictive. You will find yourself scouring your house for old greeting cards and card stock to make more and more and more!


My son and his beautiful bride love the fact that pieces of my son's past Christmases were used, as well as mementos from their wedding.

While I was digging, I found a lovely old Christmas card from some dear family friends. The card had pictures of their kids when they were little, as well as a letter talking about the family's interests at the time -- all printed on lovely card stock! I was able to make an ornament for them using their old card. They were thrilled to receive the memento. There was nothing this couple needed, as a gift -- they have had successful careers and can buy anything they want, so giving them something sentimental and handmade was perfect.


I hope this post encourages you to dig out those old greeting cards and create your own special mementos.


For another easy ornament DIY, you may want to check out this tutorial.


If you enjoyed this tutorial, please subscribe to House Revivals in the sidebar, so you won't miss any of the fun projects we have scheduled. Find us on Facebook, too, so you can catch all the "in between" stuff, and see what I'm working on daily on Instagram. Feel free to link today's post to your favorite social media sites.

Thanks so much for stopping by!
Amanda

Tuesday, October 30, 2018

FREE Sugar Skull Embellishment Printable!

Wow! Can this really be the last of the sugar skull printable series?


Throughout October, we've been publishing sugar skull coloring sheet printables. We've introduced Rose and Daisy and Hibiscus and Zinnia and Frida. These printables are perfect for your Day of the Dead decor!


Each coloring sheet came with a skull and several embellishments. Today, we're offering a FREE extra embellishment printable sheet.


All of the skulls and embellishments are coordinated, so you can mix and match embellishments to customize your sugar skulls.


For another (not so) spooky project, try this lace applique owl!


If you enjoyed this tutorial, please subscribe to House Revivals in the sidebar, so you won't miss the fun projects we have scheduled. Find us on Facebook, too, so you can catch all the "in between" stuff, and see what I'm working on daily on Instagram. Feel free to link today's post to your favorite social media sites.

Thanks so much for stopping by!
Amanda

Thursday, October 25, 2018

FREE Zinnia Sugar Skull Coloring Sheet!

Hello Friends! Today we're sharing the last of five FREE sugar skull printables, with a sugar skull embellishment printable still to come.


These printables were designed just for you, and are available to print for FREE throughout the month of October. Keep checking back, because I will be posting a full page of floral sugar skull embellishments in a couple of days -- also FREE!


So far, we've met Daisy and Rose and Frida and Mr Hibiscus. Today, we're meeting Zinnia. Zinnia is the olive green smiling friend shown below. Well, mine is olive green.


Yours can be colored any way you prefer, of course. I just thought the olive green made him look moldy and creepy.


Each sugar skull printable coloring template comes with lots of extra embellishments, so you can customize your decorations.


All the embellishments on the different coloring sheets can be mixed and matched, as the floral motifs are coordinated in this series.


I hope you enjoy coloring and assembling your sugar skull friends as much as I did!  Thanks you for following along, and be sure to check back for the extra embellishment printable.

Get your Zinnia Sugar Skull printable here.

You may also enjoy this post about how to make Christmas ornaments from dollar store supplies.


If you enjoyed this post, please subscribe to House Revivals in the sidebar, so you won't miss the fun projects we have planned. Find us on Facebook, too, so you can catch all the "in between" stuff, and see what I'm working on throughout week on Instagram. Feel free to link today's project to your favorite social media sites.

Thanks so much for stopping by!
~Amanda


Tuesday, October 23, 2018

FREE Frida Sugar Skull Printable!

Can you believe it? Today is the fourth installment of our sugar skull printable series -- only two more printable to go! This is such a fun project.


We've met Rose and Daisy and Mr Hibiscus. Today, we're meeting Frida. 


Frida is in her element with all these floral embellishments. Below, is her selfie with her good friend, Rose.


The Frida printable coloring sheet comes with lots of extra roses and leaves to create her iconic floral headdress.


She's happy hanging out with her floral friends. Here's another selfie she took with Mr. Hibiscus.

To create your own Frida sugar skull, click on the link below and print the template. Color the page as desired, using whatever coloring medium you like. I like to use alcohol markers. Cut out the skull and the embellishments and assemble as desired.


For another (not so) spooky project, try this lace applique owl!


If you enjoyed this tutorial, please subscribe to House Revivals in the sidebar, so you won't miss the fun projects we have scheduled. Find us on Facebook, too, so you can catch all the "in between" stuff, and see what I'm working on daily on Instagram. Feel free to link today's post to your favorite social media sites.

Thanks so much for stopping by!

Tuesday, October 16, 2018

Free Hibiscus Sugar Skull Printable!

It's time! As promised, we are providing FREE printable templates throughout the month of October for these fun coloring page sugar skull templates.


Last week, we shared Rose and Daisy.


This week, we are sharing Mister Hibiscus. He's the green fellow in the picture below.


As with the previous printable pages, the hibiscus sugar skull printable also comes with lots of extra flowers and medallions for embellishing your skulls. 


To create your sugar skulls, go to the link below and print your sugar skull coloring sheet. Color your page as using the media you prefer and cut out the skull and extra embellishments.


Assemble as desired. I like to mix and match my embellishments. You can glue your sugar skulls onto cord or yarn, to create a bunting, or use them in card making or however your prefer. Enjoy!


If you enjoyed this post, please subscribe to House Revivals in the sidebar, so you won't miss the fun projects we have planned. Find us on Facebook, too, so you can catch all the "in between" stuff, and see what I'm working on throughout week on Instagram. Feel free to link today's project to your favorite social media sites.

For another FREE template, click here.
Thanks so much for stopping by!
Amanda

Tuesday, October 9, 2018

Free Rose Sugar Skull Printable Template!

You guys!  For the rest of October, I will be offering FREE printable coloring sheet templates for these amazing sugar skulls!


Today, we have a link for a printable for the gold colored skull, seen below. Keep checking in, because I will continue posting several more templates all month long!

Thursday, September 27, 2018

Gift Box Printable With Wild Rose Template

Here is another version of the gift box printable I shared a couple weeks ago. The last printable featured an aster embellishment and a kaleidoscope inspired design.


Today's printable features a sweet wild rose, gift tags, and a simple floral pattern for you to color.

Tuesday, September 25, 2018

How to Make Coloring Card Gift Sets

The struggle is real. What in the world do you do with all those coloring books? I love them, the art is beautiful, and they are fun to color, but if I start coloring now, and color till I die, I will never get them done.


When people find out you're crafty, they give you coloring books. I've got soooo many coloring books, I buy them, people give them to me, and I even had a craft company send me an entire box of the SAME coloring book by mistake.

Thursday, September 20, 2018

Make a Nautical Inspired Baby Card

I had the privilege of attending a baby shower this week, for a sweet mama who is expecting her second baby boy.


The night before the shower, I realized I didn't have a card, so I pulled out my box of "card kits" to find a suitable envelope.

Thursday, September 13, 2018

How to Create Mixed Media Mail Art

It hurts my heart to throw away a large mailing envelope. Why buy new envelopes, when you can just reuse an old one and save a tree, right?


I wanted to create some mail art to send to my granddaughter. Her seventh birthday was coming up, and I wanted to send her some goodies.

Tuesday, September 11, 2018

Make Pretty Cards {from materials that don't go together}

Have you ever wondered how to pull together lots of different components that don't seem to go together, to create something pretty?


Sometimes you just need to let go of preconceived notions of what "goes" and what doesn't go.

Thursday, September 6, 2018

How to Pull Supplies Together For a Pretty Card

One thing I've noticed, when my friends are making cards, is that they often feel a little paralyzed by the thought of creating a card without a set of instructions and a materials list.


It's okay to make cards that way, but it's very freeing to know that you can go through supplies you already own, and pull out the things you need to create one of a kind pieces.