Finally! The second Scandinavian Star tutorial is here!
**Important Note: The woven star is a very old traditional pattern that goes by many names. Here is a picture of a Swedish Window Star that has been in my friend's family for nearly one hundred years! Isn't it stunning?

People have been weaving similar versions of the woven star for a long time. Most commonly, I see it called a Finnish Star. You may also see them called Advent Stars or Window Stars or Poinsettias. The woven star concept is an idea and ideas cannot be copyrighted in the US. A person can only copyright their own expression of an idea. For more information, see this important post about copyrights and why I refuse to be bullied and intimidated into removing my own expression of the process for creating this star. If you have created your own tutorial of a traditional craft, and are receiving threatening, bullying, or intimidating emails to remove your tutorial, I would urge you to know your rights and to seek the advice of an attorney. Let's not allow the bullies to win. I am not an attorney, and nothing I have said should be construed as legal advice.


Do you all remember the first woven star tutorial found here? I love these traditional stars!

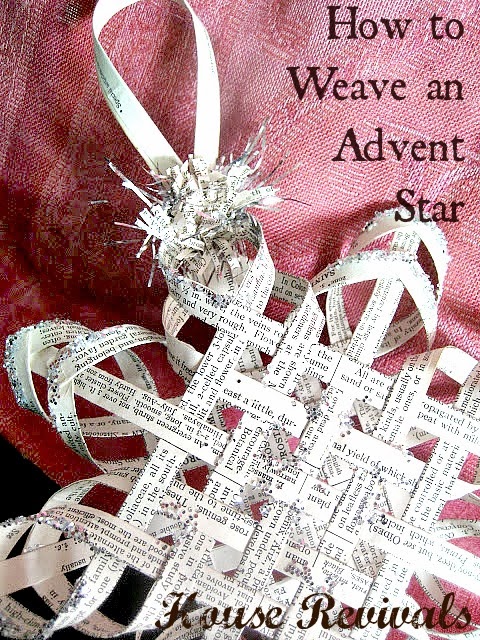
Here is the star we will make today:

This star has more strips woven together than the previous star, creating a fuller looking ornament.


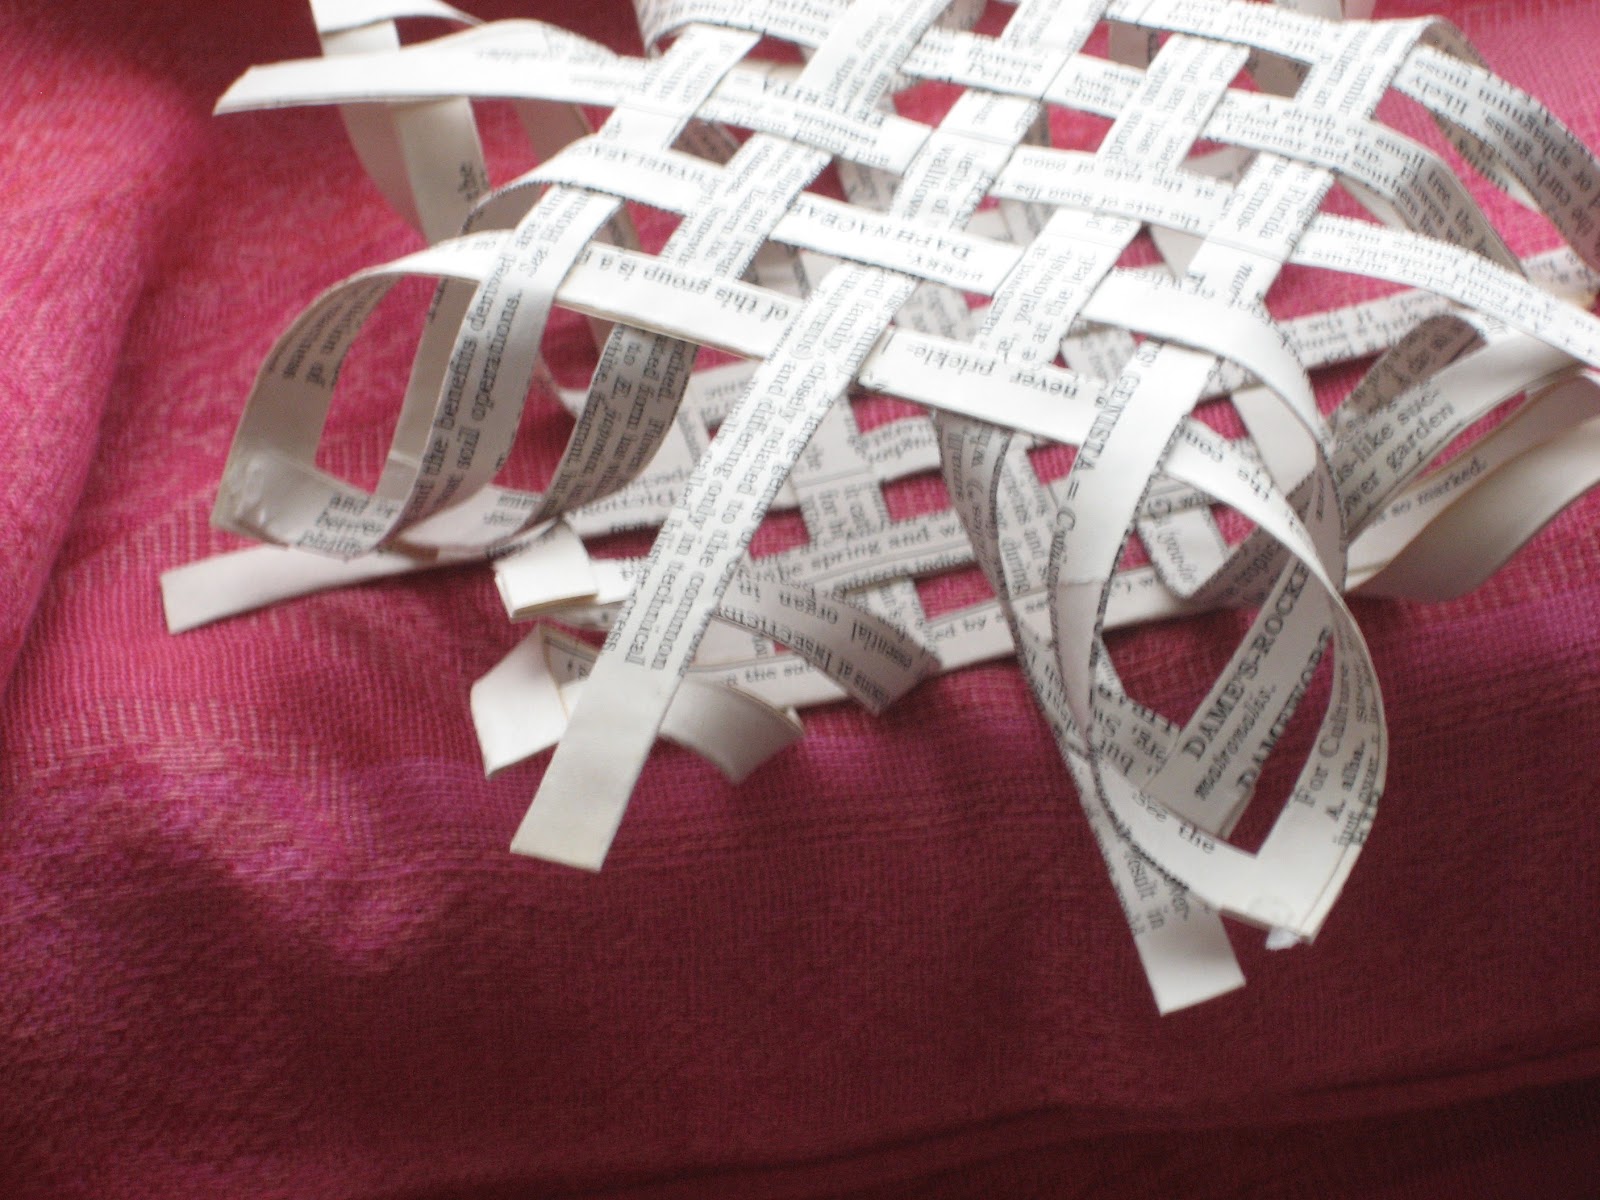
Do this by gluing together the ends of adjacent corner strips. Remember to put a twist in each strip before gluing, just like I showed you in the first tutorial. In the original star, you just glued one set of strips per corner, but for this star you will glue two sets per corner, as shown. Use clips to secure the points until the adhesive cures.

Do all four corners, or "points" the same way. *note: I have seen some people doing their corners a bit differently, gluing all four strips of each corner together. It really turns out pretty! Get creative and have fun with it.

Once the glue has cured, and you remove the clips, you should have two "sides" that look like this.

Now, you will put the two sides together just as you did for the original star, rotating the top side 45 degrees, so that the "points" from the two sides are offset, to form what will be an eight-pointed star.

Weave the remaining strip on each side through the points on the other side, as shown. Glue and clip.

Continue until all the points have been secured. When the glue has dried, remove the clips. Create a hanger, as shown in the original tutorial. Embellish as desired, or leave your star plain.

I chose to add a bit of glitter and tinsel to mine, as well as a fringed rosette for the top of the star -- this helps camouflage where the hanger was secured.


Watch for the third star! If you are not already a follower, you may want to to click on follow in my side bar, so you're sure not to miss the third installment.

In the third installment, we will be making this delicate looking star.

You might also like this post about making book page ornaments with dollar store supplies.


**Important Note: The woven star is a very old traditional pattern that goes by many names. Here is a picture of a Swedish Window Star that has been in my friend's family for nearly one hundred years! Isn't it stunning?

People have been weaving similar versions of the woven star for a long time. Most commonly, I see it called a Finnish Star. You may also see them called Advent Stars or Window Stars or Poinsettias. The woven star concept is an idea and ideas cannot be copyrighted in the US. A person can only copyright their own expression of an idea. For more information, see this important post about copyrights and why I refuse to be bullied and intimidated into removing my own expression of the process for creating this star. If you have created your own tutorial of a traditional craft, and are receiving threatening, bullying, or intimidating emails to remove your tutorial, I would urge you to know your rights and to seek the advice of an attorney. Let's not allow the bullies to win. I am not an attorney, and nothing I have said should be construed as legal advice.


Do you all remember the first woven star tutorial found here? I love these traditional stars!

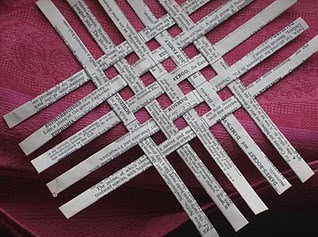
Here is the star we will make today:

Basically,
you need to follow the instructions for the original star, but instead of using
six strips per ornament side (for a total of twelve strips per ornament), you
will use ten strips per side, for a total of twenty strips per ornament. When you weave your sides together, they
should look like this. You will needs two "sides" like this to
make one star.
Secure each intersection with a tiny drop of clear drying glue just like you
did for the original star. Next, you will create the star's
"points".
Do this by gluing together the ends of adjacent corner strips. Remember to put a twist in each strip before gluing, just like I showed you in the first tutorial. In the original star, you just glued one set of strips per corner, but for this star you will glue two sets per corner, as shown. Use clips to secure the points until the adhesive cures.
Do all four corners, or "points" the same way. *note: I have seen some people doing their corners a bit differently, gluing all four strips of each corner together. It really turns out pretty! Get creative and have fun with it.
Once the glue has cured, and you remove the clips, you should have two "sides" that look like this.
Now, you will put the two sides together just as you did for the original star, rotating the top side 45 degrees, so that the "points" from the two sides are offset, to form what will be an eight-pointed star.
Weave the remaining strip on each side through the points on the other side, as shown. Glue and clip.

Continue until all the points have been secured. When the glue has dried, remove the clips. Create a hanger, as shown in the original tutorial. Embellish as desired, or leave your star plain.

I chose to add a bit of glitter and tinsel to mine, as well as a fringed rosette for the top of the star -- this helps camouflage where the hanger was secured.


Watch for the third star! If you are not already a follower, you may want to to click on follow in my side bar, so you're sure not to miss the third installment.

In the third installment, we will be making this delicate looking star.

You might also like this post about making book page ornaments with dollar store supplies.
If you enjoyed this post, please subscribe to House Revivals in the sidebar, so you won't miss the fun projects we have planned. Find us on Facebook, too, so you can catch all the "in between" stuff, and see what I'm working on throughout week on Instagram. Feel free to link today's project to your favorite social media sites.
Thanks so much for stopping by!
Thanks so much for stopping by!
~Amanda