The thing I love best about card making, is that you can create something beautiful in a short amount of time. We are all busy, but we want to be creative.

You can easily create this card while the kids are napping, or in the evening after work. To make this card, you will need a frame die, and a filigree die. You can see that my frame die had a fancy shape.
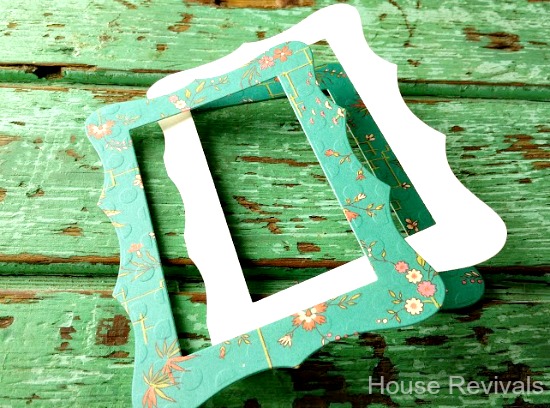
To create the "hinged" function, I folded the card base and placed it over the die, leaving a space on the side of the die where the card base was folded. Do you see how the white folded card below is not fully cut on the left side? That's because of how the edge of the fold was placed in the die.

Note that the card base is folded with the pretty side facing in. I then cut another frame from a single layer of card stock, cutting the full die shape. This single layer frame will be attached to the front of the card later in the process.


You can easily create this card while the kids are napping, or in the evening after work. To make this card, you will need a frame die, and a filigree die. You can see that my frame die had a fancy shape.
To create the "hinged" function, I folded the card base and placed it over the die, leaving a space on the side of the die where the card base was folded. Do you see how the white folded card below is not fully cut on the left side? That's because of how the edge of the fold was placed in the die.
Note that the card base is folded with the pretty side facing in. I then cut another frame from a single layer of card stock, cutting the full die shape. This single layer frame will be attached to the front of the card later in the process.
Next, add your filigree piece to outside of the card base front. You can go crazy, and fill the entire space with filigree die cuts, or just add a bit in the corner, as I did. To attach the piece, I used the tiniest dots of wet adhesive, but you can use whatever adhesive you prefer.

Next, I opened up the card and covered the hole in the inside of the back of the card base with a mat that was cut a little larger than the hole.

Since I had some perfectly cut "holes" cut from the frame, I turned the card over and added a piece inside the hole on the outside of the back of the card. This also helps support the mat piece.

Then, a message was added to the inside of the card, that would be seen through the "window". I also added another filigree piece to the inside of the card, directly behind the one on the card front.

The last step is to add the front frame to the card, as shown below.

I hope you try this technique. It looks a bit fancy, but it's actually pretty quick and simple.

Anyone would be touched to receive a handmade card. I always treasure the cards I receive that have been made by hand.
You might also like this post about making a folding flower card.
If you enjoyed this post, please subscribe to House Revivals in the sidebar, so you won't miss the fun projects we have planned. Find us on Facebook, too, so you can catch all the "in between" stuff, and see what I'm working on throughout week on Instagram. Feel free to link today's project to your favorite social media sites.
Thanks so much for stopping by!
Thanks so much for stopping by!
~Amanda