Google+ House Revivals

Tuesday, November 11, 2014

How to Dye Bottle Brush Trees to Look Vintage

Years ago, I began collecting vintage Putz houses. I just loved the pretty pastel colors of all the little bottle brush trees growing up next to a cheerful mica covered cardboard house or chapel.


I figured out how to bleach them (see that tutorial here), and experimented with ways to dye them. One year I used koolaid powder to dye my trees as well as cotton batting for vintage style cotton ornaments.  While I liked the results of koolaid dyed trees, this year I wanted the trees to have a little more "pop". I couldn't be more pleased with the results!

Start by bleaching out store bought green bottle brush trees. You can find that tutorial here.


Use any acrylic craft paint you have on hand. Pour about a half-dollar sized puddle of paint into a bowl, and add two to three tablespoons of water. You are looking for a thin consistency -- something a little thinner than half and half, but definitely thicker than coffee.


You can use an old fork to dip and roll your trees until they are coated. Then pull them out of the thinned paint and set aside to drain and dry. Avoid letting wet trees touch each other if they are different colors, or you might end up with yellow trees with green spots. Just saying....


Next, you will want to blot your trees. I used paper towels. (As a side note, mixed media artists may want to save paper towels to use on canvases and in art journals. I dry mine out and file with mixed media ephemera for later projects).


Continue blotting your trees until you no longer see puddles forming underneath them as they dry.


Once your trees are completely dry, you can play with them to your heart's content!


Make lots of colorful trees to use in Christmas decor and in ornament making. They are just so pretty!


Have fun coloring your trees! Mix lots of fun colors, and experiment. There are no rules here.


Have you ever bleached and colored your own bottle brush trees? Or maybe you've even made your own trees from jute and wire? Let me know in the comments. If you like what you've read here, be sure to subscribe, so you won't miss any upcoming tutorials. Also, please share a link on Pinterest or other social media!


This post is being linked to the following lovely places:

Thursday, November 6, 2014

Materials to Use for Mixed-Media Art

Have you ever looked a piece of mixed-media art, or an art journal, and wondered how on earth the artist thought to use the materials they chose? The options are endless!


I've been getting back into mixed media projects lately, and shared this art journal guest book this summer.

Art journals and art canvas backgrounds can be made from just about anything! I save all my paper towels from other paint or ink projects for use in mixed-media projects. Simply dry them out and stack them with other supplies.


If you like to sketch while talking on the phone, or as a way to unwind at the end of the day, or to pass the time while waiting to have the oil changed, save those doodles and drawings in a file to add to your mixed-media journals.


Simply cut out around your sketch, and glue them into your journal or onto your mixed-media canvas. Other great materials include book pages (they don't have to be in English), scrapbook paper, and children's books. I love using vintage book pages, because it gives great background texture. You can always dry brush a bit of paint over your background to tone it down, if you need to.


Game cards are great for backgrounds or letters and words can be cut from the cards and added to your art.


Vintage ephemera adds a unique touch. I love this buttonhole technique brochure found at a local Goodwill Store.


Keep on the lookout for vintage greeting cards, as well!


Vintage wallpaper is amazing, as are vintage clothing patterns. Use the envelope or use the tissue or the instructions from inside!


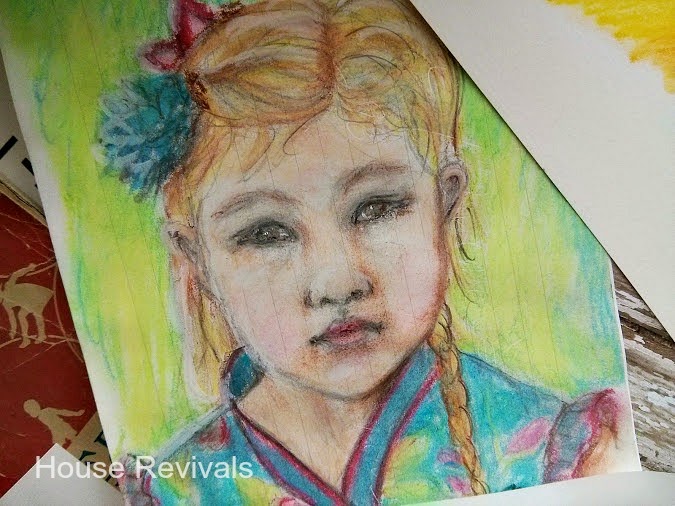
Occasionally, a sketch gets developed a bit more -- in this case, I was experimenting with a set of oil pastels from Daiso Japan. Daiso Japan is like a Dollar Store, but everything is $1.50. I was pretty impressed with how well the oil pastels performed, considering the price!


Art and journaling doesn't have to be expensive. You don't need to run to the store for all your materials. You may find exactly what you need in an old box of letters or in in your recycling bin, or on the notepad next to your phone. What do you have in your art stash?


Tuesday, November 4, 2014

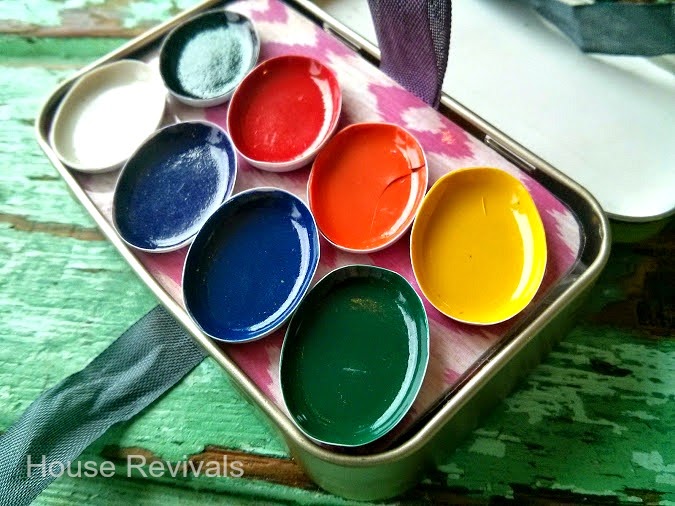
Make a Travel Paint Set From an Altoids Tin!

Here is a great gift idea for the artist in your life! Create a little travel paint set, using student grade paints.


I use mine for art journalling when I'm on the go.

Saturday, November 1, 2014

Vintage Sewing Patterns!

I don't often share thrift store hauls here on the blog, but I am doing the happy dance right now about my latest big find!  I have always loved vintage sewing patterns and pick them up whenever I find them cheap, so I was tickled to find several dozen patterns at the Goodwill recently. Most of them were ninety-nine cents for a two-pack, then another 50% off, so I got most of them for a quarter each!


I'm pretty excited about using these in mixed-media art and in craft projects, as well.  Seriously, though, the fashion illustrations are just so gorgeous, I think vintage patterns are just perfect just as they are!


Have you ever crafted with vintage patterns? What did you make?


I am busily looking up copyright information on my patterns. Some of the envelopes or illustrations seem to be under copyright, but others have fallen out of copyright. Copyrights are not usually a problem for crafting using an original pattern or envelope, but can be an issue if you are planning to make copies of the copyrighted portions of the pattern. For more information about copyright for crafters, click here.


I am loving the white boots this gal is sporting with her "above the knee" skirt!  Looking at the culottes makes me want a pair. We had to wear culottes in gym at my parochial school in the eighties, and even though I pretended to hate them, they were actually super comfy -- and since they had to hit right at the knee, nobody ever worried whether their thighs looked fat. They were wide enough at the bottom to catch a cooling breeze, too! This was kind of a big deal in Arizona where I went to school. Of course, our culottes had modesty flaps, front an back, but those flaps worked great for fanning ourselves after a run. Who knew a sewing pattern from the sixties could make me nostalgic for the eighties?


I am itching to do something with all these patterns!  What would you make?  Would you keep them as they are and use them to sew vintage style clothing?


Would you cut the patterns up and use them for a home decor project or a mixed media project? Let me know in the comments!

Thursday, October 30, 2014

How to Alter an Altoid Tin

I have a confession to make:  I may be an Altoids tin hoarder. I love them so much. I use them to organize jewelry when I travel, to keep art supplies handy, to make sewing kits and first aid kits and so on.


The date on my Creme de Menthe mints said 2009 -- I told you I was a hoarder! I remember buying the mints because I really liked the green color of the tin.  I recently altered this tin to create a watercolor kit for art journaling on the go. Are you an art journaler?


Here is a simple way to alter an Altoid tin. Start by creating a pattern for the top of the tin, by making a pencil rubbing.


I did not want to wait for paint to dry, or to worry about paint chipping, so I kept the original green color and used alcohol based markers to age the metal and to cover the white areas that I thought might peek through after I decorated the top. Alcohol based markers and inks work really well on metal. You have a little bit of work time, for blending, but it dries fairly fast.


Next, I adhered some scraps of patterned paper to the top, using the rubbing I made as a pattern.


Another, smaller piece of decorative paper was glued on top of the first piece, then the whole thing was sanded and distressed, and got a bit more "antiquing" with my alcohol markers.


The bottom of the tin got some decorative paper, as well. Hint: rubbing alcohol will remove the date stamps.


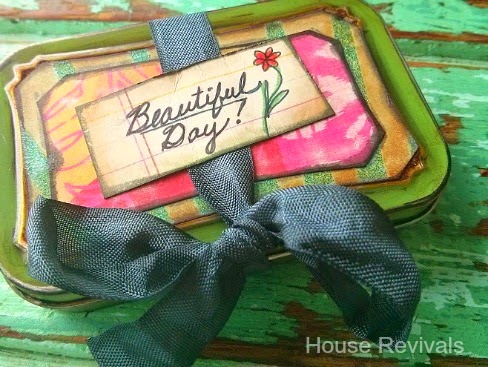
I adhered a piece of hem tape to the tin to create a pretty tie -- if I ever drop my tin, I would hate for its contents to fly all over the place.


Add a cheery note over the hem tape, to secure it well.


You're done!  This is such a simple way to alter a tin -- you can make them to give as gifts, filled with treats or anything you can think of!

Tuesday, October 7, 2014

Entertaining in This Imperfect Life: Lessons We've Learned

We live an imperfect life. Pretty much not one thing in our lives is perfect. We have lived through four renovations in the last five years, and two of them are still ongoing, but even before that our lives were imperfect. It's true.


Our family loves to entertain. We love huge back yard cookouts, and intimate game nights and everything in between. For years I pressured myself to make every single party spectacular. Don't get me wrong -- I LOVE to create well-decorated events, but sometimes the pressure to create awesome parties can take away from your own enjoyment.

Tuesday, September 30, 2014

How to Make Embellished Fabric Beads

Making beads can be really addictive!  Here is a way to make a rolled bead that uses fabric instead of paper and is embellished with strings of beads.


Start by rolling a short length of paper onto a bead roller.  Learn how to make your own bead roller from this tutorial.

Tuesday, September 23, 2014

Remember When We Got That Energy Audit?

Last year we had an energy audit done at the beach house. Best. Idea. Ever! Around that same time we were buying another property and renovating it and dealing with the sudden loss of my husband's mother, so I didn't share too much about the improvements we made afterward. While I shared a little about the audit here...


Tuesday, September 16, 2014

Vintage Style Spun Cotton Ornaments

About fifteen or so years ago I stopped making cookies to give away at Christmas. Instead, I began making Christmas ornaments to give as gifts. What I discovered was that people were actually grateful not to get yet another plate of sugar laden baked goods.


For a couple of years I made little vintage style spun cotton ornaments. I scoured Ebay, studying vintage spun cotton ornaments. Originally, spun cotton ornaments were made by wrapping an armature with cotton roving, but roving wasn't available where I lived, so I used pulled strips of cotton batting to create my ornaments.

Thursday, September 11, 2014

How to Convert Your Antique Double Bed to a Queen Bed

I recently posted about our antique bed makeover, but I forgot to share something really important -- how we convert our antique beds from double, or full-size, to queen size.


It can be very easy and affordable to convert most beds to queen, depending on the type of rails you have and how they are attached to your head board and foot board.