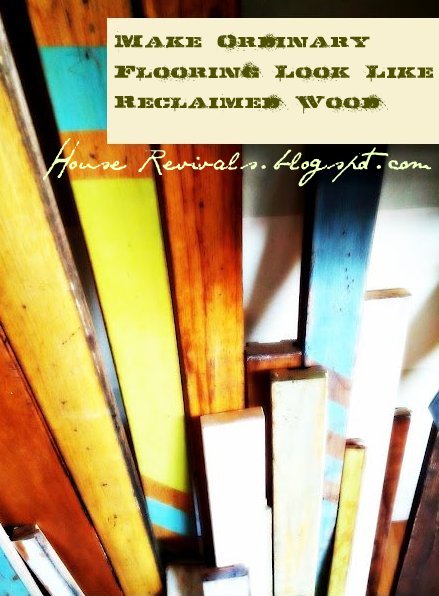
Are you IN LOVE with the reclaimed wood projects we are seeing everywhere? I posted about using reclaimed wood for paneling a few weeks ago, and shared that I want to do a similar finish in my tiny "pied-a-terre".
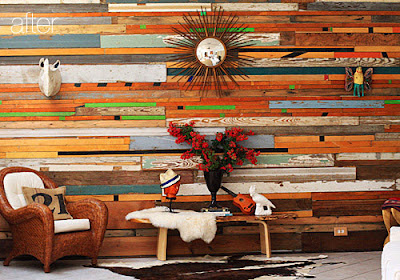
Who wouldn't want all this loveliness?
Well, the condo came with a giant box full of old boards and old wood flooring. The old wood flooring was nothing special -- just bits and pieces of oak that the flipper had been using to patch the existing floors.
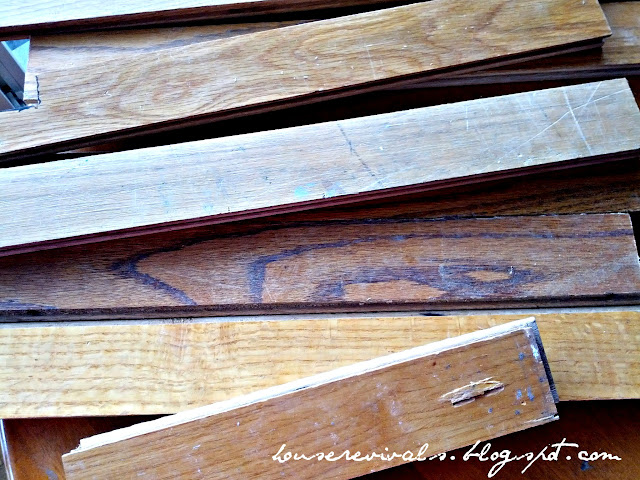
I guess, technically, the wood in the box was reclaimed, but it didn't look like "hip and stylish" reclaimed wood, and it didn't look like "charming" reclaimed wood. It was just "blah" reclaimed wood. I want to use old flooring on the back of our kitchen peninsula, but I don't want it to look like someone "just kept going" when they were installing the floor. Our local building salvage yard has some really cool reclaimed wood. Beautiful, chippy old stuff, with lovely scuffs and dings and loads of character -- and they want loads of money for it.
A light bulb went on... what if I sand and paint and stain and hammer and glaze and gouge and scratch and scrape my ordinary boards to make them look like the lovely (and expensive) old boards at the architectural salvage yard? And so it began.
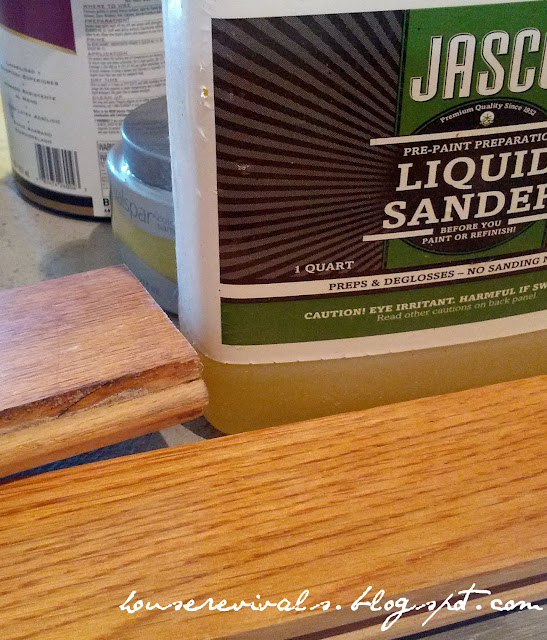
Here is how to take ordinary wood flooring and make it look like it has a charming history. Start by sanding and prepping the boards. I used liquid sander on boards I was planning to paint, but I used a good old sanding block on boards I was only planning on staining. No need to use smelly strippers -- you're not "refinishing" the boards, you're just "adding character". Just sand them enough for the new stain to have something to "grab onto", focusing on the edges and ends.
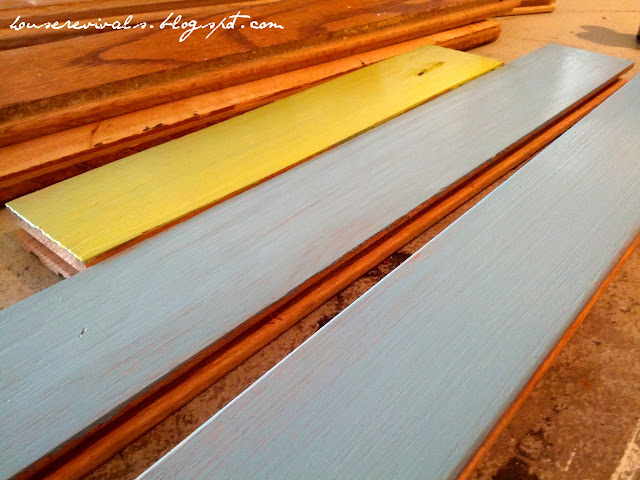
Next, paint the boards you will be painting, and set aside the boards you plan to only stain.
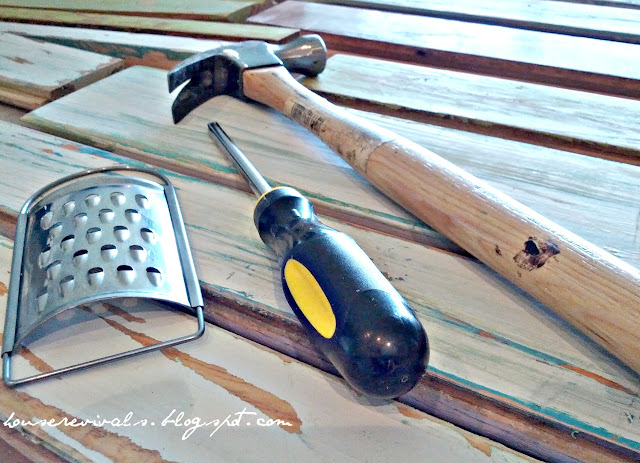
Now, for the fun part: gather up some "implements of destruction". I like to use a hammer and a screwdriver, and a little grater. Another favorite tool is an old metal meat mallet (not pictured). Next, gouge and scrape and grate and pound. And then sand it all. Distress all your boards, painted and unpainted.
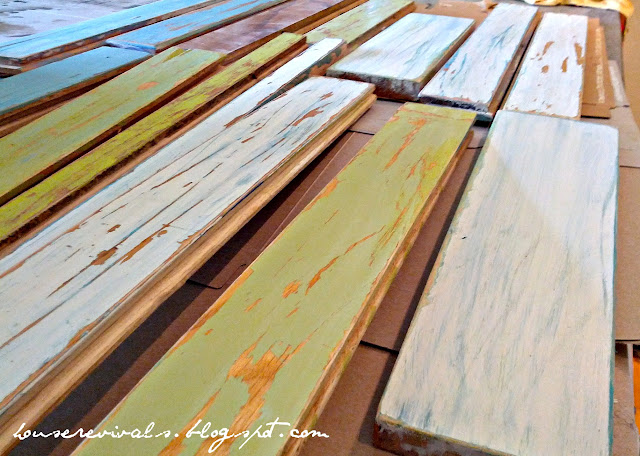
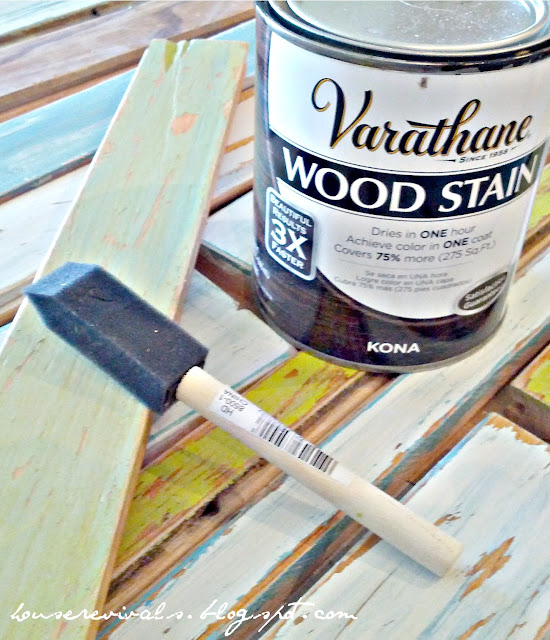
The next step is to add "patina". Use any stain or antiquing medium you have on hand. Wipe the stain on, getting it into all those gouges and scrapes and scratches, then wipe it right back off.
Do this on both the painted and unpainted boards.
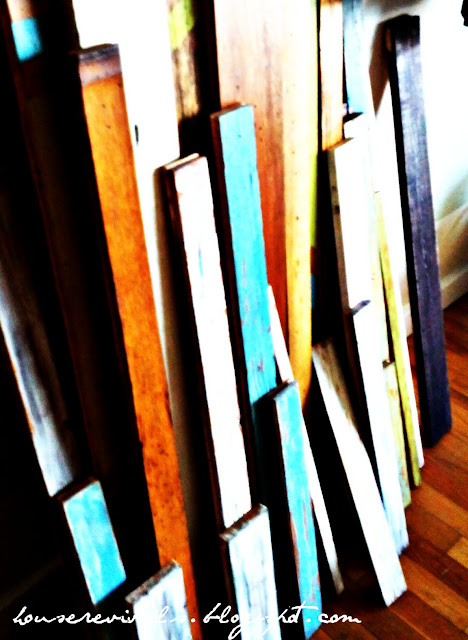
Before you know it, you will have a giant collection of charming, chippy, vintage reclaimed flooring! By staining some and painting some in different colors, the boards look like they were salvaged from a variety of buildings. I am doing my boards a little at a time -- as my schedule allows, and I already have about about two-thirds of what we need for my project. I can't wait to share more as the project progresses!

via Design Sponge
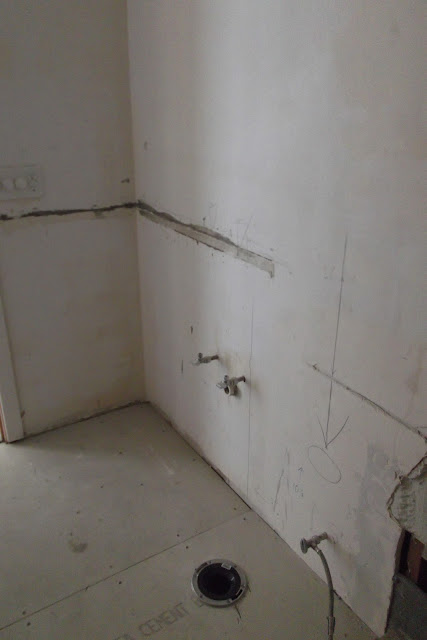
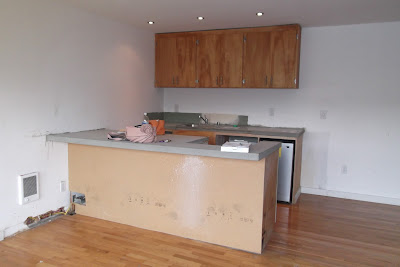
The person who had our little condo before us tried to remodel and flip it, but failed. He did every. single. thing. wrong. And never finished. And the condo went into foreclosure. And then sat on the market. Forever. Because it didn't have any bathroom fixtures. And it was a mess. So, of course, we bought it.
Who wouldn't want all this loveliness?

Well, the condo came with a giant box full of old boards and old wood flooring. The old wood flooring was nothing special -- just bits and pieces of oak that the flipper had been using to patch the existing floors.

I guess, technically, the wood in the box was reclaimed, but it didn't look like "hip and stylish" reclaimed wood, and it didn't look like "charming" reclaimed wood. It was just "blah" reclaimed wood. I want to use old flooring on the back of our kitchen peninsula, but I don't want it to look like someone "just kept going" when they were installing the floor. Our local building salvage yard has some really cool reclaimed wood. Beautiful, chippy old stuff, with lovely scuffs and dings and loads of character -- and they want loads of money for it.

A light bulb went on... what if I sand and paint and stain and hammer and glaze and gouge and scratch and scrape my ordinary boards to make them look like the lovely (and expensive) old boards at the architectural salvage yard? And so it began.

Here is how to take ordinary wood flooring and make it look like it has a charming history. Start by sanding and prepping the boards. I used liquid sander on boards I was planning to paint, but I used a good old sanding block on boards I was only planning on staining. No need to use smelly strippers -- you're not "refinishing" the boards, you're just "adding character". Just sand them enough for the new stain to have something to "grab onto", focusing on the edges and ends.

Next, paint the boards you will be painting, and set aside the boards you plan to only stain.

Now, for the fun part: gather up some "implements of destruction". I like to use a hammer and a screwdriver, and a little grater. Another favorite tool is an old metal meat mallet (not pictured). Next, gouge and scrape and grate and pound. And then sand it all. Distress all your boards, painted and unpainted.

The next step is to add "patina". Use any stain or antiquing medium you have on hand. Wipe the stain on, getting it into all those gouges and scrapes and scratches, then wipe it right back off.

Do this on both the painted and unpainted boards.

Before you know it, you will have a giant collection of charming, chippy, vintage reclaimed flooring! By staining some and painting some in different colors, the boards look like they were salvaged from a variety of buildings. I am doing my boards a little at a time -- as my schedule allows, and I already have about about two-thirds of what we need for my project. I can't wait to share more as the project progresses!
This post is being linked to the following lovely places: