Google+ House Revivals: fall decorating
Showing posts with label fall decorating. Show all posts

Thursday, November 22, 2018

Black Friday Shopping for FREE stuff!

Skip the crowds this Black Friday, and shop from the comfort of your home -- without spending a dime!  I have scoured our local Free listings on Craigslist to find all sorts of great stuff.


If you find something as amazing as this mirrored armoire, grab the truck and go get it! It's stunning, just as it is.


This white painted armoire, from Restoration Hardware, costs $1800!


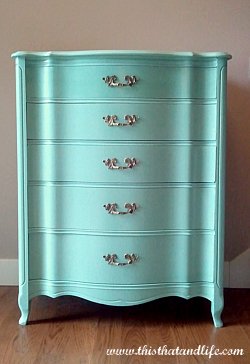
I am in love with this french provincial dresser!


It is missing veneer in a couple of places, so it's a perfect candidate for a little wood putty and paint, like this dresser, from This and That Life.


This leather sofa is in good condition, structurally, and just needs to have the leather reconditioned to be beautiful, once again.


These channel back chairs look like they've spent the last sixty years in an unused living room. I might pull the skirts off, to update them, but the off white upholstery is in great shape, and off-white is always classic.


People are often giving away faded or dated framed art. These make great "canvases" to create new art pieces for your walls.


Here's an easy example of how to create your own wall decor. If you are doing this over an old piece of art, give it a good base coat of paint, first, and let that dry completely before taping a pattern off with painter's tape or masking tape.


Two things, in the picture below, caught my attention. First, the vintage metal doll crib is just darling. I might use it like a basket, and store extra lap blankets in it, keeping it under an end table.


Second, that ornate frame is gorgeous! I would clean it up and put a thin piece of plywood in it, painted with chalkboard paint, like this one.


If you have someone strong in your life, you might grab this vintage safe. It has a working combination!


So much great patina! I would clean it and seal it and put it in my living room.


I've seen these converted to occasional table and dry bars. Here is one I found on Apartment Therapy.


While a stack of old magazines might seem like a strange thing to get on Craigslist, collage artists, and papier mache artists and crafters can find all sorts of things to do with them.


This starburst mirror was made from magazine pages!


And then there are the ubiquitous paint listings. You can paint your house, paint your armoire, paint your mirror, and still have paint left over!


I love wheeled carts. They are great for craft supplies, sewing supplies, party drink stations, etc.

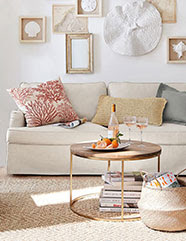
These beige sofas are clean and in good repair, with classic lines.


Add some pretty pillows, like these, from Pottery Barn, and your living room will be a show stopper!

You might also enjoy this post on how to weave a rush seat.


Or you might like this post on mixing paneling styles.


If you enjoyed this tutorial, please subscribe to House Revivals in the sidebar, so you won't miss the fun projects we have scheduled. Find us on Facebook, too, so you can catch all the "in between" stuff, and see what I'm working on daily on Instagram. Feel free to link today's post to your favorite social media sites.

Thanks so much for stopping by!
Amanda

Tuesday, November 13, 2018

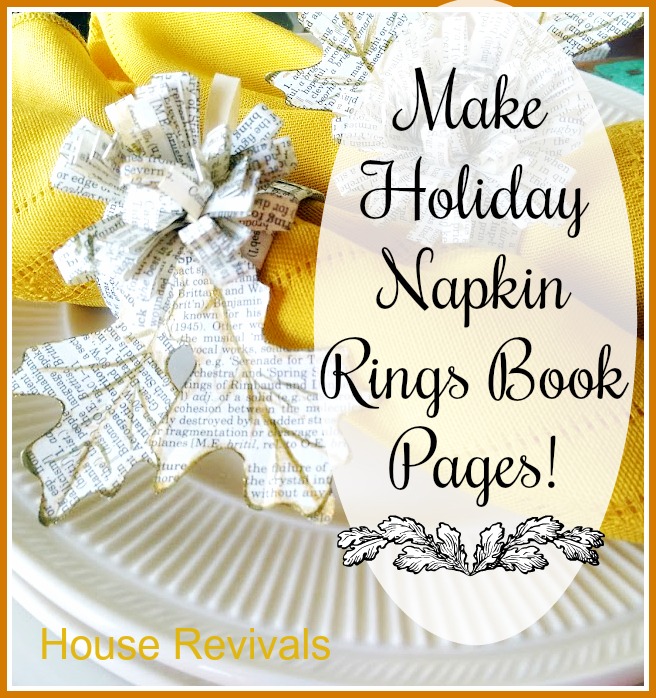
Make These Book Page Napkin Rings!

Whether you are hosting a large crowd, or just having an intimate dinner, this easy Fall napkin ring DIY is the perfect way to add a finishing touch to your Thanksgiving table.


You can even write guest's names on the leaves and use them as place cards!

Tuesday, October 30, 2018

FREE Sugar Skull Embellishment Printable!

Wow! Can this really be the last of the sugar skull printable series?


Throughout October, we've been publishing sugar skull coloring sheet printables. We've introduced Rose and Daisy and Hibiscus and Zinnia and Frida. These printables are perfect for your Day of the Dead decor!


Each coloring sheet came with a skull and several embellishments. Today, we're offering a FREE extra embellishment printable sheet.


All of the skulls and embellishments are coordinated, so you can mix and match embellishments to customize your sugar skulls.


For another (not so) spooky project, try this lace applique owl!


If you enjoyed this tutorial, please subscribe to House Revivals in the sidebar, so you won't miss the fun projects we have scheduled. Find us on Facebook, too, so you can catch all the "in between" stuff, and see what I'm working on daily on Instagram. Feel free to link today's post to your favorite social media sites.

Thanks so much for stopping by!
Amanda


Thursday, October 25, 2018

FREE Zinnia Sugar Skull Coloring Sheet!

Hello Friends! Today we're sharing the last of five FREE sugar skull printables, with a sugar skull embellishment printable still to come.


These printables were designed just for you, and are available to print for FREE throughout the month of October. Keep checking back, because I will be posting a full page of floral sugar skull embellishments in a couple of days -- also FREE!


So far, we've met Daisy and Rose and Frida and Mr Hibiscus. Today, we're meeting Zinnia. Zinnia is the olive green smiling friend shown below. Well, mine is olive green.


Yours can be colored any way you prefer, of course. I just thought the olive green made him look moldy and creepy.


Each sugar skull printable coloring template comes with lots of extra embellishments, so you can customize your decorations.


All the embellishments on the different coloring sheets can be mixed and matched, as the floral motifs are coordinated in this series.


I hope you enjoy coloring and assembling your sugar skull friends as much as I did!  Thanks you for following along, and be sure to check back for the extra embellishment printable.

Get your Zinnia Sugar Skull printable here.

You may also enjoy this post about how to make Christmas ornaments from dollar store supplies.


If you enjoyed this post, please subscribe to House Revivals in the sidebar, so you won't miss the fun projects we have planned. Find us on Facebook, too, so you can catch all the "in between" stuff, and see what I'm working on throughout week on Instagram. Feel free to link today's project to your favorite social media sites.

Thanks so much for stopping by!
~Amanda


Tuesday, October 23, 2018

FREE Frida Sugar Skull Printable!

Can you believe it? Today is the fourth installment of our sugar skull printable series -- only two more printable to go! This is such a fun project.


We've met Rose and Daisy and Mr Hibiscus. Today, we're meeting Frida. 


Frida is in her element with all these floral embellishments. Below, is her selfie with her good friend, Rose.


The Frida printable coloring sheet comes with lots of extra roses and leaves to create her iconic floral headdress.


She's happy hanging out with her floral friends. Here's another selfie she took with Mr. Hibiscus.

To create your own Frida sugar skull, click on the link below and print the template. Color the page as desired, using whatever coloring medium you like. I like to use alcohol markers. Cut out the skull and the embellishments and assemble as desired.


For another (not so) spooky project, try this lace applique owl!


If you enjoyed this tutorial, please subscribe to House Revivals in the sidebar, so you won't miss the fun projects we have scheduled. Find us on Facebook, too, so you can catch all the "in between" stuff, and see what I'm working on daily on Instagram. Feel free to link today's post to your favorite social media sites.

Thanks so much for stopping by!

Tuesday, October 16, 2018

Free Hibiscus Sugar Skull Printable!

It's time! As promised, we are providing FREE printable templates throughout the month of October for these fun coloring page sugar skull templates.


Last week, we shared Rose and Daisy.


This week, we are sharing Mister Hibiscus. He's the green fellow in the picture below.


As with the previous printable pages, the hibiscus sugar skull printable also comes with lots of extra flowers and medallions for embellishing your skulls. 


To create your sugar skulls, go to the link below and print your sugar skull coloring sheet. Color your page as using the media you prefer and cut out the skull and extra embellishments.


Assemble as desired. I like to mix and match my embellishments. You can glue your sugar skulls onto cord or yarn, to create a bunting, or use them in card making or however your prefer. Enjoy!


If you enjoyed this post, please subscribe to House Revivals in the sidebar, so you won't miss the fun projects we have planned. Find us on Facebook, too, so you can catch all the "in between" stuff, and see what I'm working on throughout week on Instagram. Feel free to link today's project to your favorite social media sites.

For another FREE template, click here.
Thanks so much for stopping by!
Amanda

Tuesday, October 9, 2018

Free Rose Sugar Skull Printable Template!

You guys!  For the rest of October, I will be offering FREE printable coloring sheet templates for these amazing sugar skulls!


Today, we have a link for a printable for the gold colored skull, seen below. Keep checking in, because I will continue posting several more templates all month long!

Tuesday, October 27, 2015

Make a Pretty Garland for Fall

This post originally appeared on House Revivals in 2011, and is being re-published because it is easily adapted to fall decor. While the inspiration was a Japanese Magnolia, this process will lend itself to chrysanthemum inspired projects, as well.

While we remodel our house, we're living in a tiny city apartment with a rooftop garden.  The garden has some beautiful blooming shrubs.  They are really lovely right now and inspired me to create this simple spring garland.


The shrubs look a bit like a Pussy Willow, but the branching pattern is different.  With some research, we discovered they are a variety of Japanese Magnolia.


The buds are velvety soft, and open up for these lovely white flowers to emerge.  Eventually, the entire shrub will be covered in these white blossoms.


The garland interpretation is not literal -- it's just inspired by the simple exuberance of the blooms.


I wanted to keep the form simple, adding interest by layering texture. This was done by using a combination of vintage crepe paper, crinoline, and vintage book paper.  You don't need to use exactly what I used to create a similar effect -- just use what you have on hand.  Maybe you have an old silk blouse, some cheesecloth, and a binder of old hand-written college notes?   You could even use your junk mail!


Begin by cutting your materials into strips and cutting a fringe into both long sides, as shown here.  The size you use will depend on the width and fullness you want for your flower.  I used pieces about seven inches long by about two and one-half to three inches wide, depending on which layer I was cutting.


You can stack your strips, cutting several layers at a time, if you wish.


Then tie each strip into a little bundle, using string or thread or wire.


Layer your bundles as desired and tie them together.  Then fluff and coax your flowers into shape.


I actually added the book page layer last, gluing it to the back perpendicular to the other layers to sort of "fill out" the flowers.  The centers are simply tiny scraps of crepe paper, about three-quarters of an inch square, snipped into fringe and glued down.  You could use bits of fabric, string or yarn -- even a button or bead.


The flowers were glued to lengths of finger crocheted thread to create a garland.  Again, you'll want to use whatever you have on hand for this -- it could be torn strips of fabric, selvages, twine, even wire -- just use what's handy.


I layered my garland with lengths of torn draped crinoline.


On a difficulty scale between one and ten, I'd give this project about a three (owing mostly to having to clean up all the little snippets of string and thread and paper -- I had it all over my clothes, on my desk, and on the carpet before I was finished)!


 This is a fun, forgiving craft.  Imperfectly inspired by nature -- not a perfect imitation of nature.


What inspires you to create?

If you enjoyed this post, please subscribe to House Revivals in the sidebar, so you won't miss the fun projects we have planned. Find us on Facebook, too, so you can catch all the "in between" stuff, and see what I'm working on daily on Instagram. Feel free to link today's project to your favorite social media sites.

Thanks so much for stopping by!