Google+ House Revivals: January 2012

Tuesday, January 31, 2012

Beach House Design and Renovation

As we begin ramping up for a new year of new (and old) projects, I have been reflecting on the design and progress of our beach house renovation.  We have come a looooooong way!   Looking back at the original state of things, I wonder if we were out of our minds to take this on, especially when I see all the work still left to accomplish.


This was the street view of our beach house the first time we saw it. Sometimes you just have to step back and remind yourself where you are going...


... and how far you have already come.  The image above shows an exterior concept for the beach house -- looks easy right?  Just slap on some paint and some new decks -- how easy is that?  Oh, and raise the house nine feet!

Easy peasy!


Honestly, the exterior has not progressed much beyond this point in the last six months -- the rains came here in the PNW, and we focused our efforts inward.


This is what the first guest room looked like when we viewed the house the first time!

This is how we envisioned the space....


.... and this is how it looked early last summer. 


It looks quite a bit different than this, now, but we still need to do the board and batten, build the window seat, and hang the window treatments. The illustration below shows this guest room, and another guestroom, in relation to a funny little attic space.  We opened the wall between this bedroom and the attic to create a sleeping loft (this is a beach house, so we will be having lots of guests)!


Here is the concept for other guest room.  We still need to build out the cabinets and hang the board and batten in this room, but like the other room, it is already "finished" by builder standards.


The loft above the living room opened onto a leaking deck on the east side (with a lovely harbor view).


We had to enclose the deck, because of the leaks.  This turned out to be a good thing, because the loft space was enlarged, and the view was enhanced.   This is our concept for the newly enlarged space!


This was the space during construction....


We have plans for the courtyard, as well!


So, this was where we started on our project, and a few of the places we've been along the way, and where we're heading.  We've actually made quite a bit of progress since most of these interior shots were made.  Looking at some of these old  photos almost makes me wonder why we took on a deep renovation like this, then I remember...


We did it for the sunsets....

Imagine the Impossibilities!


This post is being linked to the following lovely places:
No Minimalist Here
Blue Cricket Design
Someday Crafts
Wow us Wednesdays


Classic Chair Styles


You can never go wrong when you stick to the classics!  Classics never go out of style (though they do certainly trend).  Here are a few of my favorite chair styles:

These bentwood chairs have been freshened with sweet pastel paint...

 via

... or you might opt for the classic finish of an original Thonet, Chair No: 14.

source

 The Louis XV Bergere is shown here in a very formal fabric....


... and here, reinterpreted in more casual garb....


Velvet covered Louis style XVI side chairs are always in style...


A more casual version of the Louis XVI side chair is also lovely.

Restoration Hardware via

Here is a Louis XVI style square backed chair in formal garb....


... and here, an updated version....

Restoration Hardware via

A Twentieth Century classic was the Arne Jacobsen Egg Chair.


Perhaps you prefer it upholstered in a bright Patchwork?


So, do you have a favorite classic chair?  Do you prefer the more traditional interpretations of the styles, or the or do you like the updated classics?  Or do you love (hate?) them all?


Saturday, January 28, 2012

Best Bloody Mary Mix Ever

Another recipe I'm moving over from the old blog.  This really is the BEST Bloody Mary I've ever had!  Here is the original post:

This weekend I was fortunate enough to be given a going away "girlfriend brunch" hosted by a very special lady.  The hostess is a really great sport, so when I sent her the recipe for the Best Bloody Mary in the entire world, she agreed to prepare a batch of the mix.


Halfmoon Bay Bar and Grill, in Westport, Washington, generously shares this recipe in a tourist information magazine (visitorschoiceusa.com) that is available in Washington coast hotels.

After fixing this mix for yesterday's brunch, the hostess is looking for a reason to host another brunch-- just to have an excuse to make more of these delicious (and gorgeous) drinks!  The beautiful picture is from the Halfmoon Bay Bar and Grill website.  Check out those amazing garnishes-- you could have this for breakfast!  It has pepperoni and shrimp, and several different veggies.  It just doesn't get any better than this!

Ingredients:
4 - 46 oz cans of premium tomato juice
1 cup lemon juice
1/2 cup horseradish
1/2 cup Dijon mustard
2 tbsp fresh minced garlic *we used a garlic press
2 tbsp celery seed (please grind first) *we used a small mortar and pestle
3 tbsp ground sea salt
1/2 cup Worcestershire sauce
3 tbsp white wine vinegar
1/4 cup Tabasco sauce

Combine all ingredients and mix with emersion blender.....We highly recommend pairing this wonderful
mix with Absolut peppar vodka....Enjoy! *we used an organic vodka from the Midwest

We prepared this mix the evening before the brunch, and "tested" it.  It was very good right then, but the next day the flavors had married beautifully, and it was absolutely perfect!


Huckleberry Cobbler Recipe

This is a re-post from an old blog I am shutting down.  I've decided to start including recipes on House Revivals, so some of the old posts can be repeated here, like this yummy skillet cobbler! Here it is:

As many of you know, we are in the throes of moving out of our Colorado house.  This transition has taken us several months, and has involved going through things, throwing out things, donating things, and recycling things.  Just today I was going through what I think is the last small stack of magazines-- ripping off the address labels (why, since I'm moving? I don't know), and flipping through them one last time before donating them.  And I ran across this recipe from the August issue of Sunset.

Yum.  Huckleberry Skillet Cobbler.  Doesn't this look amazing?

Suddenly, I can't wait for summer!  I'm going to try this recipe over the campfire.  I usually just stick to simple recipes like baked apples, or bananas, wrapped in foil and placed in the campfire coals, but I think I need to get a little more creative this year.


The place where we vacation has tons of huckleberries, so I'm just so excited to try this dessert!  Isn't it beautiful?  Here is the recipe from Sunset-- you can find this recipe, plus complete nutritional information on the Sunset website, here.

Cobbler:
Time: 1 3/4 hours, plus at least 45 minutes to cool. One of our all-time favorite desserts, with just a hint of spices to pull out the complex, wine-rich flavor of the huckleberries—and also delicious made with blueberries.
Yield: Serves 8 to 10

Ingredients

  • 1 1/2  cups  plus 2 tbsp. sugar (if using blueberries, decrease to 1 cup plus 2 tbsp.), divided
  • 1/3  cup  quick-cooking tapioca
  • 1/2  teaspoon  cinnamon
  • 1/2  teaspoon  ground cardamom
  • 1  tablespoon  fresh lemon juice
  • 2  qts. (2 1/2 lbs.) fresh or frozen huckleberries* or blueberries
  • Buttery Pastry
  • 1/2  tablespoon  milk
  • 1  cup  crème fraîche

Preparation

1. Preheat oven to 400°. In a 12-in. ovenproof frying pan or a 9- by 13-in. baking dish, combine 1 1/2 cups sugar (1 cup if using blueberries), tapioca, cinnamon, and cardamom. Gently mix in lemon juice and berries. Let stand, stirring occasionally, for tapioca to soften slightly, 15 minutes (50 minutes for frozen berries; they'll start to look wet). Spread berries level.
2. On a floured surface with a floured rolling pin, roll out pastry to a 14-in. round or 10- by 14-in. rectangle, lifting up pastry and re-flouring underneath if needed to prevent sticking. Trim uneven edges with a knife. Slide a rimless baking sheet under pastry and ease it over berries. Fold edges of pastry under so they're flush with pan or dish, pressing together any cracks. Flute pastry edges with a finger and thumb to seal.
3. Brush crust (but not fluted edges) with milk and sprinkle with remaining 2 tbsp. sugar. Cut about 6 vents in crust to release steam. Bake until crust is golden brown and filling is bubbling through vents, 50 to 60 minutes; tent with foil if pastry starts to get too brown, and put a rimmed baking sheet underneath if the cobbler starts to bubble over.
4. Supporting cobbler underneath, carefully transfer to a rack and let cool at least 45 minutes. Serve warm or cool, with crème fraîche to spoon on top.
*Buy huckleberries from specialty produce markets or pick your own, from your garden if you grow them or from the wild. Huckleberries range from blue-purple to red and even white; they thrive in subalpine forests and meadows in many Western states. In the Cascades, respect posted areas reserved for the Yakama Indian Nation.

Buttery Pastry:
Time: 5 minutes
This recipe goes with Huckleberry Skillet Cobbler
Yield: Makes 1 cobbler crust; 8 to 10 servings

Ingredients

  • 2  cups  flour
  • 3/4  cup  cold butter, cut into 1-in. pieces
  • 1  teaspoon  sugar
  • 1  teaspoon  fresh lemon juice
  • 1/2  teaspoon  salt
  • 1/4  cup  plus 1 tbsp. heavy whipping cream

Preparation

Put all ingredients in a food processor and whirl just until dough comes together and is evenly moistened. Gather into a ball, then shape into a flat disk.

*the huckleberry bush photo is from the International Wild Huckleberry Association website.

Friday, January 20, 2012

Television Gallery Walls

We've been trying to decide where we want to put our televisions in the  beach house reno and in our marina condo reno.   For now, the television sits on top of a cardboard box in the beach house, and the one in the condo sits on a folding table....  We're definitely living the beautiful life!

via Atlanta Homes Mag

I love the idea of  blending the TV into a gallery wall.  In the image above, the composition is anchored with a mirrored dresser.  Similar gold finishes unify a variety of frame types and echo the hardware on the dresser. Overlapping the lampshade with the wall composition, pulls the vignette together, as does the amber color of the glass lamp base.

A floating console anchors the gallery wall shown below.  Most of the frames are sleek and black, like the television, but a few are more ornate or more rustic, for variety.  Again, items on the console overlap the gallery wall to create a more unified and pleasing vignette.


I love that the screen saver on this TV references the black and white photography on the living room wall!

via

In this eclectic and fun living room, the TV sits on the bookcase that anchors the wall arrangement.

via Apartment Therapy

Here, the entire vignette sits on the bookcases and is framed by sculptural tree silhouettes.

from Room Remix via Tip Junkie

How fun is this wall?  I love that it is playful and funky. 


 In case you thought that a television couldn't be elegant, this gorgeous display should change your mind!


Here's another gorgeous and elegant interior with a gallery TV wall.


The amazing new flatscreen TVs have opened up so many possibilities!  They don't need to be giant black holes, and they don't need to be tucked away in cabinets anymore (although you certainly can do that)! 

How do you display your television?  Do you have a gorgeous gallery wall, or a not-so-lovely cardboard box, or something else entirely?


this post is being linked to the following lovely places:

Thursday, January 19, 2012

Vintage Campers

Do you ever yearn to hit the open road?  To carry your house on your back, and live a little like a gypsy?  I'm not sure if I'm yearning for a gypsy lifestyle, or just yearning for warm sunny weather, but I've been drooling over these vintage campers lately.  I guess I'm not the only one -- there is actually a magazine devoted to these beauties!


There are even blogs devoted to fixing up and selling vintage campers!


 AND, there are vintage camper vacation rentals!


It's been snowing/ raining/ sleeting all week and the PNW has turned into a giant ice skating rink, so the idea of glamping by a riverside sounds especially nice right now...


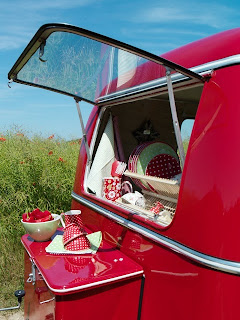
Hitting the road on a summer day, and stopping for an impromptu roadside picnic... it sounds sounds heavenly....
via  http://renaemoore.blogspot.com/2010/07/america-beautiful.html 
photos: Erin McDonald

Peering out my window,  I notice a neighbor, holding ski poles and wearing ice skates, making her way down the sidewalk.  I'm not feeling so ambitious.  I think I will throw another log on the fire, and dream of summer....