
Google+ House Revivals: weddings
Showing posts with label weddings. Show all posts

Thursday, January 10, 2019

Comic Book Rose Wedding Bouquet

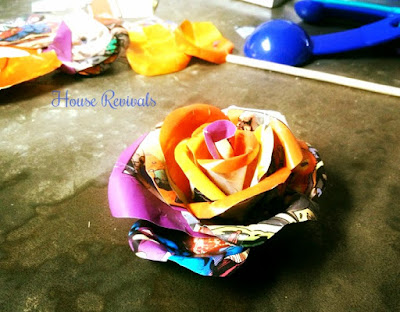
On Tuesday, I shared how to make paper roses, using measuring spoons to form each petal. Today, I am sharing how to turn those roses into a unique and beautiful bridal bouquet -- Dr. Who style!


To create the bouquet, I ordered a couple of Sonic Screwdrivers from Amazon, and bought a couple of Styrofoam spheres from a local craft store. I bought two sizes of each item, because I wasn't sure which would work best. After some experimentation, and consulting with the bride, I chose the larger Sonic Screwdriver and the six inch diameter Styrofoam sphere. The "screwdriver" would be the bouquet's handle, and the sphere would be the base of the bouquet.


The comic book page roses would be adhered to the base, using hot glue.

I started by flattening one side of the styrofoam base. This was done by carefully pressing one side of the sphere against a hard flat surface. Next, I took a steak knife and "drilled" out a hole for the top of the "screwdriver." Since the screwdriver actually opens up and lights up, I was careful to insert the handle so that the part that opened could open, and the part that lighted up could be seen from the top of the bouquet.


Next, the roses were attached to the styrofoam, starting at the bottom, and working up.


The bride wanted plain blue roses interspersed with the comic roses, so those were added, as well.


I was careful to use all predominately orange petals, or all blue petals, etc, when making each rose, and was mindful of how the colors were distributed throughout the bouquet.


After all the flowers were in place, the bottom of the bouquet needed to be addressed, as flattened Styrofoam is not terribly attractive.


I cut wide grosgrain and satin ribbon into six inch lengths and glued them into loops, as shown above.


These loops were then glued to the bottom of the bouquet, in alternating layers. To give the piece a nice finished look, I punched a large scalloped circle from a piece of the blue paper and cut a circle out of the center of the punched paper the same diameter as the collar of the screwdriver. A slit was cut into one side of the circle, so it could be slipped over the collar. This piece was then glued into place to cover the raw edges of the ribbon.


The bride loved her bouquet.


There were even enough extra petals to make the groom a matching boutonniere!


The wedding was beautiful, and the happy couple, a year and a half later, are the proud parents of a sweet baby boy!


This lovely couple may not live in the pages of a graphic novel, in their day to day life....


But they are definitely living their happily ever after.


If you enjoyed this post, you might also enjoy this post about how to make a flower garland.


If you enjoyed this tutorial, please subscribe to House Revivals in the sidebar, so you won't miss the fun projects we have scheduled. Find us on Facebook, too, so you can catch all the "in between" stuff, and see what I'm working on daily on Instagram. Feel free to link today's post to your favorite social media sites.

Thanks so much for stopping by!
Amanda

Tuesday, January 8, 2019

Make These Comic Book Roses!

Happy New Year to all my readers. I hope your holidays were joyful. In spite of being taken out for most of the month of December by a nasty flu bug, ours was still a joyous Christmas. Our oldest son proposed to his girlfriend on Christmas Eve, and she said yes!


Needless to say, I have weddings on the brain, going into 2019, so I thought I would share a tutorial for paper roses that I used to make a wedding bouquet for the daughter of a dear friend a couple of years ago.

Thursday, September 27, 2018

Gift Box Printable With Wild Rose Template

Here is another version of the gift box printable I shared a couple weeks ago. The last printable featured an aster embellishment and a kaleidoscope inspired design.


Today's printable features a sweet wild rose, gift tags, and a simple floral pattern for you to color.

Thursday, April 28, 2016

Create This Folding Flower Greeting Card!

Here is a great card idea for Mother's Day -- or hang the card from a neighbor's doorknob for May Day.


It's simple to make using our free template!

Tuesday, April 5, 2016

How to Make Paper Peonies {Without Fancy Tools!}

Have you ever wondered how how to make dimensional paper flowers? Well, there are some wonderful tools you can buy to make perfect curves in your petals, but if you don't have access to a craft store or don't have the budget for fancy tools, here is a hack for making pretty paper flowers.


I love working with vintage book pages, but other sturdy papers will work with this technique, as well.

Tuesday, July 8, 2014

Best Painted Mason Jar Projects!

All the cute canning jar projects, that are so popular right now, remind me of summers at my grandmother's house.


When I was growing up, every summer we would take a road trip to see my grandparents on their little 40 acre farm in Oklahoma. We would show up around canning time, so my mom could help my grandmother put up vegetables from the summer garden.

My grandparents had an old summer kitchen, and under that kitchen was a dirt cellar. The walls were lined with shelves and the shelves were filled with jars of vegetables and pickles and relishes and jams and jellies fruits and my absolute favorite: pickled peaches!


Canning was serious business at my grandmother's house and canning jars were well cared for. Although, it's popular to use old mason jars for iced tea now days, my grandmother's generation would never have risked damaging the top edge of a good canning jar through daily use. Every year, Grandma would send Grandpa down to the cellar to bring up boxes of empty jars. New boxes of seals were purchased, but jars and rings would be reused. My mother and grandmother would carefully examine the top edges of all the jars and set aside for other purposes any jars that might have gotten damaged in storage.

If they had only known about the CUTE things you can do with old canning jars!  Most of my grandmother's less than perfect canning jars ended up in Grandpa's garage, storing nails and screws and nuts and bolts and leftover paint. I suppose you could say my Grandpa was ahead of his time -- he was "painting" jars long before it was popular!  In honor of my late grandmother and grandfather, here are some of my favorite decorative painted Mason jar projects.


Your Home Based Mom managed to make the humble canning jar so elegant with gold paint!


At Real Coake you can find these adorable striped mason jar vases.


The Happy Housie painted this charming trio of coral colored vases!


At Mason Jar Crafts Love, you can find these adorable back to school themed mason jars.


Check out these silver painted Ball jars from It All Started With Paint.


Darling Darleen has a tutorial for drip painted Mason jars, inspired by these jars in an Anthropologie display!


Michaela Noelle created a tutorial for these sweet lace painted jars.

I hope you were inspired to look at your old jars differently -- you can recycle all sorts of jars for all sorts of uses, both decorative and practical!


Sunday, April 17, 2011

Easy Party Decorations

Most of you saw the re-purposed bulletin board tray, we made for my daughter's baby shower last week.  We also made a few decorations for the party. 


We made about a million giant tissue paper flowers, including a rose for this sweet gentle dog; and we had fun re-using some decorations from last summer's beach wedding.  I can share about making the tissue paper flowers in a later post, if you'd like.  For now, I will share how we re-made these paper lanterns.

We had quite a few of these simple paper lanterns saved from the wedding reception.


For the wedding reception, we dressed them up a bit to go with some of the other decor.


Remember the flower pompoms we made from leis and Wiffle balls?


Well, most of the leis came with elasticized ankle and wrist bands, as well.  These were the perfect size to slip over the bottom of these colorful paper lanterns to dress them up!


These were lovely decorating the wedding reception, and  my daughter requested that we re-use them for the baby shower.   We wanted the lanterns to feel more "showerish", though, so we pulled off all the flowers.


Then we gave them all brand new skirts, using pink tissue paper fringe.


To make the fringe, we simply cut strips about three and a half inches wide from a stack of folded tissue paper.  Then we snipped a fringe into the sides of the strips.


Next we just glued the fringe to the bottom edge of the lanterns, gathering it as we went.


 I used a tacky glue, as I've not yet recovered from that last hot glue episode.


The finished product turned out pretty cute, and it was fun to re-invent decorations from another special day!


This post is being linked to the following lovely places: 

Tuesday, April 5, 2011

More Budget Wedding Decor

A few weeks ago I shared these elegant hydrangea centerpieces we did for our daughter's wedding reception last summer.  The reception venue was a restored net shed overlooking the Columbia River -- it was a gorgeous space.  But it was just a bit too large for our party.  We needed to fill in some corners, and it needed to happen on a tight budget!  The solution we found was to decorate branches with these fun little pompoms.

The nice thing about this idea is that you can use it indoors or out -- these sweet pompoms hold up to the weather really well.  Since we are in the Pacific Northwest, this is pretty important!

These little guys were super easy to make.

We used silk flowers from dollar store leis and dollar store whiffle balls (I have absolutely NO idea how to spell whiffle -- or is it wiffle? whiffel? wiffel?).  Using flowers from leis ended up being quite a bit cheaper than buying bunches of silk flowers!  For smaller pompoms, we bought packages of ping pong balls to use as a base.  We also found some slightly larger whiffle balls at a thrift store, so we had three sizes of pompoms to decorate our branches.

 After pulling the leis apart, we just glued the flowers onto the whiffle balls -- in no time at all we had a little pile of sweet pompoms.  A loop of ribbon was glued to each pompom to hang it.

I wish I could share pictures of the decorated branches from the reception, but all my pictures showing the branches have people in them, and I want to respect their privacy.   I took these photos of the decorations outside so you could get an idea of how they looked on the branches at the reception venue.

They looked great!

It was such an easy and inexpensive way to "fill out" the space, and add color to the room.

Pardon the blurring in this pic -- I've smudged out the 
faces of the wedding guests for the sake of their privacy.

We even used them at the beach ceremony, tied onto the poles of the wedding huppah with wide ribbons of flowy fabric. The ribbons of fabric danced gloriously in the wind!

Just for fun, here is a basket of kids' games and activities we had at one of the reception tables.  Our celebration was a family event, and we wanted everyone to have fun.  Trust me when I say, this basket bought moms and dads of kiddos precious hours of dancing and socializing and celebration!

I hope you enjoyed a little peak into our daughter's wedding celebration!  The pompoms were such a simple and inexpensive decoration, suitable for lots of different types of parties, mobiles, or just about anything.

Edit:  Okay, I looked up "whiffle" -- turns out it's "Wiffle", and it's a specific brand of ball, so I guess my Dollar Tree balls are called Wiffle balls in the same way that store brand tissues are called Kleenex.  They're not really Wiffle balls at all, but what else can you call them?  "Hard plastic balls with holes in them" is kind of a mouthful.   :)
Tip Junkie handmade projects