Google+ House Revivals: cardmaking
Showing posts with label cardmaking. Show all posts

Tuesday, November 20, 2018

Easy Thanksgiving Greeting Card

Sometimes, it's a good idea to pull out old craft supplies, and look at them with new eyes. For this card, I used a decades old Stampin' Up Thanksgiving stamp.


The rubber was still in perfect condition, and it stamped perfectly. I paired the stamp with this adorable fox paper. The paper is from a couple of years ago, but the colors are still a fresh take on Fall.

Tuesday, November 6, 2018

Make Special Ornaments From Greeting Cards

My son and his new wife had a sad assortment of Christmas ornaments -- a couple of hand print ornaments from a little niece, and a half dozen plastic spheres. It hurt my heart.


Both my son and his bride are busy software engineers, with a forty-five minute commute to and from work, so they don't have a lot of time to shop for Christmas decorations. After their wedding last September, they brought me all their leftover invitations, thinking I could "do something" with them. I could. I did. I combined them with some of the greeting cards our family had received over the years, and some scraps of card stock to create these pretty paper ornaments for their tree. They were delighted.


These are made using the same "triangle-within-a-square" technique that our grandmothers used to made paper spheres from old greeting cards to decorate their Christmas trees, except these are two sided, instead of spherical. My beautiful daughter-in-law is from India, so I wanted to create something colorful and elegant that had an Asian feel.


To make these ornaments, you need a circle template and a triangle template. Normally, I would have drafted the templates in CAD, and printed them out, but my printer was out of ink, and I am impatient. I decided to use a two inch hole punch that I had in my stash (here's an affiliate link to a two inch punch), and then hand draft an equilateral triangle to fit perfectly inside it. Except, I didn't have access to my drafting tools.

I tried holding a piece of paper to my computer screen and tracing a 60 degree angle, but that was less than perfect. Then, I looked around the house for a triangle. I also began looking around for a flat piece of plastic to cut a sturdy template from. When I found the plastic lid to my dishwasher pod container, I also found my equilateral triangle! As is turns out, that little recycling symbol is an equilateral triangle, so I was able to get my sixty degree angle. I drew two legs of the triangle the exact same length, then connected them.

I made my triangle slightly small -- the points don't quite reach the edge of the two inch circle. This was because I wanted to account for the thickness of the plastic.


Side note: this technique will also work with your scalloped punch. Just make sure the number of scallops is divisible by three. My scallop punch, from Fiskars, has fifteen scallops, so it works perfectly. (Fiskars scallop punch affiliate link)


For each ornament, you will need to punch ten circles. Place your sturdy triangle template on top of the pretty side of your card stock (or upcycled greeting card), centering it. Carefully fold the card stock up, using the edge of the triangle as a guide. Some folks use the triangle as a guide to carefully score a fold line, but I like my method better, because it's so fast.


 Do this on all three sides, being careful to keep the triangle centered.


Fold the sides completely over, to get a nice crease. You will now have a triangle with three rounded tabs. Each tab will be glued to a tab on an adjacent triangle to create your ornament.


Glue five of the triangles together, radiating out from a central point, for the first side. Repeat, for the second side. Glue the front and back together. You can glue a ribbon hanger into the top of the ornament at this time. If desired, punch a hole in the bottom of the ornament and hang some fibers to create a pretty tassel.


I must warn you, these ornaments are addictive. You will find yourself scouring your house for old greeting cards and card stock to make more and more and more!


My son and his beautiful bride love the fact that pieces of my son's past Christmases were used, as well as mementos from their wedding.

While I was digging, I found a lovely old Christmas card from some dear family friends. The card had pictures of their kids when they were little, as well as a letter talking about the family's interests at the time -- all printed on lovely card stock! I was able to make an ornament for them using their old card. They were thrilled to receive the memento. There was nothing this couple needed, as a gift -- they have had successful careers and can buy anything they want, so giving them something sentimental and handmade was perfect.


I hope this post encourages you to dig out those old greeting cards and create your own special mementos.


For another easy ornament DIY, you may want to check out this tutorial.


If you enjoyed this tutorial, please subscribe to House Revivals in the sidebar, so you won't miss any of the fun projects we have scheduled. Find us on Facebook, too, so you can catch all the "in between" stuff, and see what I'm working on daily on Instagram. Feel free to link today's post to your favorite social media sites.

Thanks so much for stopping by!
Amanda

Thursday, September 27, 2018

Gift Box Printable With Wild Rose Template

Here is another version of the gift box printable I shared a couple weeks ago. The last printable featured an aster embellishment and a kaleidoscope inspired design.


Today's printable features a sweet wild rose, gift tags, and a simple floral pattern for you to color.

Tuesday, September 25, 2018

How to Make Coloring Card Gift Sets

The struggle is real. What in the world do you do with all those coloring books? I love them, the art is beautiful, and they are fun to color, but if I start coloring now, and color till I die, I will never get them done.


When people find out you're crafty, they give you coloring books. I've got soooo many coloring books, I buy them, people give them to me, and I even had a craft company send me an entire box of the SAME coloring book by mistake.

Thursday, September 20, 2018

Make a Nautical Inspired Baby Card

I had the privilege of attending a baby shower this week, for a sweet mama who is expecting her second baby boy.


The night before the shower, I realized I didn't have a card, so I pulled out my box of "card kits" to find a suitable envelope.

Tuesday, September 11, 2018

Make Pretty Cards {from materials that don't go together}

Have you ever wondered how to pull together lots of different components that don't seem to go together, to create something pretty?


Sometimes you just need to let go of preconceived notions of what "goes" and what doesn't go.

Thursday, September 6, 2018

How to Pull Supplies Together For a Pretty Card

One thing I've noticed, when my friends are making cards, is that they often feel a little paralyzed by the thought of creating a card without a set of instructions and a materials list.


It's okay to make cards that way, but it's very freeing to know that you can go through supplies you already own, and pull out the things you need to create one of a kind pieces.

Tuesday, September 4, 2018

Pulling Together a Color Coordinated Card

When you're pulling together an assortment of elements to create a card, it's a good idea to choose the elements based on a theme.


A favorite theme I like to use is color. Sometimes I do a "one color" card, like I shared in this post.

Today, I will share how I choose color coordinated card elements.


I start with one main color -- in this case, the apple green background in the floral printed die cut, above. Then, I choose a second print, with the same apple green. This is the turquoise die cut, with the apple green embossed flourishes. From there, I began grabbing elements that went with that pairing, including pink washi tape, yarn, pink paper, and a scrap of embossed paper, which I distressed with an apple green stamp pad.


I also chose a gold polka dot washi tape. Gold goes with just about everything, and the white part of the thin washi tape "disappears" when you use it in your projects. The dots in the washi, referenced the dots on the pink paper.

The pale turquoise color of the yarn repeated the background color of the second print. By repeated and referencing colors or patterns, you can achieve a cohesive look.

I don't worry too much about things matching. Instead I focus on coordinating, or finding things that look great together. Do you have any tricks or tips for creating coordinated cards?

You might also enjoy this tutorial about making a filigree card.

If you enjoyed this post, please subscribe to House Revivals in the sidebar, so you won't miss the fun projects we have planned. Find us on Facebook, too, so you can catch all the "in between" stuff, and see what I'm working on throughout week on Instagram. Feel free to link today's project to your favorite social media sites.

Thanks so much for stopping by!
~Amanda

Tuesday, August 28, 2018

To Make the Impossible Card....

Have you seen these "impossible" cards? I'm not sure whose brainchild they are, but they are super fun.


If you receive one, you will be left scratching your head, wondering how in the world it was made.

Tuesday, August 21, 2018

Striped Card From Scraps

If you're looking for a quick card making project, that also uses up your stash of scraps, this is the perfect project for you.


I was collecting a large stash of remnants from various projects, and wanted to use them up, so I decided to create my own "striped" card stock.


I started by cutting several of my scraps into narrow strips. These were then adhered to a piece of light weight card stock that I'd cut and folded into a card base. This is 60 lb card stock, which is usually just a bit too flimsy for card making.


I glued the pieces to the the front of the card base, keeping them flush with the folded side of the card, and allowing them to overlap the open side of the card. Then I flipped the card over and trimmed the pieces that were hanging over with scissors. Had I trimmed along the folded edge, I would have run the risk of accidentally cutting into the fold.


Next, I grabbed a piece of bias tape from my stash of fibers and fabric trims to use as a band across the front, and glued a premade Anna Griffin sentiment on top of that. You can use whatever ribbon or fiber you have on hand -- or use another strip of paper, if you don't have fibers.

I found some light weight paper that looked nice with the card to line an envelope, and Bam! Done.

This is a project you can easily do in twenty minutes to an hour, depending on the interruptions in your household.

I hope this project encourages you to grab the little moments to create something pretty.


You might also like this post on how to draw and paint when you don't know how and don't have time.

If you enjoyed this post, please subscribe to House Revivals in the sidebar, so you won't miss the fun projects we have planned. Find us on Facebook, too, so you can catch all the "in between" stuff, and see what I'm working on throughout week on Instagram. Feel free to link today's post to all your favorite social media sites.

Thanks for stopping by!
Amanda


Thursday, August 16, 2018

Quick and Simple Birthday Card!

Sometimes it's nice to use premade materials when making a card. You get something that looks very professional, but is still unique and personal.


You can often find boxes of fifty card bases, with envelopes, for around five dollars, on sale or with a coupon. You just can't beat that price!

Tuesday, August 14, 2018

How to Draw Fanciful Mushrooms -- Easy!

Sometimes it's fun to sketch something fanciful. A couple of years ago, my granddaughter and I decided to draw each other pictures and mail them to each other.


These little mushrooms were originally drawn to send to her, but then my contractor came by with his little girl, and she loved the mushrooms, so I sent them home with her. Don't worry, my granddaughter got plenty of other pictures. 

Thursday, August 2, 2018

Create Marker Storage From Recycling!

I was looking for an inexpensive way to store pens and markers the other day, but wasn't ready to invest in an expensive storage system.


I wanted something that could sit in a shelf on its side, since that's better for the markers, but that could sit upright at my work table.

Thursday, July 5, 2018

Draw and Color a Peony

On rainy Sunday mornings at the beach house, I like to sit at the dining table and sketch or doodle. I rarely go upstairs to the studio to get "real" art supplies. Instead, I use supplies from a kid's art supply tote. This way, I don't feel pressured to create something special, and I remind myself that you can create pretty stuff from anything (also, sometimes I'm just too lazy to climb the stairs).


On rainy spring days, in the Pacific Northwest, I find myself craving color and flowers, so on this particular morning, I grabbed a silk flower and quickly sketched it out.

Tuesday, July 3, 2018

Pretty Gift Tags From Packaging!

I have a confession to make. I don't buy a lot of card stock. The occasional scrapbooking paper pack, bought with a 40% off coupon or picked up at Tuesday Morning, does find it's way into my home, but for the most part, I find my card stock at thrift stores and Creative Reuse stores.


When all I need is a substrate, and I'm not worried about archival qualities, I try to find my material in the recycle bin.

Thursday, June 28, 2018

The Art of Meenakshi Temple {a tutorial}

On our recent trip to India, we visited Meenakshi Ammon Temple, in Madurai, Tamil Nadu. Meenakshi Temple is beautiful, with a central pool, intricate carvings, ceiling murals, and Kolam designs on the floor.


The temple is an amazing example of Dravidian architecture, with it's towers encrusted with carvings of gods and goddesses.


I was most enamored with the colorful ceiling medallions. Each medallion is unique and brightly painted.


You can't help but be cheered by the abundant use of joyous color at Meenakshi Temple.


Much as I would have loved to sit down with a sketchbook to record what I saw, I had to satisfy myself with snapping a few pictures at the time.


I've always enjoyed doodling medallions or mandalas, but after the Meenakshi Temple visit, these doodles bring fond memories of a very special time and remind me of the exuberantly painted ceilings we'd admired.

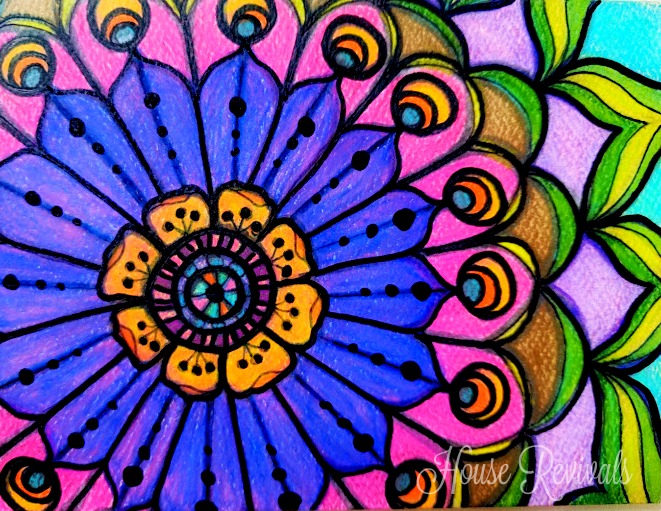
I like to start a doodle using a mechanical pencil with a white eraser. White erasers don't smudge like the red ones do. To create a medallion, I start by creating circles -- these can be freehand or made with templates like lids and cups and bowls. Next, I divide the circles into four segments, then eight segments, and so on. I don't worry about perfection, because, it's just a doodle. Doodling is a creative way to relax, and I don't find seeking perfection to be relaxing. I usually doodle medallions without a plan, making petals or leaves or feathers in concentric patterns.


After I've sketched the medallion with pencil, I go over my lines with a smear proof pen and erase the pencil lines (sometimes -- other times I leave the pencil lines, because of that perfection thing).


The piece is then colored in layers. In this case, I started out by lightly laying on a base of color with Spectrum Noir markers.


Then more layers were added, to build up color. I changed my mind about the color direction along the way, but didn't stress over it, since the point was to play.


Next, I added some colored pencil on top of the marker layers. That turned out pretty, but I didn't like the texture, so I took the Spectrum Noir blending pen and blended the color out. I was pleasantly surprised by how well this worked, as not all alcohol markers play well on top of colored pencil. My Chartpaks cause waxy colored pencil marks to get gummy and weird.


I hope you try your hand at doodling. I love it, because it's not intimidating -- you don't need any drawing skills or knowledge of perspective or shading (although you may want to try shading to add dimension to your pieces at some point). If you can trace around a bowl, you can draw a decorative medallion.

You might also enjoy this post about India's colorful trucks.


You might also enjoy this post about how to draw a spring tulip.

If you enjoyed this tutorial, please subscribe to House Revivals in the sidebar, so you won't miss the fun projects we have scheduled. Find us on Facebook, too, so you can catch all the "in between" stuff, and see what I'm working on daily on Instagram. Feel free to link today's post to your favorite social media sites.

Thanks so much for stopping by!
~Amanda


Tuesday, June 26, 2018

Upcycle Clothing Tags into Unique Gift Tags!

This is a fun little project where the hard work is already done for you, so all you need to do is the fun stuff? Don't you love projects like that?


I find myself hanging on to nicer quality clothing tags. Some of them already have rivets and twine or ribbon or acetate layers, etc.

Thursday, June 21, 2018

Create One of a Kind Card Stock {Masterboard} From Scraps

What do you do with all your creative paper scraps? Those bits left over after punching or die cutting or trimming your paper? Those intricate die cuts that didn't quite work out? Embossed papers that cracked or tore? Stuff that really isn't useful, but it's still really pretty?


Every so often, I will gather up a collection of bits and pieces that I've been hoarding, and use it to create a masterboard. A masterboard is simply a decorated sheet that can be cut apart and used in other projects. To create a masterboard, you need a substrate. Your choice of substrate will depend on the finished purpose of your masterboard.


For instance, if you are creating a masterboard for scrapbooking, you may want to keep your materials archival. If you are making cards or crafts, archival qualities might not be important. My favorite substrates include cereal box sides, ugly scrapbook paper, packaging, mailing cardboard, and junk mail.


I've even used those heavy card stock weight handwriting strips that teachers use.


How you decorate your sheets will also depend on how you want to use the piece. You can layer materials, paint, stamp, or doodle. I usually do a little of all those things.


This is also a great way to use up small amounts of leftover paint. My favorite way to add paint is by spreading it with an old gift card or a stiff piece of cardboard.


Since I like to layer scraps on my masterboard, I use all-purpose white glue. It's inexpensive and can be purchased by the gallon. I have a smaller glue bottle that I refill from my gallon jug. The glue can be spread with an old gift card. Your choice of adhesive may depend on your finished application.


Glue all your layers down really well, then use a brayer, if you have one, to flatten it out and get good adhesion. To protect my brayer and to get good contact, I sometimes use an old sheet of fun foam over my masterboard while using the brayer.


I keep layering collaged items, paint, and ink until I'm happy with the finished piece. I do not seal the top of the piece.


I've used heavier masterboards to cut up and use for business cards. If you cut them out after the glue is mostly dry, but the paper is still cool to the touch, you can run the pieces through your embossing machine for beautiful results that are very sturdy. Or run them through the machine between your shimmed plates to flatten them out perfectly. Embossed pieces can be lightly inked on the raised areas for very pretty effects.


Lighter weight masterboard is perfect for cards or tags. The possibilities are limitless. I know of an artist who creates his own masterboard from found ephemera, presses it perfectly flat, then screen prints over it! His pieces are beautiful.


If you enjoyed this post, please subscribe to House Revivals in the sidebar, so you won't miss the fun projects we have planned. Find us on Facebook, too, so you can catch all the "in between" stuff, and see what I'm working on throughout week on Instagram. Feel free to link today's project to your favorite social media sites.

Thanks so much for stopping by!
~Amanda