Google+ House Revivals: flowers
Showing posts with label flowers. Show all posts

Thursday, January 10, 2019

Comic Book Rose Wedding Bouquet

On Tuesday, I shared how to make paper roses, using measuring spoons to form each petal. Today, I am sharing how to turn those roses into a unique and beautiful bridal bouquet -- Dr. Who style!


To create the bouquet, I ordered a couple of Sonic Screwdrivers from Amazon, and bought a couple of Styrofoam spheres from a local craft store. I bought two sizes of each item, because I wasn't sure which would work best. After some experimentation, and consulting with the bride, I chose the larger Sonic Screwdriver and the six inch diameter Styrofoam sphere. The "screwdriver" would be the bouquet's handle, and the sphere would be the base of the bouquet.


The comic book page roses would be adhered to the base, using hot glue.
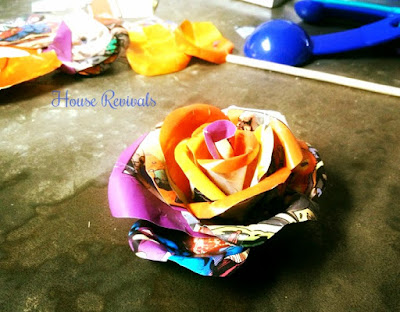

I started by flattening one side of the styrofoam base. This was done by carefully pressing one side of the sphere against a hard flat surface. Next, I took a steak knife and "drilled" out a hole for the top of the "screwdriver." Since the screwdriver actually opens up and lights up, I was careful to insert the handle so that the part that opened could open, and the part that lighted up could be seen from the top of the bouquet.


Next, the roses were attached to the styrofoam, starting at the bottom, and working up.


The bride wanted plain blue roses interspersed with the comic roses, so those were added, as well.


I was careful to use all predominately orange petals, or all blue petals, etc, when making each rose, and was mindful of how the colors were distributed throughout the bouquet.


After all the flowers were in place, the bottom of the bouquet needed to be addressed, as flattened Styrofoam is not terribly attractive.


I cut wide grosgrain and satin ribbon into six inch lengths and glued them into loops, as shown above.


These loops were then glued to the bottom of the bouquet, in alternating layers. To give the piece a nice finished look, I punched a large scalloped circle from a piece of the blue paper and cut a circle out of the center of the punched paper the same diameter as the collar of the screwdriver. A slit was cut into one side of the circle, so it could be slipped over the collar. This piece was then glued into place to cover the raw edges of the ribbon.


The bride loved her bouquet.


There were even enough extra petals to make the groom a matching boutonniere!


The wedding was beautiful, and the happy couple, a year and a half later, are the proud parents of a sweet baby boy!


This lovely couple may not live in the pages of a graphic novel, in their day to day life....


But they are definitely living their happily ever after.


If you enjoyed this post, you might also enjoy this post about how to make a flower garland.


If you enjoyed this tutorial, please subscribe to House Revivals in the sidebar, so you won't miss the fun projects we have scheduled. Find us on Facebook, too, so you can catch all the "in between" stuff, and see what I'm working on daily on Instagram. Feel free to link today's post to your favorite social media sites.

Thanks so much for stopping by!
Amanda

Thursday, November 8, 2018

Library Card FREE Printable Template

I love the library.  I have great memories of pouring through the Nancy Drew titles as a girl, making my selections, and checking out. My friends and I liked to read the names on the library cards to see if we knew anyone who had checked out our books before us. Usually, we found each other's names.


Library cards are becoming a thing of the past, but nostalgia keeps me coming back to them. On our trip to India this year, we visited some beautiful places that I wanted to commemorate with some new designs. A series of library cards came out of this. This library card set is named after Kerala -- one of the loveliest places on this earth.

Tuesday, October 30, 2018

FREE Sugar Skull Embellishment Printable!

Wow! Can this really be the last of the sugar skull printable series?


Throughout October, we've been publishing sugar skull coloring sheet printables. We've introduced Rose and Daisy and Hibiscus and Zinnia and Frida. These printables are perfect for your Day of the Dead decor!


Each coloring sheet came with a skull and several embellishments. Today, we're offering a FREE extra embellishment printable sheet.


All of the skulls and embellishments are coordinated, so you can mix and match embellishments to customize your sugar skulls.


For another (not so) spooky project, try this lace applique owl!


If you enjoyed this tutorial, please subscribe to House Revivals in the sidebar, so you won't miss the fun projects we have scheduled. Find us on Facebook, too, so you can catch all the "in between" stuff, and see what I'm working on daily on Instagram. Feel free to link today's post to your favorite social media sites.

Thanks so much for stopping by!
Amanda


Thursday, October 25, 2018

FREE Zinnia Sugar Skull Coloring Sheet!

Hello Friends! Today we're sharing the last of five FREE sugar skull printables, with a sugar skull embellishment printable still to come.


These printables were designed just for you, and are available to print for FREE throughout the month of October. Keep checking back, because I will be posting a full page of floral sugar skull embellishments in a couple of days -- also FREE!


So far, we've met Daisy and Rose and Frida and Mr Hibiscus. Today, we're meeting Zinnia. Zinnia is the olive green smiling friend shown below. Well, mine is olive green.


Yours can be colored any way you prefer, of course. I just thought the olive green made him look moldy and creepy.


Each sugar skull printable coloring template comes with lots of extra embellishments, so you can customize your decorations.


All the embellishments on the different coloring sheets can be mixed and matched, as the floral motifs are coordinated in this series.


I hope you enjoy coloring and assembling your sugar skull friends as much as I did!  Thanks you for following along, and be sure to check back for the extra embellishment printable.

Get your Zinnia Sugar Skull printable here.

You may also enjoy this post about how to make Christmas ornaments from dollar store supplies.


If you enjoyed this post, please subscribe to House Revivals in the sidebar, so you won't miss the fun projects we have planned. Find us on Facebook, too, so you can catch all the "in between" stuff, and see what I'm working on throughout week on Instagram. Feel free to link today's project to your favorite social media sites.

Thanks so much for stopping by!
~Amanda


Tuesday, October 16, 2018

Free Hibiscus Sugar Skull Printable!

It's time! As promised, we are providing FREE printable templates throughout the month of October for these fun coloring page sugar skull templates.


Last week, we shared Rose and Daisy.


This week, we are sharing Mister Hibiscus. He's the green fellow in the picture below.


As with the previous printable pages, the hibiscus sugar skull printable also comes with lots of extra flowers and medallions for embellishing your skulls. 


To create your sugar skulls, go to the link below and print your sugar skull coloring sheet. Color your page as using the media you prefer and cut out the skull and extra embellishments.


Assemble as desired. I like to mix and match my embellishments. You can glue your sugar skulls onto cord or yarn, to create a bunting, or use them in card making or however your prefer. Enjoy!


If you enjoyed this post, please subscribe to House Revivals in the sidebar, so you won't miss the fun projects we have planned. Find us on Facebook, too, so you can catch all the "in between" stuff, and see what I'm working on throughout week on Instagram. Feel free to link today's project to your favorite social media sites.

For another FREE template, click here.
Thanks so much for stopping by!
Amanda

Tuesday, October 9, 2018

Free Rose Sugar Skull Printable Template!

You guys!  For the rest of October, I will be offering FREE printable coloring sheet templates for these amazing sugar skulls!


Today, we have a link for a printable for the gold colored skull, seen below. Keep checking in, because I will continue posting several more templates all month long!

Thursday, September 27, 2018

Gift Box Printable With Wild Rose Template

Here is another version of the gift box printable I shared a couple weeks ago. The last printable featured an aster embellishment and a kaleidoscope inspired design.


Today's printable features a sweet wild rose, gift tags, and a simple floral pattern for you to color.

Tuesday, August 28, 2018

To Make the Impossible Card....

Have you seen these "impossible" cards? I'm not sure whose brainchild they are, but they are super fun.


If you receive one, you will be left scratching your head, wondering how in the world it was made.

Thursday, June 28, 2018

The Art of Meenakshi Temple {a tutorial}

On our recent trip to India, we visited Meenakshi Ammon Temple, in Madurai, Tamil Nadu. Meenakshi Temple is beautiful, with a central pool, intricate carvings, ceiling murals, and Kolam designs on the floor.


The temple is an amazing example of Dravidian architecture, with it's towers encrusted with carvings of gods and goddesses.


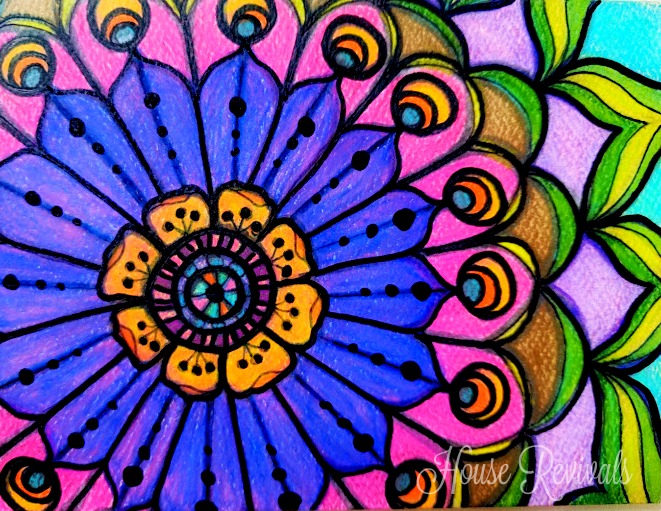
I was most enamored with the colorful ceiling medallions. Each medallion is unique and brightly painted.


You can't help but be cheered by the abundant use of joyous color at Meenakshi Temple.


Much as I would have loved to sit down with a sketchbook to record what I saw, I had to satisfy myself with snapping a few pictures at the time.


I've always enjoyed doodling medallions or mandalas, but after the Meenakshi Temple visit, these doodles bring fond memories of a very special time and remind me of the exuberantly painted ceilings we'd admired.

I like to start a doodle using a mechanical pencil with a white eraser. White erasers don't smudge like the red ones do. To create a medallion, I start by creating circles -- these can be freehand or made with templates like lids and cups and bowls. Next, I divide the circles into four segments, then eight segments, and so on. I don't worry about perfection, because, it's just a doodle. Doodling is a creative way to relax, and I don't find seeking perfection to be relaxing. I usually doodle medallions without a plan, making petals or leaves or feathers in concentric patterns.


After I've sketched the medallion with pencil, I go over my lines with a smear proof pen and erase the pencil lines (sometimes -- other times I leave the pencil lines, because of that perfection thing).


The piece is then colored in layers. In this case, I started out by lightly laying on a base of color with Spectrum Noir markers.


Then more layers were added, to build up color. I changed my mind about the color direction along the way, but didn't stress over it, since the point was to play.


Next, I added some colored pencil on top of the marker layers. That turned out pretty, but I didn't like the texture, so I took the Spectrum Noir blending pen and blended the color out. I was pleasantly surprised by how well this worked, as not all alcohol markers play well on top of colored pencil. My Chartpaks cause waxy colored pencil marks to get gummy and weird.


I hope you try your hand at doodling. I love it, because it's not intimidating -- you don't need any drawing skills or knowledge of perspective or shading (although you may want to try shading to add dimension to your pieces at some point). If you can trace around a bowl, you can draw a decorative medallion.

You might also enjoy this post about India's colorful trucks.


You might also enjoy this post about how to draw a spring tulip.

If you enjoyed this tutorial, please subscribe to House Revivals in the sidebar, so you won't miss the fun projects we have scheduled. Find us on Facebook, too, so you can catch all the "in between" stuff, and see what I'm working on daily on Instagram. Feel free to link today's post to your favorite social media sites.

Thanks so much for stopping by!
~Amanda


Tuesday, November 1, 2016

Quilting Retreat at a Franciscan Monastery

Around this time last year we were traveling in New England. We were having one of those rare vacations, where two of our children and our granddaughter were able to join us. Now that we're empty nesters, we grab at any opportunity to spend time with the kiddos!


When the kids were growing up, we liked to stay in interesting places when we traveled.

Tuesday, August 30, 2016

How to Create a Henna Tattoo

My son's dear love, Aparna, is from India. A few weeks ago, at a weekend house party at our beach house, Aparna brought several henna cones and offered henna tattoos to all the ladies. We had so much fun designing and drawing our tattoos -- we all felt so special!


Aparna, who is a software engineer, is always saying that she hasn't a creative bone in her body, but I realize now that she is just being humble. She created beautiful art for everyone. When she asked each of us what we wanted, we searched the internet for inspiration, then described what we liked, while she sketched out the concept on scratch paper. Once a design was settled on, she transferred the pattern to skin, using a blue ballpoint pen, since any exposed blue ink will wash off easily later.