Google+ House Revivals: reuse
Showing posts with label reuse. Show all posts

Tuesday, October 2, 2018

Furnish Your Home With Free Stuff -- Beautifully!

The holidays are right around the corner, and many of us are thinking about sprucing up our homes, in preparation. With tight budgets, the task can feel a bit daunting, but it doesn't have to be. You don't need a lot of money to create a beautiful home. In fact, sometimes you don't need any money!


This morning, a quick scroll items being offered up for FREE on Craigslist turned up scores of awesome stuff.

Tuesday, September 25, 2018

How to Make Coloring Card Gift Sets

The struggle is real. What in the world do you do with all those coloring books? I love them, the art is beautiful, and they are fun to color, but if I start coloring now, and color till I die, I will never get them done.


When people find out you're crafty, they give you coloring books. I've got soooo many coloring books, I buy them, people give them to me, and I even had a craft company send me an entire box of the SAME coloring book by mistake.

Thursday, August 30, 2018

This Abbot Kinney Welding Shop is a Piece of Authentic Venice

We've been spending a lot of time in Los Angeles, lately. For a couple of years, we need to travel between Venice and Seattle for my husband's job. We have fallen in love with Venice.


Venice is amazing. Venice is crazy. Venice has heart. Venice has crime. Venice has very high end homes, and Venice has homeless encampments. Lots of movies and TV shows are filmed in Venice. In fact, I can see The Today Show filming down by the graffiti wall as I type. When we first came here, I made my husband spend an afternoon with Linda Blair and me, watching Roller Boogie. The two star film was shot in Venice, and it's fun to locate the old Venice landmarks and to see how things have changed. You can see the exterior of our apartment in some of the scenes. You can still find roller skaters on the Venice Boardwalk, though roller skating has been eclipsed by skate boarding, with the addition of a new skate park.

Tuesday, September 8, 2015

Make Pretty Cone Pendants From Bottle Caps

I'm loving this bottle cap upcycling project! It's so fun to flatten out used bottle caps to turn them into unique jewelry, but you can take your upcycling project a step further by turning your bottle caps into jewelry cones for pendants and earrings and keychains.


Make them for yourself, or to give as gifts! It's easy with this tutorial.

Monday, January 26, 2015

Make Beautiful Jewelry From the Hardware Store!

You can create beautiful things using humble supplies. Craft stores are amazing, but we don't always have the time or extra cash to shop there, and sometimes we don't live anywhere near a craft supply store. Other times, we just want to create something beautiful from stuff we have lying around.


I recently found myself with a few moments on my hands, and cleaned out my purse. In the very bottom of my bag were some glass sample tiles from a big box hardware store.

Tuesday, January 13, 2015

Why You Need to Shop Architectural Salvage Stores

If you've been reading House Revivals for very long, you will know about my love affair with reused, reclaimed, and re-purposed items.  After all, why buy new, when you can buy used, right?


I adore architectural salvage. As an interior designer, I love the idea of giving a design project "soul" by including items that have a story to tell.

Tuesday, January 6, 2015

How to Repair Broken Jewelry With Paper

A few months ago, I found this broken necklace in an Alabama thrift store for a couple of dollars. It would have been cute, except for the fact that several of the cabochons had fallen off.


The necklace came home with me because I thought it would be simple to repair. It was very simple to repair, although it took me months to get around to it!


Of course, I had no matching cabochons at home, but what I did have was even better! I had this lovely sheet of vintage paper.


It was super easy to cut out circles from the paper and Mod Podge them into the empty necklace bezels.


After the Mod Podge was completely dry, I added Dimensional Magic to the top. The necklace now looks gorgeous, and it looks like it was always meant to have vintage text alternating with the cabochons.


Do you have some old jewelry in need of rescue? Do you ever remake your old jewelry?


Tuesday, December 2, 2014

Make a Portable Marshmallow Roasting Kit With an Altoids Tin!

Here is a sweet idea for an easy gift this Christmas! Give someone special a little marshmallow roasting kit in an altered Altoids tin!


I promise the recipient will love it. We do beach fires and roast marshmallows all summer long, but somehow the idea of roasting marshmallows inside, while the snow falls outside, seems extra special!


To make this kit you will need:
  • An Altoids tin (or similar container)
  • Marshmallows (I used regular sized and had to squish them a bit to fit in the tin, but you can use miniature marshmallows if your prefer)
  • Cellophane or plastic baggie
  • Matches (you can include a striker, if you like, by gluing a piece of sandpaper to the inside of the lid)
  • Skewers
  • Washi tape (optional)
  • Decorative Duck Tape (optional)
  • Tea Lights


Start by cutting a piece of Duck Tape to fit inside your tin (this is optional). I used the bottom of my tin as a cutting guide.


Place the tape in the bottom of the tin. You may want to add a striker by attaching a piece of sand paper to the inside of the lid (this is also optional).  Wrap your tea light in pretty washi tape. Cut your skewers down, so they will fit inside your tin. Put some marshmallows in a baggie, close with a twist tie or ribbon, and trim down the excess.

Decorate the outside of the tin, if you like. Here is a tutorial for altering tins.


This would be such a heartfelt little gift to give a special friend in your life!  I'm a firm believer that gifts don't need to be expensive to be special.

What about you? Do you love receiving thoughtful little handmade gifts? If you enjoyed this tutorial, be sure to subscribe, so you won't miss any of the great gift and craft ideas we have planned!  Please feel free to use the icons at the bottom of this post to share this idea on social media. Happy gifting!

Saturday, November 22, 2014

Easy Stash Busting Ideas for Beads and Broken Jewelry!

I recently spent a lovely Saturday morning doing some stash busting!  The leftover beads and bits of broken necklaces had been accumulating in my craft stash and things were getting out of control. Does this happen to you?


Being the craft supply hoarder that I am, I can't bear getting rid of a piece of broken or dated jewelry, so there were plenty of random supplies in my stash. The solution?  Create lots of bead charms and links (and use up random packages of wire findings and partial spools of wire, at the same time)!


By the end of the morning, a nice little stash of "ready to use" charms and links were done. I have found the charms to be especially useful! I love to add simple charms to necklaces and bracelets, and it's so handy to be able to just grab something truly unique from my stash.


In one morning we went from having several plates of random beads and broken jewelry, to having lots of lovely charms!


The charms shown here, were made using whatever pin head wires I found in the stash.  I have loved the convenience of having these at the ready, and have already used them in several different projects!

Do you enjoy playing around with beads and making your own jewelry? Maybe you're a beginner? If so, be sure and subscribe to House Revivals, so you won't miss any of the upcoming jewelry tutorials we have planned. If you enjoyed this post, please feel free to use the icons at the bottom of this post to share on social media!


Tuesday, November 18, 2014

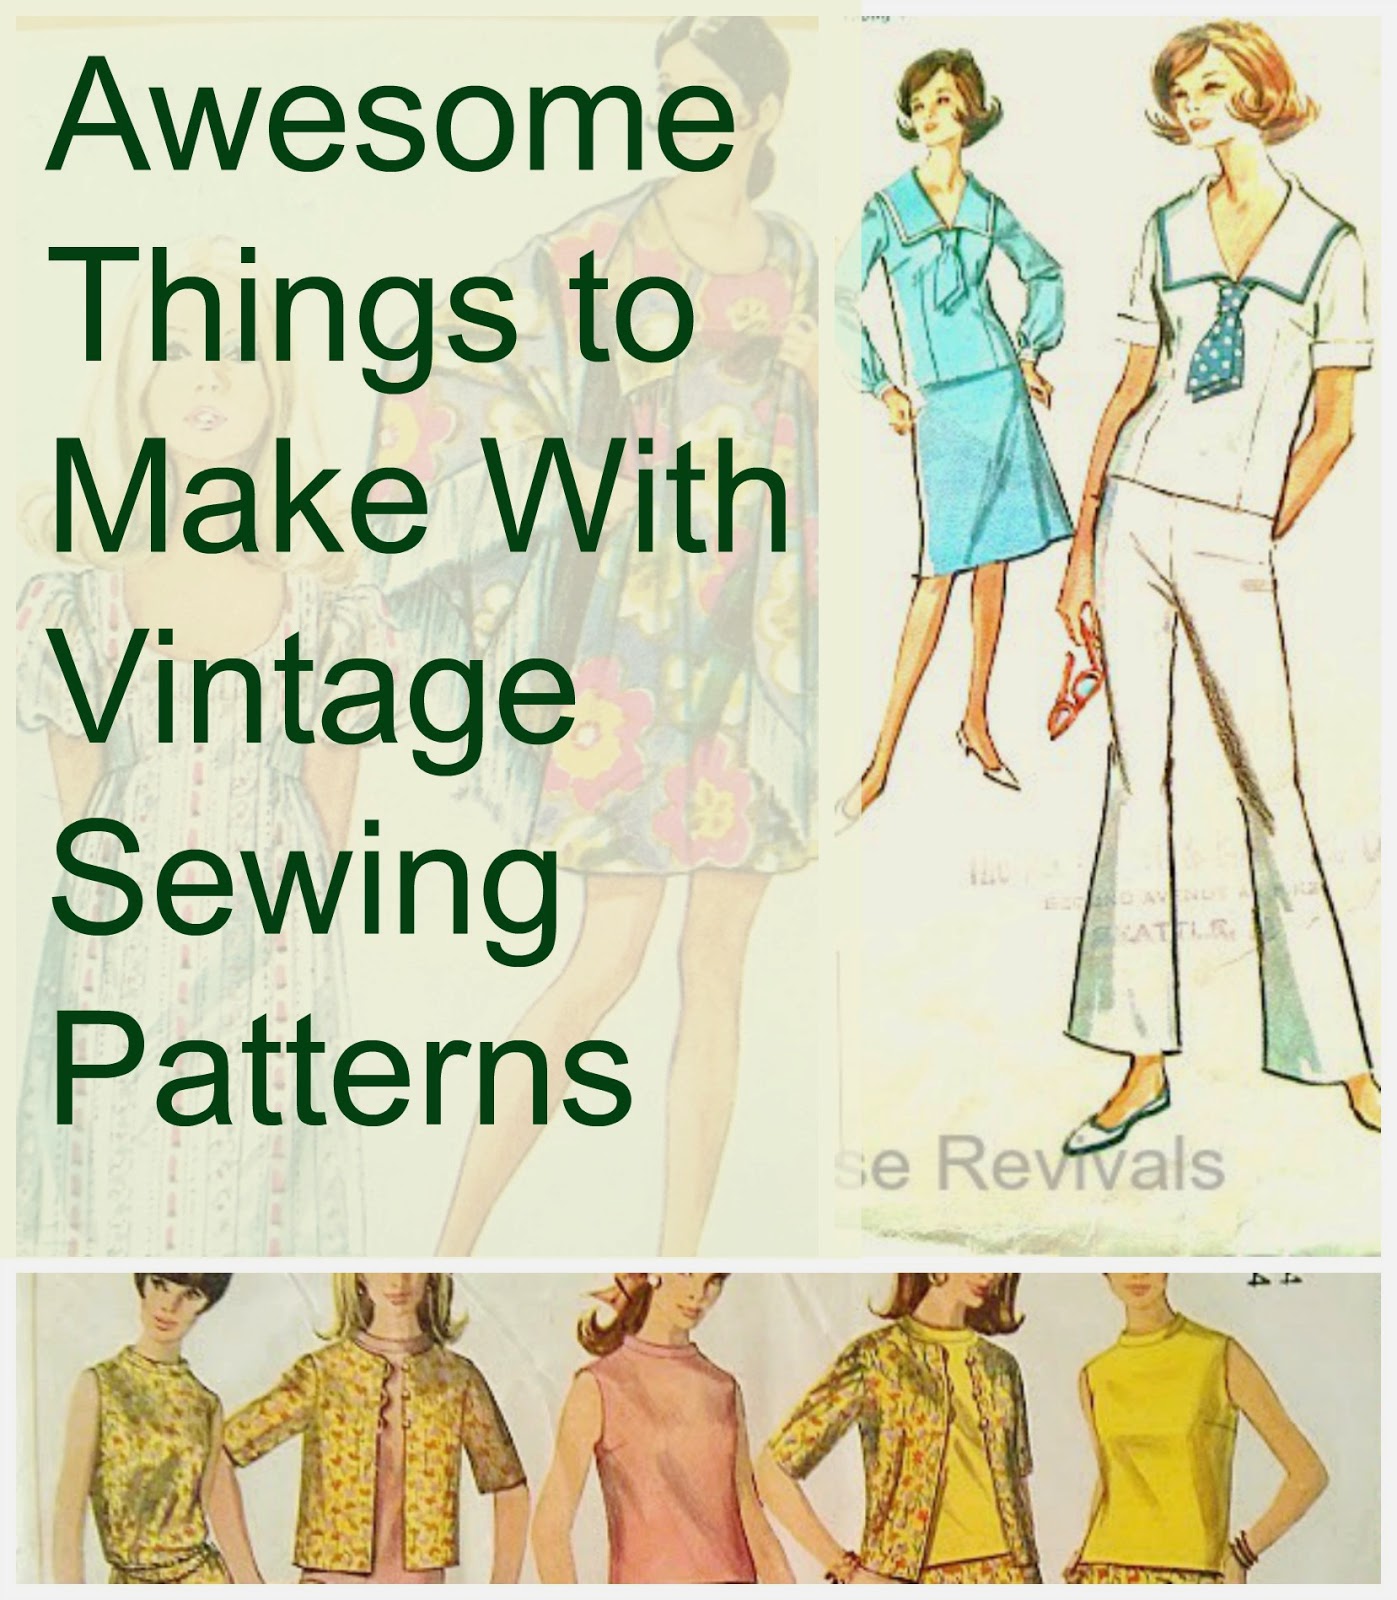
Cool Things to Make With Vintage Sewing Patterns

Remember when I shared about all those gorgeous vintage patterns I found at the local Goodwill? Now I'm sharing tons of awesome craft ideas using vintage sewing patterns!


I love the idea of re-using old patterns for new projects -- the graphics and illustrations are so gorgeous! As a word of caution, if you are planning to make copies of your pattern, check the copyright first. Many pattern envelopes and illustrations were copyrighted, and quite a few of the vintage patterns have had their copyrights renewed, so you will want to do your research before making copies. Here is an article about copyright law and crafting.
Gift Tags - Vintage Sewing Pattern Packaging - One Dozen

MontclairMade on Etsy, has these adorable gift tags. So. Stinking. Cute.


I love these pattern weights made from heavy washers and decoupaged paper from Pin and Paper.


Use old patterns to organize your sewing space, like these from Cathe Holden, Just Something I Made.

Vintage Sewing Pattern Elegant Tote Bag Purse FREE SHIP

Use a pattern envelope to decorate a tote bag, like this one from georgiapeachez on Etsy.


Have a lazer cutter? Make pins to give as gifts, like these from Red Revival. Image from Poppytalk.


Use the tissue to wrap a gift! I also use the tissue inside gift bags and boxes. Heather Bullard

Sewing Embellishments

Use the tissue patterns to cover a lampshade. BHG


Use the illustrations in an art journal, like this one from Sandra Pearce.


Use the patterns for wallpaper! Image from Meet Me at Mikes.

sewing patterns vintage tote bag

You will want to check for copyright before doing this, but isn't this tote bag from the Tom Kat Studio darling?


I'm so excited about all these fun ideas for using my vintage pattern haul! Which projects would you do? Help me decide! Click here to check out more of the amazing vintage patterns found at our local Goodwill!


You might also like this post about making jewelry from fabric scraps.

If you enjoyed this post, please subscribe to House Revivals in the sidebar, so you won't miss the fun projects we have planned. Find us on Facebook, too, so you can catch all the "in between" stuff, and see what I'm working on daily on Instagram. Feel free to link today's project to your favorite social media sites.

Thanks so much for stopping by!

Thursday, November 13, 2014

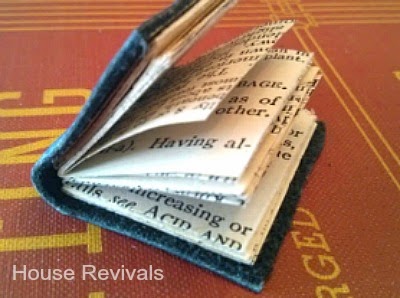
Make These Easy Mini-Book Pendants!

If you are looking for an easy project for gift giving this holiday season, look no further! These sweet little book pendants are the perfect project for the book lover in your life.


I decided to figure out how to make them when my friend Cheryl from the Amber Waves Band reached out to me looking for a product to sell at concerts that supported their new Storyteller CD (by the way, if you don't have your copy already, you can buy it via CD Baby here). This is not a sponsored post, I just love this band and their music.

After a bit of brainstorming, the idea of Storyteller Necklaces emerged.


We talked about which materials would be best, and settled on sustainable reclaimed leather, and reclaimed vintage book pages. A quick trip to my closet yielded several old purses and belts that were perfect for this project. Score!


Start by cutting out your books pages. I used a paper cutter and was able to cut several thicknesses at one time. The tiny book pages shown here are about one inch high by about two inches wide. The sizes of your leather pieces may determine the size of your little books. Basically, cut your little pages twice as wide as you want your finished pages to be, because you will be folding them in half.


Once you have cut out your little pages, you will fold the pages in half to create "signatures" just like a regular book has, except these will not be sewn (unless you really, really, really want to sew them). Instead, they will be glued.


Simply run a very thin bead of glue down the center of each fold line to glue the sheets together. The thin bead of glue shown in the picture above is actually a bit too much glue.


I found that four or five sheets was enough to make a believable signature. Fold up each signature as you go, so they will dry in the right shape.You can trim them up as you go, or just leave the signature edges a bit organic, as I did.


Next run a very thin bead of glue along the top of the folded edge of the signatures to glue them together. Each little book will probably consist of between three and five signatures.


Next, you will lay your stack of glued together signatures onto the piece of leather you have chosen for the book cover.


Determine to what size you need to trim your leather, so that it wraps around the spine of the book and is slightly larger than the pages. Cut out the leather with a pair of sharp scissors.


Using any clear drying glue, adhere the insides of the book to the inside of the book cover.


The book will want to splay open, so weight it down while the glue dries. I found that my coffee cup worked well for this.


When the glue has dried, you should have a perfectly lovely perfect little mini-book -- too perfect, actually. Using the edge of an old pair of scissors, rough up the edges of the pages and the leather. You don't have to do this, if it hurts your heart to damage something so perfect, but it gives the little tomes a lovely patina.


You can create single book pendants, like this little blue book. We added another layer of interest to it by wrapping it in a contrasting strip of leather. Use a sharp awl and a wood block to pierce the leather at the top of the spine to add a jump ring to attach the pendant to a necklace.


Another wonderful option is to stack two or three little books together to create a pendant. For the pendant shown here, each book was pierced with a sharp awl, using a wooden block to protect my table. Then, a pin head wire finding was inserted through all three books and a jump ring was then attached.


This is what the bottom of the pendant looks like.

Wouldn't this be a fun gift to make or receive?


If you love working with vintage book paper, you might like this post about making mixed media flowers.


If you enjoyed this post, please subscribe to House Revivals in the sidebar, so you won't miss the fun projects we have planned. Find us on Facebook, too, so you can catch all the "in between" stuff, and see what I'm working on throughout week on Instagram. Feel free to link today's project to your favorite social media sites.

Thanks so much for stopping by!
~Amanda