Last week, I posted about making a permanent gelatin printing plate at home. The project was much easier than imagined.


These are the four plates I used to compare prints. From top left, clockwise, 12x12 Gel Press, 8" round homemade gelatin plate, 6x6 Gelli Arts, and 5x7 Speedball.
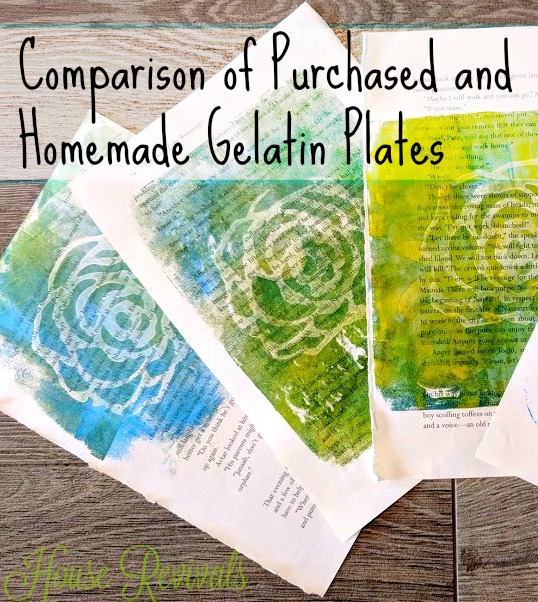
I used book pages and acrylic transparent and opaque paints to pull all the prints.


You can see where the paint would not release from the Speedball plate, and bits of torn paper remained on the plate. To be fair, the Speedball plate was created for use primarily with inks, and I've pitted it up against plates designed for use with paints. The Speedball plate does not even appear to be made from the same material as the other two purchased plates. To clean the plate, I ended up immersing it in water and letting it soak, then scrubbing it clean. As I mentioned earlier, I'd previously played with the Speedball plate quite a bit. This was the first time I had these disastrous results.
All in all, I thought the plates were all great, depending on the application. If you only plan to work in acrylics, and don't want to bother with extenders or buying special open acrylics, I would not recommend the Speedball plate. The Gel Plate and Gelli Arts plate were pretty comparable. I might be partial, but I thought my homemade permanent gelatin plate held up pretty well in the comparison. Basically, the more squish to the plate, the better it performed with stencils and masks. If you are looking for lots of transparency, the firmer plates allow you to lay down a much thinner coat of paint. You might even consider using different plates for different layers of the same print, depending on the effect you are looking for.
Was this clear as mud... or at least amber?
I hope you were encouraged to try gelatin print making. Maybe this informaion will help you decide which product is best for you, or if you'd like to try making your own permanent gelatin plate.
Here are the products I purchased (affiliate links):
6x6 Gelli Arts Plate
12x12 Gel Press Gel Plate
5x7 Speedball Gel Plate
gelatin
glycerin
To see how to make your own permanent gelatin plate, click here.


Today, I'm sharing a comparison of how a homemade gelatin plate stacks up against purchased gel plates. I purchased three gel plates on Amazon to compare.
These were purchased at my own expense, and I was not sponsored to do this post.
These were purchased at my own expense, and I was not sponsored to do this post.

The three brands of gel printing plates that I purchased were Speedball, Gel Press, and Gelli Arts.

I also used one of the plates I'd made, using the recipe I shared last week.

Above, you can see the three purchased plates stacked together. (from top, Speedball, Gelli Arts, and Gel Press) The Speedball is the thinnest, at about 1/4 inch thick. The Gel Press is the thickest, being a scant 1/32 of an inch thicker than the Gelli Arts plate. I didn't include the homemade plate, here, because they can be poured to any thickness. Note that the Speedball plate has an orange tint. That is because I'd played with it quite a bit before the others arrived in the mail, so it was already stained.

Next, I gave them a "squish" test, to see how much displacement there was in each plate. When I pressed down on the homemade plate, it "squished" quite a bit. (You can also see, in this picture, that the homemade plate has some texture on the surface.)

The Speedball plate barely squished at all.

The Gel Press squished quite a bit, but not nearly as much as the homemade press.

The Gelli Arts plate squished a little bit less than the Gel Plate. All in all, the Gel Press and the Gelli Arts plate were pretty comparably medium squishy, while the Speedball was very firm, and the homemade plate was very squishy.

Next, I did a "flop test". The Speedball, when lifted from underneath, remained fairly stiff.

The Gelli Arts plate flopped a bit more than the Speedball.

The Gel Press was a bit more floppy than the Gelli Arts plate.

The homemade plate was somewhat less floppy than the Gelli Arts plate, but that may be because it was poured about an eighth inch thicker. You can also see that the homemade gelatin plate has an amber tint. This isn't staining, it's just the color of the gelatin. I did notice that the longer you "cook" your gelatin, the clearer your plate will become, though it will still be amber. The rectangular plate, shown above was remelted, after I accidentally bumped the mold it was in, after it was partially set up. This caused the surface to get a weird ripple effect that would not allow for good prints, so, after it was all set up, I cut it up and remelted and repoured it. Compared to the round homemade plate shown below, it is quite clear. It also has a slightly smoother surface than the round plate, below, so don't be afraid to remelt your homemade plate, if you are not happy with your results the first time around.

The homemade plate was somewhat less floppy than the Gelli Arts plate, but that may be because it was poured about an eighth inch thicker. You can also see that the homemade gelatin plate has an amber tint. This isn't staining, it's just the color of the gelatin. I did notice that the longer you "cook" your gelatin, the clearer your plate will become, though it will still be amber. The rectangular plate, shown above was remelted, after I accidentally bumped the mold it was in, after it was partially set up. This caused the surface to get a weird ripple effect that would not allow for good prints, so, after it was all set up, I cut it up and remelted and repoured it. Compared to the round homemade plate shown below, it is quite clear. It also has a slightly smoother surface than the round plate, below, so don't be afraid to remelt your homemade plate, if you are not happy with your results the first time around.

These are the four plates I used to compare prints. From top left, clockwise, 12x12 Gel Press, 8" round homemade gelatin plate, 6x6 Gelli Arts, and 5x7 Speedball.
I used book pages and acrylic transparent and opaque paints to pull all the prints.

For the first pull, I used a brayer to apply orange and yellow paint to each plate. From left, homemade, Gel Press, Speedball, and Gelli Arts. The Speedball won this round.

Next, I laid down an intricate stencil before braying on some color, then removed the stencil before pulling the prints. The homemade plate, left, won this round.

I decided to try a less intricate stencil, next. Once again, the homemade plate did best, but all the plates did well.

For the next test, I decided to take the original prints I'd pulled and print over them. I grabbed a mask to put onto the plates before applying the blue paint. The mask was then removed before pulling the prints. Once again, the homemade plate did very well. Surprisingly, the Gel Plate, second from left, did the worst. One reason I think the homemade plate did so well here was that it does not have a perfectly smooth surface, like the other plates, so it grabs more paint, which it then releases onto the prints.

I decided to put some color onto the plates, then remove color, using a foam stamp. From left, Gel Plate, Speedball, Gelli Arts, and homemade. None of the prints were perfect, but I liked them all.

For the next round, I used a homemade styrofoam printing plate, to transfer a design to each plate. This was done by applying paint to the styrofoam plate with the brayer. Next I pressed the styrofoam onto the gel plate to transfer the paint.Then I let the paint dry, and put a light coat of paint over that and pulled the prints. I stacked the plates with the dried paint together, to get them in the same picture (above), but did not pull the prints with them stacked like this. The Gel Press is the large plate on the bottom, the back left plate is the Speedball, and the square plate is the Gelli Arts plate. The round plate is the homemade plate.

I was pretty disappointed in all of these prints, and I suspect user error was involved. The Gelli Arts plate seems to have done the best (top center). The Speedball turned out to be a big mess. It did not want to release the dried paint at all. In fact, it tore the paper when I tried to pull the print.

You can see where the paint would not release from the Speedball plate, and bits of torn paper remained on the plate. To be fair, the Speedball plate was created for use primarily with inks, and I've pitted it up against plates designed for use with paints. The Speedball plate does not even appear to be made from the same material as the other two purchased plates. To clean the plate, I ended up immersing it in water and letting it soak, then scrubbing it clean. As I mentioned earlier, I'd previously played with the Speedball plate quite a bit. This was the first time I had these disastrous results.
All in all, I thought the plates were all great, depending on the application. If you only plan to work in acrylics, and don't want to bother with extenders or buying special open acrylics, I would not recommend the Speedball plate. The Gel Plate and Gelli Arts plate were pretty comparable. I might be partial, but I thought my homemade permanent gelatin plate held up pretty well in the comparison. Basically, the more squish to the plate, the better it performed with stencils and masks. If you are looking for lots of transparency, the firmer plates allow you to lay down a much thinner coat of paint. You might even consider using different plates for different layers of the same print, depending on the effect you are looking for.
Was this clear as mud... or at least amber?
I hope you were encouraged to try gelatin print making. Maybe this informaion will help you decide which product is best for you, or if you'd like to try making your own permanent gelatin plate.
Here are the products I purchased (affiliate links):
6x6 Gelli Arts Plate
12x12 Gel Press Gel Plate
5x7 Speedball Gel Plate
gelatin
glycerin
To see how to make your own permanent gelatin plate, click here.
You might also like this post about how to make a quilted card.
If you enjoyed this post, please subscribe to House Revivals in the sidebar, so you won't miss the fun projects we have planned. Find us on Facebook, too, so you can catch all the "in between" stuff, and see what I'm working on throughout week on Instagram. Feel free to link today's post to all your favorite social media sites.
Thanks for stopping by!
Amanda
Thanks for stopping by!
Amanda