Google+ House Revivals

Friday, March 8, 2013

Upcycle a Skirt into a Cute No-Sew Apron!

I've been wanting to up-cycle a thrifted skirt into an apron like the one I shared about here.   But, for some reason, the idea of dragging out the sewing machine had me dragging my heals.  Does that happen to you?


Some would call that lazy, but I prefer to call it "energetically challenged"  :)

So, I devised a way to up-cycle a skirt into an apron without sewing one single stitch!  The trick is to find a skirt that has belt loops.

Monday, March 4, 2013

Before Pictures of our New Project

Are you ready to see some interior shots of our newest project?  I can't promise you your eyes won't burn.  This condo has some truly ugly spaces.  Did I mention that there is pretty much not one finish in this condo that I like? 

Here is the fireplace wall.  Somewhere along the line, someone gave it a make-over by tacking on a tiny little mantle that is totally out of scale and out of place.  But, it is a real fireplace, and that cosmetic stuff can easily be addressed.


 This is the bank of windows adjacent to the fireplace wall.  A great view can make up for a lot.

Monday, February 25, 2013

Our Newest Make-Over Project

We signed our closing documents today for our newest project!    It's another condo in our building -- right in the middle of a big city, but right on the edge of a lake and wetlands.  The seller signs tomorrow, and hopefully the rest of the closing will go smoothly. (closings are different here -- sellers and buyers don't sit down together, and you usually sign a day or so before the actual closing)


I was waiting to share more on this project till the closing was completely finished, but I was too excited, so here is a peak of the views from the new condo.

Thursday, February 21, 2013

Make a Pretty No-Sew Cuff Bracelet

Do you just love a pretty cuff bracelet?


All the fabric cuff bracelets floating around are so pretty I decided I needed to make my own.  But I did not want to sew -- I didn't even want to sew on one button.  And I didn't want to spend any money, either. And it needed to be a quick project.  Basically, I wanted a quick, cheap, and easy project :)

Monday, February 18, 2013

What NOT to Buy from the Thrift Store

Do you ever wonder if there are certain things you should not buy from a thrift store?  Here are a few things you may want to skip on your next trip to the thrift shop:


Skip poor quality sofas.  It can be really expensive to reupholster or slipcover a sofa, and typically, a low end sofa is worn, and sagging when it hits the thrift store.  It's probably not going to be worth the investment to reupholster or slipcover a poor quality piece.  Even if the piece looks "pretty good," it's likely to look pretty dumpy, pretty soon, and you will be stuck paying someone to haul it to the landfill. 


Here are some clues to help you determine if a sofa is good quality:
  • The piece should be very heavy.  If you can easily lift one end of the sofa, it probably does not have a hardwood frame.
  • Press down on the "deck" of the sofa.  Does it "give", indicating that it has springs?  That's a good sign.
  • Try to peak under the dust cover on the bottom of the piece.  Look for eight-way hand-tied springs.  Avoid pieces with sinuous springs, or no springs.
  • Check the label on the sofa (generally found on the deck, under the middle cushion).  Is it from a high end maker?
  • Try to press your fingernail into the underside of the frame.  Does your fingernail easily leave a mark?  This would indicate you are not dealing with a good hardwood frame.
  • Check for cracks or breaks in the frame -- does the sofa bend where it shouldn't?
  • Check to see if the arms "wobble".

 ...............................
Particle board?  Pass on by!   Particle board is heavy and difficult to transport without breaking it.  Did you know that many moving companies won't move particle board pieces?  Very often, particle board pieces are already broken, sagging, or delaminating when they hit the thrift store aisles.  And, they are usually ugly and in need of a makeover. 


Your time and energy are valuable.  Why waste it on a piece that won't last?

Tip:
If you not sure whether a piece is made from particle board or not, see if you can look at the back side of the piece. Usually, backs of furniture pieces are not laminated or veneered, so you can see what the material is.
......................................

Are you sure that safety helmet is "uncrashed"?  Here is what Cleveland Clinic has to say about used or hand-me-down helmets:

If considering a used or hand-me-down helmet, never purchase or use a helmet that is cracked, broken, or has been in a crash. Keep in mind that used or older helmets might have cracks you cannot see and might not meet current safety standards if manufactured before 1999.


We want our little ones to be safe, so inspect helmets carefully.
........................................

Now, I don't want to step on any toes, but my personal preference would be to avoid used undergarments. 


Just my own very humble opinion.... (that said, I would scoop up used training pants and good cloth diapers in a heartbeat)!
 
................................


Think twice before buying that used child safety seat!


Here is a link to the National Safety Commission website, that gives information and links to more information about child safety seats:


Friday, February 15, 2013

Colorful Painted Paneling

We are engaged in a debate, at the beach house, about painting our paneling. 


It would be so simple if our paneling was that fake wood stuff from the seventies.  I've painted that stuff before, and my other half didn't have a problem with it. 


Our beach house paneling is a really beautiful cedar.  It's lovely, it's warm, it feels homey.  And it is dark.  During our dark Pacific Northwest winters it can feel oppressive -- not "beachy" at all.  At night, it can make our living area feel like a black hole.

The plan (well, my plan) all along, was to paint it and lighten things up a bit.  But now my other half is saying "you can't paint wood".  I've heard this from client's husbands many times, and we always come to a workable solution that pleases everyone, but it's harder when it's your own spouse.  This is his house, too, and I need him to be on board with this.  I know, if I can help him visualize how the space will look and feel, he will come around.

For this moment, we will leave it unpainted, but paint out all the trimwork in white.  Not because I've given in, mind you, but because I don't have time to paint it right now, anyway.

{Traditional Bedroom design by Portland Maine Architect Whitten Architects}

For now, I will content myself with images of rooms with painted paneling.  My husband mentioned that the idea of painting paneling white, reminds him of the Portlandia sketch "Put a Bird on It".  I get that.  That's why I'm compiling a collection of colorful painted paneling :)


Doesn't it just make you happy to see all that gorgeous color?  Combined with the texture of the paneling, I think it's just. to. die. for.  Love.

We also have tongue and groove style paneling on our ceiling that would sure reflect a lot more light if we brightened it up! 

I pretty much love everything about this blue paneled wall....

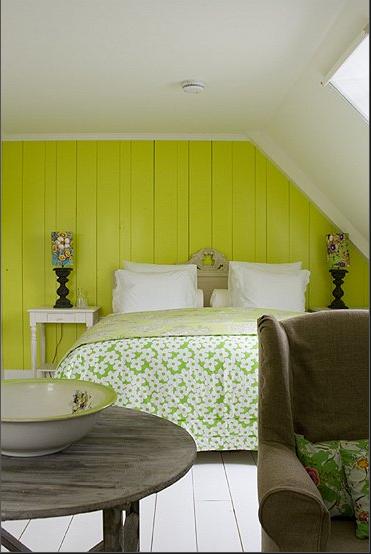
This yellow paneling is so cheery -- it would certainly perk things up on those long gray days of winter!

How about chartreuse?  Personally, I adore chartreuse.... not sure if my husband would go for it, though....

These two bedrooms are from Bed of Flowers -- a beautiful vacation rental in The Netherlands.

I love how the blue painted paneling in this kitchen from The Carriage House Chronicles makes the wood floors and countertop pop.  Gorgeous.

Now, tell me what you think!  Would you paint your paneling?


Tuesday, February 12, 2013

Building an Entry Cubby

It's hard to believe it's been over a year since we bought our little foreclosed marina condo!  The condo was in rough shape.  Someone had tried to remodel it themselves to flip, but the remodel was a failure, and it was foreclosed long before it was ready to flip.  When we purchased the place it had a leaky roof, no bathroom fixtures, bare drywall in places, holes in the floor and walls, paint and primer dripped all over the floor, and a broken, cracked and lumpy DIY concrete counter top.  People thought we were crazy.  Especially since we were still finishing up the beach house remodel.

 Yes, we keep three canoes in our boat slip!  There is nothing more relaxing after fighting city crowds, than getting in a canoe and paddling through swamps, enjoying nature.

I guess we probably were a tiny bit crazy, but the foreclosed condo came with a boat slip.  Do you know how rare it is to have your very own boat slip right in the middle of a huge city?


We have been making slow, but steady progress on the condo.  It now has a beautiful new bathroom (which I still need to share).  We made it through the rainy season without one single roof leak, so I think it is safe to say the roof is repaired.  The drywall has been taped and patched and painted.  The stains on the ceiling have been primed and painted.  The holes in the floor have been patched.  The fireplace has had a facelift (though it still needs new hearth tile); and we have a new entryway.


The condo kitchen had originally been just to the left of the front door (above), but the flipper had moved the kitchen, creating a weird open area right as you enter the condo.  There was a ton of wasted space and no place to hang a coat or drop your keys when you walked in.  Plus, there was absolutely no privacy from the front door.


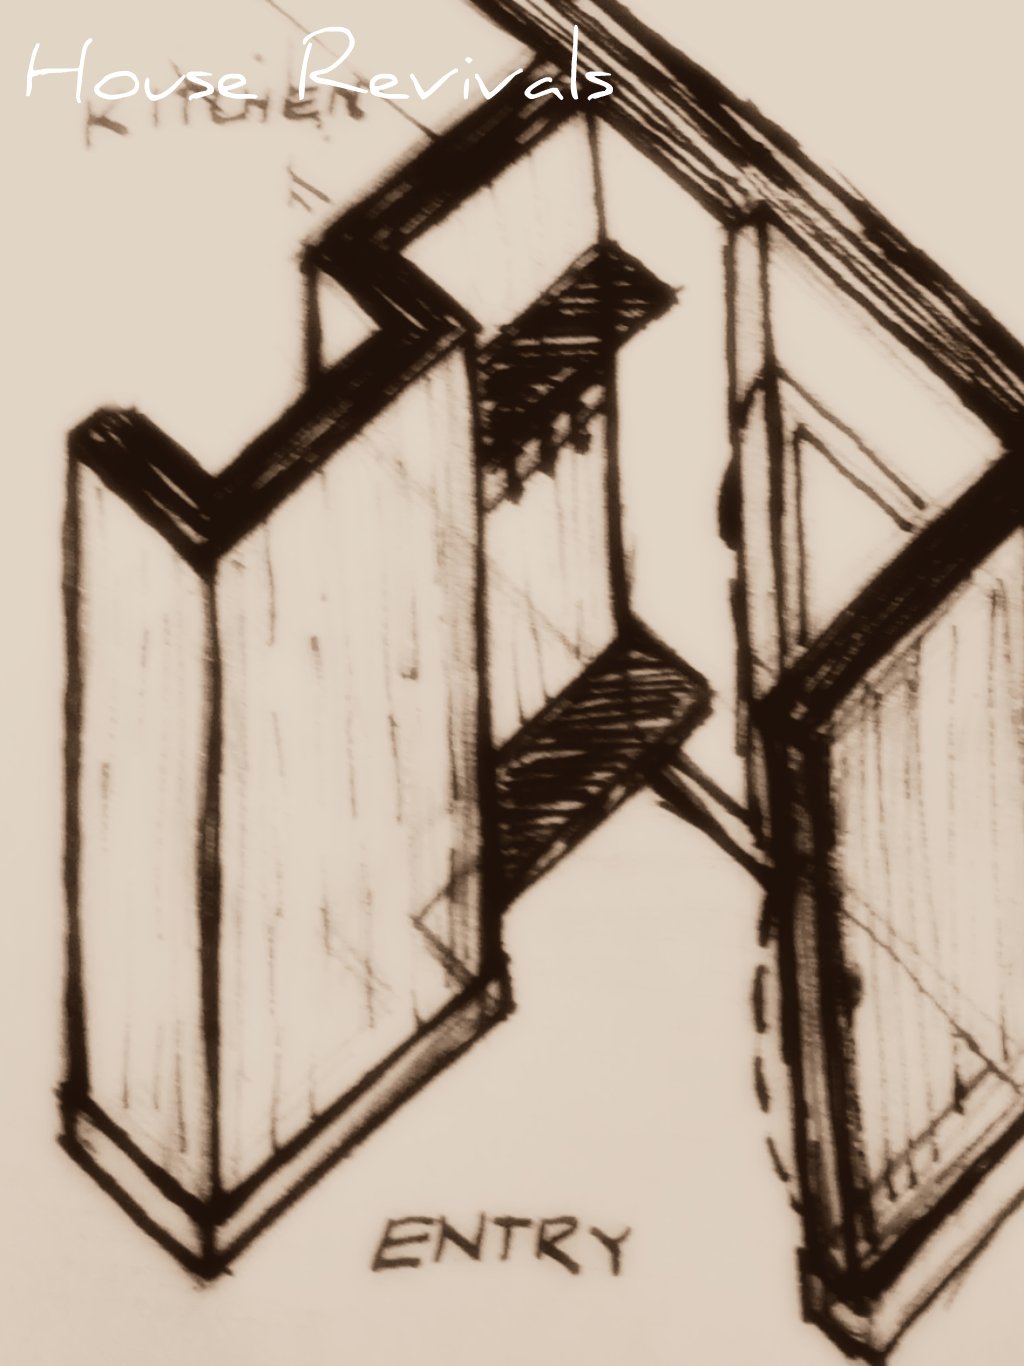
Moving the entire kitchen back to it's original location was out of the question, so we created a little entry area by adding a partition wall next to the door.


The partition wall was built with nooks to create a coat cubby on the entry side, and a charging station, message center, and shelves on the other side.


We used tongue and groove paneling, since this a marina condo, and we wanted it to have a vintage boat house kind of vibe.

All the paneling got primed, then painted.


 A little bench and shelf were added to the entry cubby (I still need to photograph the final reveal).


We even included a little dog feeding station under the message center, where our sweet, nearly seventeen year old pup eats his dinner. 


You can read about how to make a simple raised dog feeding tray in this post.


We have loved working on our little pied-a-terre, and it is very nearly finished.  Just in time, too, because we are under contract to buy another unit in our building.  The new unit has the prettiest view!


Our plan is to turn our present condo into a rental, and to move into the new condo.  Please keep your fingers crossed for us, that we will have a smooth closing!


Sunday, February 3, 2013

Our Christmas Mantel 2012

I never shared our 2012 Christmas mantel.  Our mantel was not featured in any blogs or magazines or link parties.  Sad, I know, but well.... our mantel was dismantled!  See that sad picture, below?  To the left of the fireplace, the mantel is leaning against the wall.  It stayed like that until the day we put our tree up and I told my husband the (VERY heavy) mantel had. to. go.  So, he carried that eight foot long beam down to the garage.  He's a good man.


I know it's not customary to dismantle your mantel right before the holidays, but you have to take your opportunities where you find them.  Our nephew, the stonemason, was visiting and we hired him to make some repairs to the fireplace.  When we lifted the beach house (yes, we raised it NINE feet -- you can read about that HERE), some bricks loosened up on the hearth, and a couple of cracks in the surround widened just a wee bit, so we needed to make some repairs.

Our nephew started by removing all the loose bricks and cleaning off any loose mortar.  Somehow, a couple of the loose bricks had gone missing during the remodel, so he had to search out some new bricks to mix in with the existing bricks.


This picture was taken right after the repairs were made and before the mortar had cured, but you can still tell that our nephew did a great job!  We are so pleased with his work :)

I am so happy to have the repairs made, and to have that ridiculous mantel gone.  The picture below is from before we bought the house -- the mantel and legs on the fireplace were really strange.  The mantle was actually six inches wider than the fireplace on both sides, and it overlapped the window on the left. Weird.


Now, we have a blank slate -- ready for a makeover!  What type of mantel would you add?


It probably won't happen right away -- there are plenty of other projects already in the queue, but we'll get to it eventually :)


Monday, January 28, 2013

Antique Woven Star Tutorial

Thank you all so much for sharing your Scandinavian stars with me over the last weeks!  I am collecting of portfolio of images and stories of these lovely woven stars.  I think the best part of this process has been the new friendships that have been forged.  I love you gals!  As a thank you, I have created a new tutorial inspired by one of your stars.


Readers have shared family heirlooms, antique store finds, Girl Scout craft memories, and stories of weaving stars from paper or straw or wood in the "old country" as children.  Please keep your stories and pictures coming!
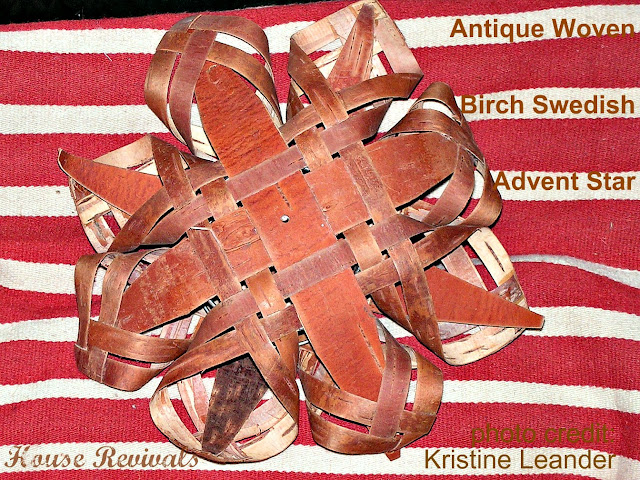
Antique Woven Swedish Advent Star

Today I want to share a star from the private collection of Kristine Leander, executive director of our Swedish Cultural Center.  Kristine lived in Norway in the eighties and early nineties.  On weekends, she would travel to Sweden, haunting the antique shops there.  On one of her trips, she found this lovely antique birch star.  You can tell, simply by looking at this picture, that her woven star has seen many winters!  I adore the woven details on the star tips -- so very pretty. The fact that it has become a bit warped over the years just adds to its charm.  Kristine's star was woven from birch, and held a little light inside.  It would have been hung in a window at Christmastime, to welcome family and friends to the warmth and comfort of home.  This star held an electric bulb, but earlier Advent stars often held a small oil lamp!
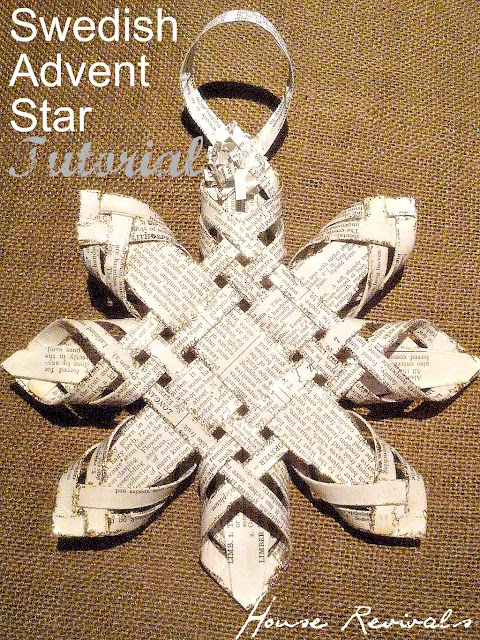

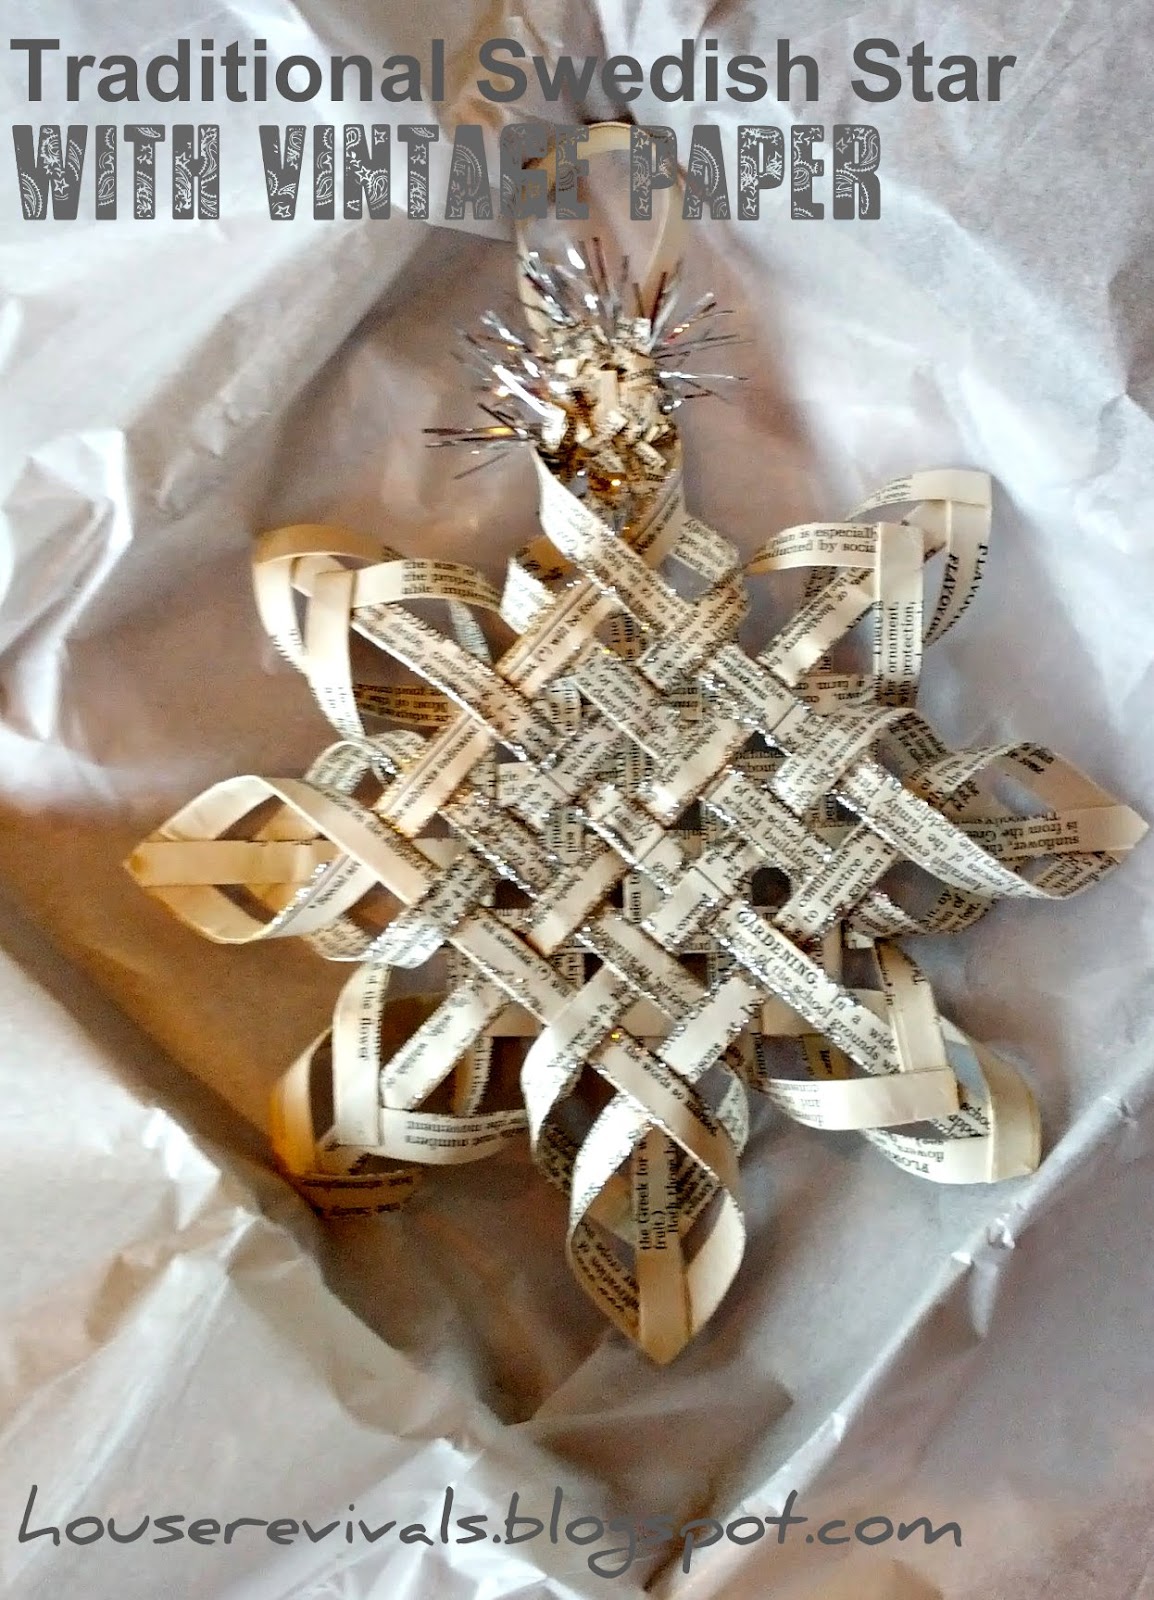
I created a tutorial for making this paper star, inspired by Kristine's antique star.  As you all know, I love to work these stars from folded strips of vintage book pages; but you can make them from just about any material you'd like to use.  Most of my readers prefer to use heavy scrapbooking paper, cut into strips. Use whatever you like -- and pretty please, share your star with me!  I love to see your projects!


You will need twenty strips of your chosen material to make your star.  To see how I fold my paper strips, see this post.   In this case, Kristine's center strips are very wide, so I made sixteen strips that are approximately one-quarter inch wide by six inches long; and I made four strips that were three-quarter inches long by six inches.

Kristine's star had center veneer strips with tapered ends -- probably because the center strips were so wide, it would have been impossible to form the star tips without narrowing the strips on the end.  I tapered mine by folding the corners in and securing with glue, but I would recommend simply trimming the strips with scissors and securing the edges with glue (if you are working with multiple folded layers).


Next,  find the center of each fat strip, and glue two pairs together, as shown.


Now, take your skinny strips, and weave together with the fat strips.  You will be creating two sides, that will be joined later. Secure each intersection with a dot of glue. (note:  I am not sure it is necessary to glue the intersections, but I don't seem to have enough hands to make these without doing so. Plus, by gluing the intersections, I can control the spacing of the strips)


The next step is to glue your star tips together.  Begin by taking the adjacent strips and twisting them toward each other and gluing the tips together at right angles, as shown.


Kristine's star had that lovely woven detail on the tips.  To get this look, simply take the next adjacent strips and twist them in and weave across before securing.


If the written instructions seem confusing here, simply recreate the pattern shown in the detail picture above.


Next, take one of the sides and join it to the other side.  You will need to turn one side by forty-five degrees, so that each star tip joins with a fat center strip.


Glue to secure.


Embellish as desired, or leave your star plain -- whatever you do, I promise your result will be beautiful!


I like to add glitter and a hanger made from a strip of paper, but ribbon or twine would work just as well (and it will fit into those little square gift boxes much better without the stiff paper hanger)!   Just for fun, I wove some one-eighth inch wide strips through the center.  These strips are about four inches long and are secured with dots of glue in a couple of places.

These woven stars are an old traditional craft, and lots of variations exist, but the concept is the same for all of them.  If you choose not to make your center strips wider, you will end up with a star that looks something like the star shown below. See that tutorial here.

Notice the tips on this star are not woven like they are on Kristine's star?  This technique is easier to do than the woven star tips, but I must admit I'm kind of in love with the idea of weaving the tips from now on :)

Happy star weaving!  Maybe, if we all get started in January, we will have lots of lovely handcrafted items for Christmas gift giving this year :)

To see more star tutorials inspired by an antique woven star, go here, and here.