A few months ago my beautiful mother-in-law passed away very suddenly. She had many beautiful pieces of furniture -- mementos of her travels and of a life well lived.... aaaaand she had a few not so beautiful pieces.

In the days before her funeral, her seven children flew out from every corner of the country and began the heart-breaking task of sorting through her belongings. The children took turns selecting items they wanted to keep, then they decided which items to donate and which items to put in the huge dumpster that had been delivered to the house.

When I arrived in town, I saw this poor little stool in the dumpster and made my husband crawl in there and get it out. Over the years, the rush seat had busted out and had been upholstered over in black vinyl (badly). The legs had gotten a bit marred up, and the joints had all come loose. It was no wonder that it had been tossed in the dumpster.

I had lovely memories of my mother-in-law sitting on that stool at the head of the picnic table in her kitchen at mealtime (when you have seven children, sometimes a picnic table is the only way to squeeze all the kids in).

My husband remembers standing inside the upside-down stool as a small child, and "walking" the stool across the floor. That might explain the busted out seat....
We brought the stool back to Seattle with us and got an estimate to have the seat rewoven and the stool re-glued. It was going to cost nearly $400! Yikes! I decided to restore the stool myself.

Before deconstructing the stool, I took lots of photos of how the seat was woven together. I also watched a couple of you-tube videos. Over. And over. And over.

Next, I cut off all the old rush and cleaned up the frame. After labeling all the joints (very important), I wiggled the frame apart, and cleaned the dried glue out of the joints.

Then it was time to re-glue the stool. To hold the stool together really tightly while the glue dried, I wound strong cording around the stool base several times, then tied it off. Next, I twisted a small flashlight around and around in the cording until it was very tight, then propped it against one of the stringers on the chair to keep it from unwinding. I used a flashlight because it was handy, but a pen or dowel of some sort would work just fine.

When the glue was completely dry, it was time to reweave the seat.
I used Commonwealth Basket Fibre Rush 6/32-Inch 2-Pound Coil, Kraft (approximately 210-Feet) that I ordered from Amazon.com. This is a paper fiber that is very easy to work with. It comes in a big coil, and you just cut off as much as you can handle at a time.

Each piece of rush needs to soak in warm water for a couple of minutes to soften it and make it workable. By "a couple" of minutes, I mean literally just a couple of minutes. If you soak it for too long, the paper fibers start to get fuzzy and weird.
When you pull off your working piece, keep it in a coil and tape the end of the piece to itself to prevent tangling. Otherwise, you can end up with a jumbled up mess like this:

When you first begin, you need to nail or staple the end of the fiber rush to the frame. Then, you just knot the ends of the cord together as necessary. Plan your knots so that they are on the underside of the seat, and tuck them out of the way, as you work.

Sometimes you need a third hand, so clips or clamps will come in handy. I used these giant clips, but clamps from the hardware store would have been a better choice. Every now and then my clips would pop off the chair frame and go flying across the room! Probably not the safest way to work....
Periodically, you need to nudge the cords over to keep your weave nice and tight. I did not use the right tool for this, either. For some inexplicable reason, a ball-peen hammer was the closest thing at hand, so I used that for "nudging".

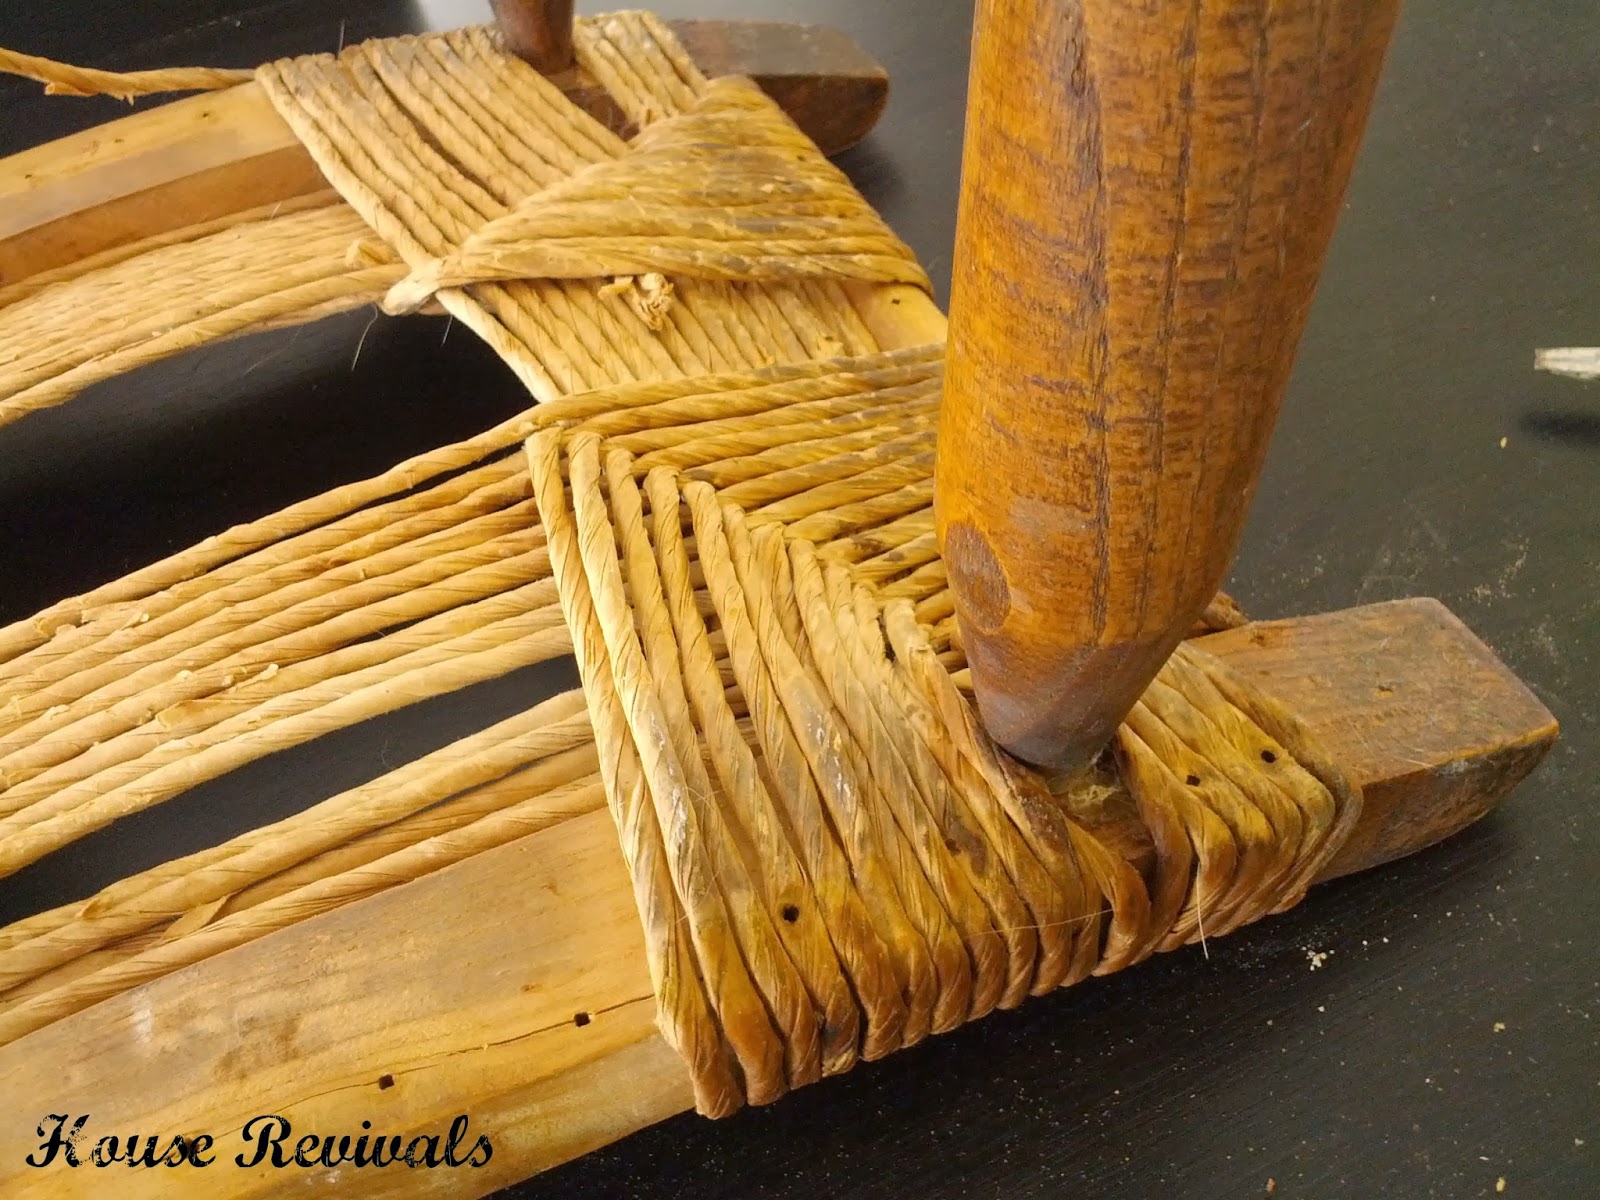
Once you get the "over/ back up through the middle" rhythm it gets easier. About midway through, you will want to cut some triangles of corrugated cardboard and slide them between the layers of rush in your seat. Do this on the topside and the underside. This fills in the gap between the layers, giving the seat a fuller appearance, and it also helps prevent wear and tear to the fibers where they might rub against the edge of the seat frame.
My seat is not perfect, and at some point I managed to change weave direction altogether, but nobody seems to notice the imperfections. My husband's siblings love the transformation, and seeing the restored stool has prompted them to share their own stories of how they used and abused the stool when they were little!

My husband thinks I'm the most amazing person ever for having figured out the mystery of how to weave a seat. Lets not tell him, I learned it all on YouTube, okay?

disclosure: this post contains affiliate links

In the days before her funeral, her seven children flew out from every corner of the country and began the heart-breaking task of sorting through her belongings. The children took turns selecting items they wanted to keep, then they decided which items to donate and which items to put in the huge dumpster that had been delivered to the house.

When I arrived in town, I saw this poor little stool in the dumpster and made my husband crawl in there and get it out. Over the years, the rush seat had busted out and had been upholstered over in black vinyl (badly). The legs had gotten a bit marred up, and the joints had all come loose. It was no wonder that it had been tossed in the dumpster.

I had lovely memories of my mother-in-law sitting on that stool at the head of the picnic table in her kitchen at mealtime (when you have seven children, sometimes a picnic table is the only way to squeeze all the kids in).
My husband remembers standing inside the upside-down stool as a small child, and "walking" the stool across the floor. That might explain the busted out seat....
We brought the stool back to Seattle with us and got an estimate to have the seat rewoven and the stool re-glued. It was going to cost nearly $400! Yikes! I decided to restore the stool myself.

Before deconstructing the stool, I took lots of photos of how the seat was woven together. I also watched a couple of you-tube videos. Over. And over. And over.

Next, I cut off all the old rush and cleaned up the frame. After labeling all the joints (very important), I wiggled the frame apart, and cleaned the dried glue out of the joints.

Then it was time to re-glue the stool. To hold the stool together really tightly while the glue dried, I wound strong cording around the stool base several times, then tied it off. Next, I twisted a small flashlight around and around in the cording until it was very tight, then propped it against one of the stringers on the chair to keep it from unwinding. I used a flashlight because it was handy, but a pen or dowel of some sort would work just fine.

When the glue was completely dry, it was time to reweave the seat.
I used Commonwealth Basket Fibre Rush 6/32-Inch 2-Pound Coil, Kraft (approximately 210-Feet)

Each piece of rush needs to soak in warm water for a couple of minutes to soften it and make it workable. By "a couple" of minutes, I mean literally just a couple of minutes. If you soak it for too long, the paper fibers start to get fuzzy and weird.
When you pull off your working piece, keep it in a coil and tape the end of the piece to itself to prevent tangling. Otherwise, you can end up with a jumbled up mess like this:

When you first begin, you need to nail or staple the end of the fiber rush to the frame. Then, you just knot the ends of the cord together as necessary. Plan your knots so that they are on the underside of the seat, and tuck them out of the way, as you work.
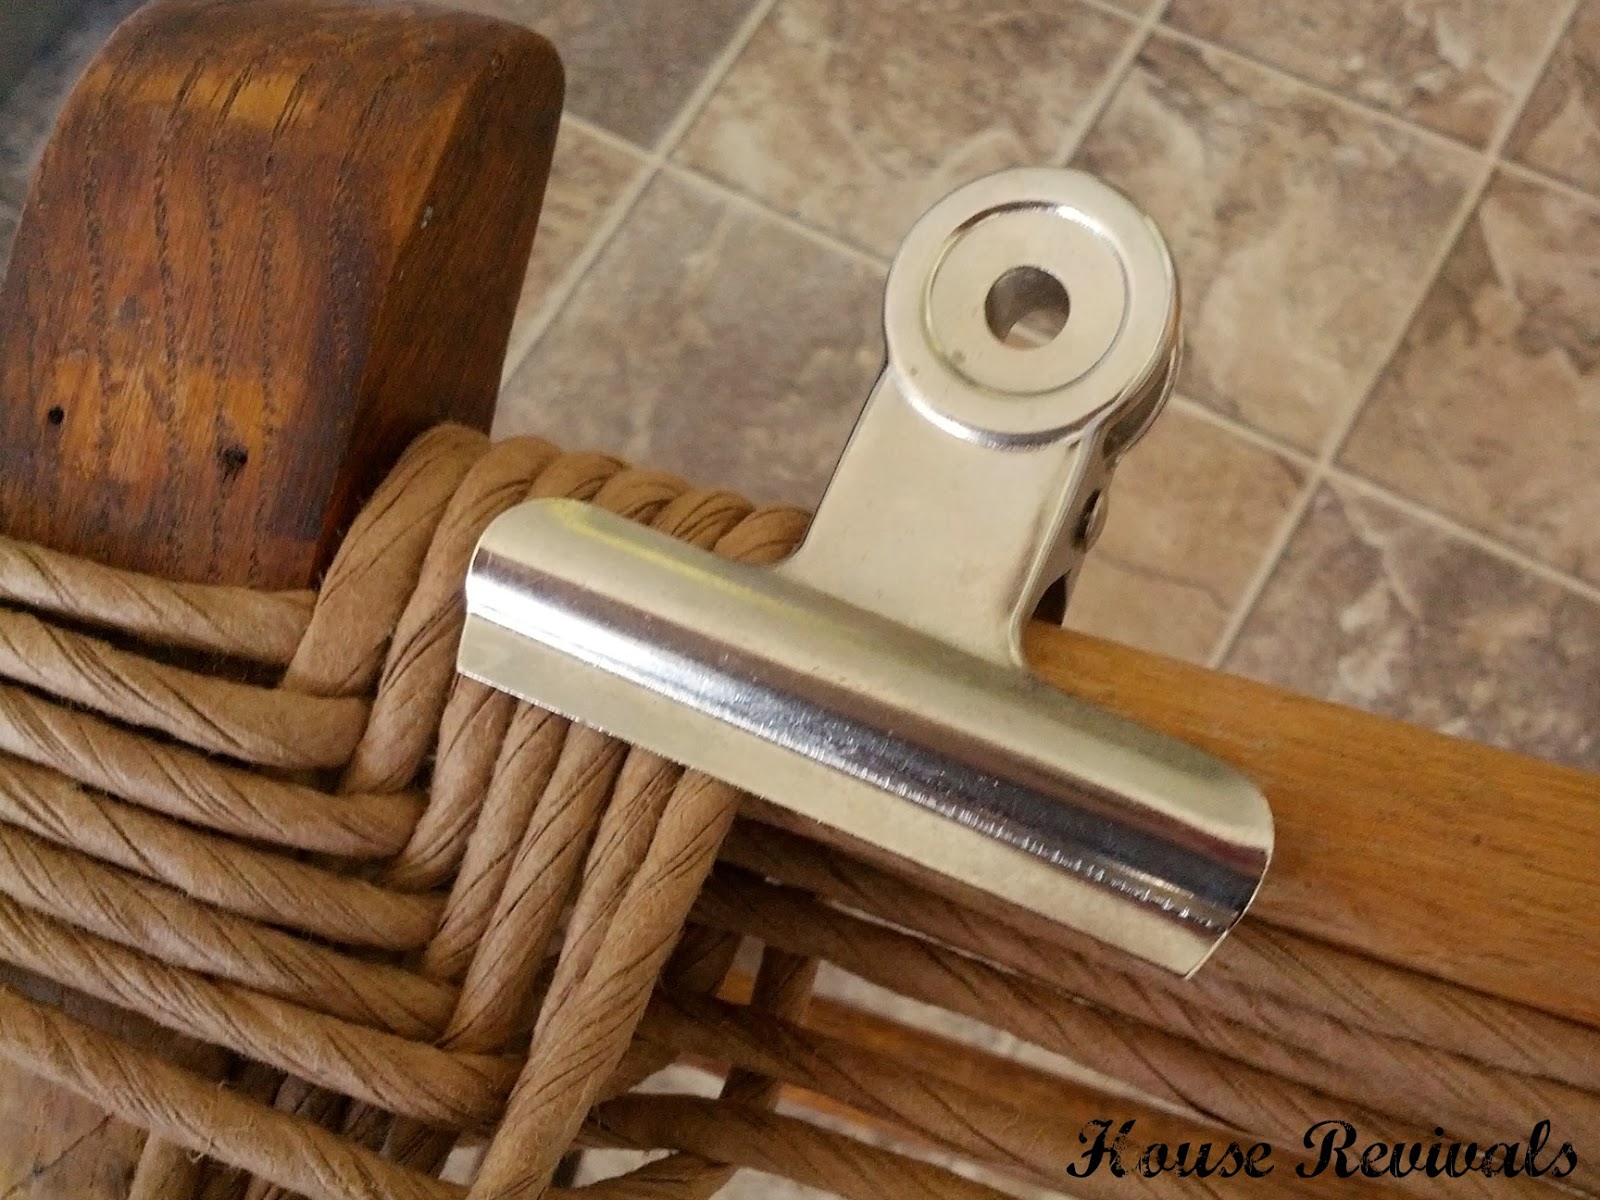
Sometimes you need a third hand, so clips or clamps will come in handy. I used these giant clips, but clamps from the hardware store would have been a better choice. Every now and then my clips would pop off the chair frame and go flying across the room! Probably not the safest way to work....
Periodically, you need to nudge the cords over to keep your weave nice and tight. I did not use the right tool for this, either. For some inexplicable reason, a ball-peen hammer was the closest thing at hand, so I used that for "nudging".

Once you get the "over/ back up through the middle" rhythm it gets easier. About midway through, you will want to cut some triangles of corrugated cardboard and slide them between the layers of rush in your seat. Do this on the topside and the underside. This fills in the gap between the layers, giving the seat a fuller appearance, and it also helps prevent wear and tear to the fibers where they might rub against the edge of the seat frame.
My seat is not perfect, and at some point I managed to change weave direction altogether, but nobody seems to notice the imperfections. My husband's siblings love the transformation, and seeing the restored stool has prompted them to share their own stories of how they used and abused the stool when they were little!

My husband thinks I'm the most amazing person ever for having figured out the mystery of how to weave a seat. Lets not tell him, I learned it all on YouTube, okay?
Here is the video tutorial that I found the most helpful.
Happy weaving!
disclosure: this post contains affiliate links