Our beautiful daughter was married last summer. I only rarely blogged about the wedding and reception last year, as the bride really wanted her wedding guests to be surprised and wowed

Since the wedding took place back in August, I think it's safe to share a few of the floral arrangements we created. I cannot take credit for any of these designs -- my daughter found images of things she liked, tweaked the concepts, and together we executed her plans.

She fell in love with a particular style of centerpiece that incorporated orchids and long branches, but after getting quotes from florists, and knowing the bride was not willing to compromise on band or venue, we knew we were going to have to get much more creative with our centerpieces to stay on our budget. We had these issues to consider.

We found our best source for beautiful twigs was the local Fred Meyer -- tall four or five foot high stems for ninety-nine cents each-- but your own back yard might provide all the twigs you need. Again, the beautiful and resourceful bride found a discount source for preserved drapey green amaranthus. And she found a discount source for very tall vases. When the vases and amaranthus arrived in the mail, she asked me to send her a picture -- did I mention we live in different states?

A great source for buying hydrangeas in bulk can be found at the most unlikely of places -- Sam's Club!
Here's how their flowers arrive.

We had them shipped directly to our hotel, and the hotel staff was really great about getting the flowers to our room and having the AC cranked for them (we had called in advance and arranged for this to be done). The boxes of flowers were waiting for us when we arrived.

Do you see how the flowers are kind of smashed up in the shipping carton? Not a problem! Fortunately, we had done a lot of research on hydrangeas, so we did not FREAK OUT. Hydrangeas need to be hydrated (hence the name?) -- they even "drink" through their petals. We had access to the reception venue the evening before our event, so a dear friend and I simply filled the sinks at the bar and in the kitchen with water, and put the flowers in. The entire flower. Heads and all.
Then we just left them, and went to the beach for the most amazing rehearsal dinner. Ever. A beach barbecue at sunset, with tag football and dogs and kids and grandparents and blankets.

Weddings are a ton of work, so get lots of help, and remember to go to the beach and have a party! After a relaxing and rejuvenating evening of celebration, the bride and her entourage joined me at the reception venue, where we pulled all the flowers from the water. We were happy to see they had perked right up.
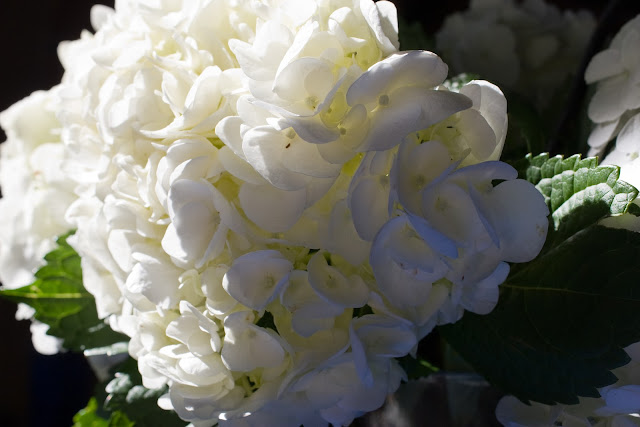
We put together a few dozen arrangements and placed them on the tables. Then we all went to our hotels and went to bed, knowing the reception area was going to be gorgeous. The photo of the beautiful hydrangea, below, was taken the next morning. We were so pleased with the size and quality of the blooms, and with how well they "plumped up" after being immersed in water for several hours.
Our lovely photographer slipped into the reception hall the next day, while the caterers were setting up, and got some photos of the centerpieces.

We think they turned out beautifully.
 We alternated taller and chunkier arrangements on the tables.
 It looks a little empty here, but when the caterers and the band and the cakes arrived, the space really filled in perfectly.
We even had enough hydrangeas for the bridal party's bouquets.
 Including the vases, we were able to pull this off for around twenty dollars per arrangement, and the bouquets were made from the leftovers! The bride will be able to resell all of the vases, as well. This worked out to be only a fraction of the cost of hiring a florist. I will warn you that it took a lot of planning and work, and you need to have good friends who are ready to jump in and help, to pull it off successfully, but it was lots of fun for us, and we were really pleased with how everything turned out.
Would you do your own centerpieces for a big event? Maybe you have done so already and have a link you would like to share in the comments section? I would love to hear your thoughts!
Also, if you love beautiful photography and live in the PNW, be sure to check out our photographer's website.
For a bit about the humorous side of planning a wedding, you might want to read this article.


Since the wedding took place back in August, I think it's safe to share a few of the floral arrangements we created. I cannot take credit for any of these designs -- my daughter found images of things she liked, tweaked the concepts, and together we executed her plans.
source unknown -- from the bride's idea file
- The reception venue called for centerpieces with a lot of height and volume, so we knew we wanted to incorporate tall beautiful twigs.
- Budget being a huge consideration, we nixed the orchid idea and decided to look for a more affordable flower. We found a great source for hydrangeas. And we love hydrangeas.
- We are not florists, and we would be on a bit of a time crunch, so the arrangements needed to be fool proof.

source unknown -- is this gorgeous arrangement yours?

A great source for buying hydrangeas in bulk can be found at the most unlikely of places -- Sam's Club!
Here's how their flowers arrive.

photo, Sam's Club website
We had them shipped directly to our hotel, and the hotel staff was really great about getting the flowers to our room and having the AC cranked for them (we had called in advance and arranged for this to be done). The boxes of flowers were waiting for us when we arrived.

photo, Sam's Club website
Do you see how the flowers are kind of smashed up in the shipping carton? Not a problem! Fortunately, we had done a lot of research on hydrangeas, so we did not FREAK OUT. Hydrangeas need to be hydrated (hence the name?) -- they even "drink" through their petals. We had access to the reception venue the evening before our event, so a dear friend and I simply filled the sinks at the bar and in the kitchen with water, and put the flowers in. The entire flower. Heads and all.
Then we just left them, and went to the beach for the most amazing rehearsal dinner. Ever. A beach barbecue at sunset, with tag football and dogs and kids and grandparents and blankets.

Weddings are a ton of work, so get lots of help, and remember to go to the beach and have a party! After a relaxing and rejuvenating evening of celebration, the bride and her entourage joined me at the reception venue, where we pulled all the flowers from the water. We were happy to see they had perked right up.
We put together a few dozen arrangements and placed them on the tables. Then we all went to our hotels and went to bed, knowing the reception area was going to be gorgeous. The photo of the beautiful hydrangea, below, was taken the next morning. We were so pleased with the size and quality of the blooms, and with how well they "plumped up" after being immersed in water for several hours.

Chrystal Brand Photography
Our lovely photographer slipped into the reception hall the next day, while the caterers were setting up, and got some photos of the centerpieces.

Chrystal Brand Photography
We think they turned out beautifully.

Chrystal Brand Photography

Chrystal Brand Photography
Chrystal Brand Photography

Chrystal Brand Photography
Would you do your own centerpieces for a big event? Maybe you have done so already and have a link you would like to share in the comments section? I would love to hear your thoughts!
Also, if you love beautiful photography and live in the PNW, be sure to check out our photographer's website.
For a bit about the humorous side of planning a wedding, you might want to read this article.
Have a lovely weekend!
This post is being linked to these lovely places:
The Lettered Cottage
Get Your Craft On at Today's Creative Blog
Market Yourself Monday at Sumo's Sweet Stuff
Met Monday at Between Naps on the Porch
Sundae Scoop at I Heart Naptime
Motivate Me Monday at Keeping It Simple
Sunday Showcase at Under the Table and Dreaming
Tatertots and Jello Weekend Wrap Up