Google+ House Revivals

Friday, June 22, 2012

A Mid-Century Inspired Mariner's Compass Starburst Mirror

I'm so excited to share the summer mantel at our little marina condo!  The star of the vignette is, well, a star -- a fun starburst mirror made from paper mache!


Several months ago I shared that we were buying a pied-a-terre in the city.  It is in a little mid-century building that hangs out over the water and has a marina underneath.  The condo was in really rough shape -- the victim of  "flipper in over his head".
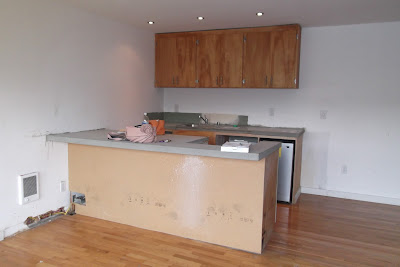

When we found our little pied-a-tier, she was bank owned. Someone had been squatting in her, and her parking space, storage locker, AND boat slip were being poached!  Yikes!  She deserved something special for all the indignities she had endured.  If she were a woman, a lovely piece of jewelry might have sufficed, but since she's a condo, I thought I would give her a gorgeous mirror for her mantel.  Mirrors are like jewelry for a room, wouldn't you agree?


I began looking for just the right piece.  Everything I found either looked "skimpy" or was too pricey.  I loved these gorgeous chunky designs from Horchow.


I also really loved this updated mid-century feeling mirror, also from Horchow.  It was *almost* exactly right. 


My new mirror needed to fill a tall order:  It needed to be substantial, with a mid-century vibe.... aaaaaand, I also wanted the mirror to reference the nautical context of the building -- without being too cheesy.

Enter the mid-century sunburst clock.  They have a kind of "mariner's compass or compass rose" feel, but I wanted a mirror, not a clock, and I didn't actually want a mid-century piece -- I just wanted to reference a mid-century *vibe*.

The next inspiration came in the form of a cardboard box.  Well, actually hundreds of cardboard boxes!


We have been slowly sorting the contents of FOUR storage lockers, now that our beach house remodel is nearing completion.  What to do with all that cardboard???!

Random cardboard + mid-century clocks + gilded Horchow mirrors 
=  a paper mache mariner's compass inspired starburst mirror!

(That was probably obvious, right?)


So far the paper mache starburst mirror has gotten rave reviews from visitors to our little pad in the city.  I gave it an aged, gilded finish to keep it from from looking too retro-kitsch, and used a variety of natural textures in the mantel vignette to keep the look casual.

The full tutorial for the paper mache starburst mirror is coming. Be sure to hit follow, in my side-bar, so you won't miss it.
Note :  the tutorial is up and you can see it here!


Photobucket
The Lettered Cottage

Saturday, June 16, 2012

Featured at Knock Off Decor!

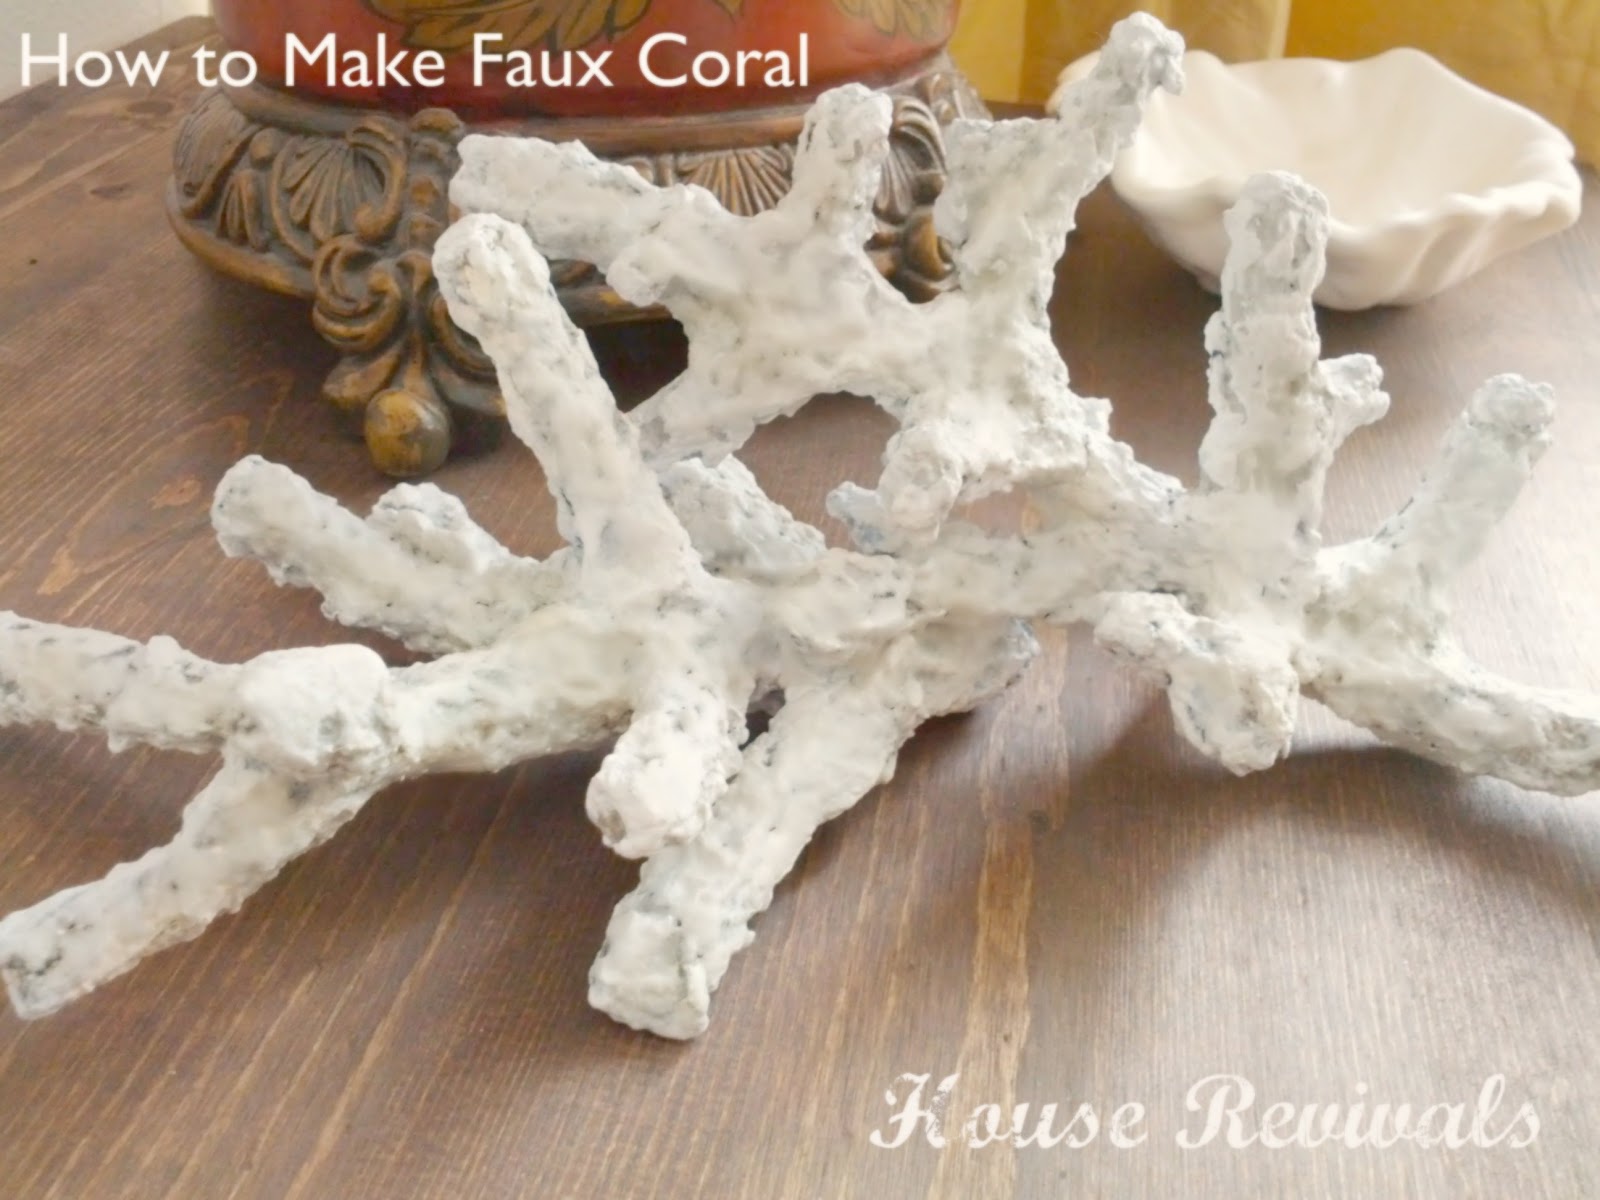
Come see my project over at Knock Off Decor!  Beckie is featuring my tutorial on How to Make Faux Coral  (like the gorgeous faux corals we see at places like Pottery Barn).


I used a special recipe to create a paper mache modeling clay.  You'll never guess the "secret ingredient"!  Here's a hint:

Thanks, Beckie, from Knock Off Decor, for the feature!


Thursday, June 7, 2012

How to Make Faux Coral

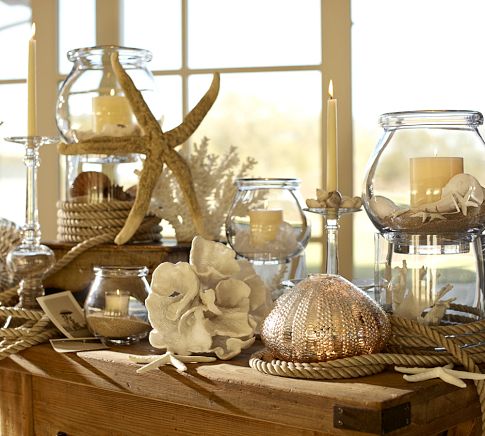
Are you still loving all the faux coral decor we've been seeing at places like Pottery Barn and Horchow?  I know I love it!


By using faux coral, you can enjoy the casual beachy feeling of decorating with coral, without worrying about how the coral was harvested.  Sometimes that faux coral comes with a pretty steep price tag, so I've come up with a way to create beautiful faux coral using very inexpensive materials.


My faux coral was created using paper mache pulp.  Although you can purchase paper mache pulp in craft supply stores, I make my own pulp using toilet paper!


Start by unwinding about a half a roll of toilet paper into a bowl and soaking it in hot water from the tap.


After a few minutes, it should look really disgusting.  Next, drain off your excess water if it's really soupy, and agitate the toilet paper with your fingers -- toilet paper is made from really short fibers so that it will break down easily, which is why it works great for paper mache pulp.


Now, add a giant handful of joint compound and about three-quarters of a cup of flour to the bowl.  Mix it all up together with your hands (or use an electric beater).  Some people like to add a giant dollop of glue to the mix at this point.  I add it if I have it, as it really does strengthen the final product, but you don't need to use it, as the flour is your "glue".  I also sometimes add talc to my mix (the kind we used to put on babies' bottoms) if I think the mixture needs more "body".

(The talc and the joint compound act as "filler", while the paper fiber adds strength.  The flour and glue cement it all together.)

Congratulations, you have just made paper mache pulp!


Now you need to create an armature to apply your paper mache pulp to.  Here, I created an armature from florist wire I had on hand.  Baling wire would probably have been a better choice, but I didn't have any when the "inspiration to create" struck.  For smaller projects the florist wire is fine, but for heavier projects, you will want to use a heavier gauge wire.


Because the paper mache is wet, it can cause the wire to rust and stain your pulp, so I wrapped it all in masking tape.  This also gives the armature some "tooth" for the pulp to hang on to as you apply it.


You may need to do two or three coats, depending on your project.  Allow your project to dry completely before adding another layer of pulp, or you might end up with a wet moldy mess.  In Arizona, a layer might dry completely in a couple of hours, while here in the Pacific Northwest, I wait at least a day for a layer to dry. Sometimes I can hurry it along by placing a project on a rack over a heating vent. After your final coat is partly dry, you may want to experiment with adding texture to the surface of your project.  I poked at mine with a wooden skewer to make it look craggy.

If you would prefer a smoother surface, be sure to smooth the wet pulp as you apply it (you can use a little spatula for this).  You can also sand your project when it is completely dry.


When your sculpture is completed, add a coat or two of gesso and any sealer you like.  I actually used an antiquing glaze on my faux coral.  I wanted it to feel like an antique specimen you might find in a dusty old library.  If you like the sun-bleached look, you might want to skip the antiquing step.


If you've enjoyed this tutorial, you may want to subscribe to House Revivals, so you won't miss parts two and three of this series. Happy creating!


This project is being linked to the following lovely places:
The Shabby Creek Cottage 
Hookin' Up with HoH 
Funky Junk Interiors
Tip Junkie handmade projectsSomewhat Simple

A Crafty Soiree


Tuesday, June 5, 2012

How to Make an Apron from a Recycled Skirt

Here is a fun way to give new life to an old skirt. This project is so quick and easy that you may decide to recycle all your old skirts into aprons!


Or, in my case, recycle a cute thrifted garment that was never. ever. ever. going to fit.  I'm pretty sure I haven't worn this size since I was twelve.

The skirt was just too darling to pass up,  so I bought it and stuffed it into a closet for a year.  Then, as I was unpacking boxes in our beach house, I realized I didn't own an apron that was newer than twenty years old.  Sad, I know. We entertain a lot at the beach house, and I needed some "company worthy" aprons.  I decided this cute little skirt would make a cute little apron -- and because it's a skirt, there is enough fabric for it to "wrap" (not all the way around, mind you -- if it wrapped all the way around, I would wear it as a skirt).

Here is how  to recycle a skirt into an apron:


Begin by cutting out or picking out the back seam and zipper.  I cut mine out to save time.  Because I planned to cut the part of the waistband away that had the buttonhole, I actually ended up cutting away about two inches of fabric.  It doesn't really matter how much you cut away -- it  just depends on how much apron coverage you want and how the garment is constructed.  Just be sure you cut away the same amount on each side, so your apron won't be lop-sided.


Pick out a few inches of the waistband on either side in the back to free up the apron sides for hemming.

Hem the sides of the apron, finger press, tuck the sides back into the apron and top-stitch.   Leave the ends of the waistband open.


Cut two lengths of pretty ribbon and tuck into the ends of the waistband and top-stitch closed.


I used extra long ribbon (it's actually vintage blanket binding) so they could be tied into a flirty bow in front.


This is a pretty quick project -- it will take you longer to set up and put away your sewing machine than to whip up this apron, so you might want to make several at one time.  You can even give them as gifts. Happy sewing (and cooking)!


This post is being linked to the following lovely places:

Tip Junkie handmade projects
A Crafty Soiree
TDC Before and After

Monday, June 4, 2012

How to Build a Beach Ladder

We've had a little bit of beach erosion in the last year, and what used to be a gentle approach to the beach has turned into a sand cliff.  We could still clamber up and down, but not without getting pretty sandy.  My husband and youngest son decided to build a beach rope ladder as a Mother's Day project a few weeks ago.


They started with a trip to the hardware store where they bought some four by four boards and a length of rope.  When they got home, they cut the boards into eighteen inch rungs and drilled holes on each end of each rung for the rope to pass through.


To insure that the spacing between each rung was the same, they built a little jig.


Next, it was simply a matter of threading the rope through each side of the ladder, and knotting the rope below each rung to secure it.


The ladder was then staked into place at our beach access.


We played around with the placement until we were satisfied.


Now it's easy to get up and down our beach access -- even with an armload of marshmallow roasting supplies. 

This was a perfect Mother's Day present. I'm not sure how to top this for Father's Day!  Do you have any big projects planned for Father's Day?


This post is being linked to the following lovely places:
The Shabby Chic Cottage

Today's Creative Blog
Not Just a Housewife

TDC Before and After
Tip Junkie handmade projects