I think we should all do something creative every day, but sometimes our schedules don't allow us to spend lots of time on projects.
This is why I love making cards -- and the bonus? You get to send a friend a cheerful message!
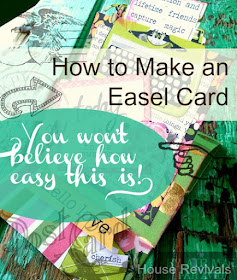
While your friend will be delighted, no matter how simple or fancy your card, here is an easy way to make a simple card that looks fancy. Start with a card base. You can use a pre-made card base, like I did, or you can make your own from card stock. To make your own, just take a half sheet of card stock and fold it in half. It's that easy.
Now, take the front of the card and fold it in half, as shown above, to form a "tent". Next, cut a piece of card stock, or mat, about one-quarter to one-half inch smaller on all sides than the card front. Adhere the card stock mat to the bottom half only of the card front.
Embellish the card front, and add sentiments, as desired, being careful not to glue anything to the top half of the card base front.
You can decorate the inside, or bottom of the card, as well. Here, I lined the bottom with a coordinating paper and added a few embellishments. You will need to create a "stop" to hold the easel card in place. For this, I cut out the words "hello love" and popped it up with two layers of kid's fun foam.
Now, all you need to do is drop your beautiful and easy card in the mail. Your recipient will be able to prop their fancy card on a desk or shelf to enjoy. So easy (but that will be your secret)!
To learn how to make a pocket card, click here.
If you enjoyed this post, please subscribe to House Revivals in the sidebar, so you won't miss the fun projects we have planned. Find us on Facebook, too, so you can catch all the "in between" stuff, and see what I'm working on throughout week on Instagram. Feel free to link today's project to all your favorite social media sites.
Thanks for stopping by!
Amanda
Thanks for stopping by!
Amanda


