Monday, May 26, 2014

Never Forgotten: A Story of Sacrifice and a Remembrance Poppy Tutorial

I have loved the little Remembrance Poppies, sold by our veterans, as long as I can remember.  As a little girl, shopping with my mother, I was always given a bit of change to donate for my own little poppy to wear.


Each year, when I get my poppy, I am reminded of my mother, and how she taught me about the sacrifices made by so many.


A few years ago, the reality of this great sacrifice was driven home, when I received a phone call saying that the son of a friend had been killed while serving in Iraq. Our sons had enlisted at the same time, and I still remember sitting with the other young man's father, a veteran himself, during a parent orientation evening.

Wednesday, May 21, 2014

21 Fabulous Ideas for Re-Using Shutters!

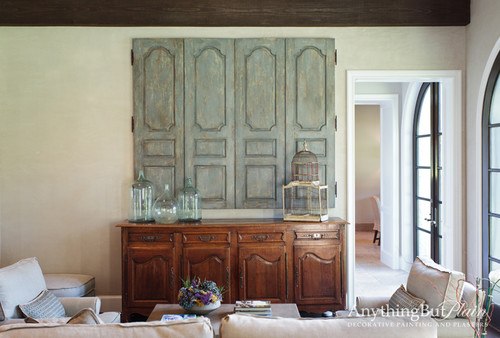
On a recent consult, I recommended we visit local salvage yards to find some chippy and rustic old shutters to live over the client's mantel. The clients were somewhat surprised, but open to the idea, so I did a (not so) quick internet search that evening to find similar installations to show them.


Before I knew it, I had stayed up way too late, looking at Google images and Pinterest. Loooooooong after I'd found examples to show my clients, I was still collecting ideas for repurposed shutters! Does this happen to you? Here are a few of my favorites:

This vignette makes me swoon. The raised panel shutters are perfectly faded and worn.


We all love Jane Coslick's renovated beach houses, and this creative re-use of vintage shutters for pantry doors is classic Coslick styling!


Fitted out with sliding barn door hardware, these chunky old shutters are right at home in a traditional interior.


On a smaller scale, here is a small shutter upcycled as jewelry storage.


How about adding brackets and coat hooks and using old shutters to organize the mud room?


At Olive and Love, they used a collection of vintage shutters to add texture and interest to their wall!


At Life as a Thrifter, an upcycled shutter keeps the family organized.


At Organize and Decorate Everything, they created these sweet vignette using chippy white shutters and a pretty wreath.


This trio of shiny black shutters functions as the family's message center. So cute!


The Nester uses a set of old shutters as a backdrop to her art de jour.


At Christina's Adventures, pretty yellow shutters dress up a planter!


How about using a tall shutter to organize your craft supplies? I love this idea!


What a charming idea to use an old shutter as a table runner!


I love the idea of using a chippy old shutter to hang beach towels and swim suits!


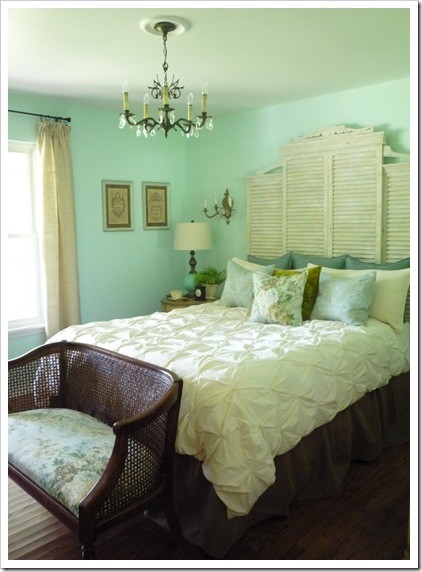
How about dressing up some old shutters to create an elegant headboard, like this one?


If space is tight, but you want to create a cute little entry area, a set of old shutters just might be the solution.


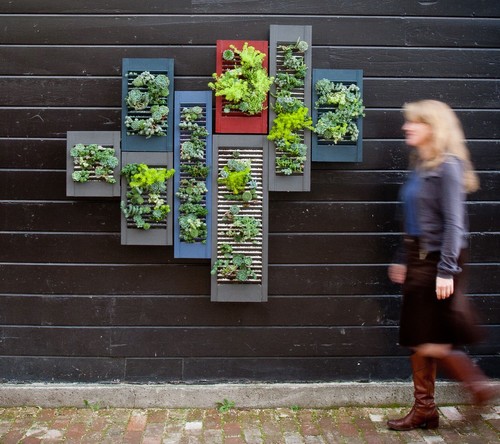
Elevate a succulent garden to art with an installation like this one:


Or create a {love}ly piece of word art! (I LOVE this entire vignette.... sigh....)


How about building a "just the right size" kitchen island?

Beyond the Picket Fence via

Here is another shutter wall installation -- this time all in tones of white for a serene feeling space.


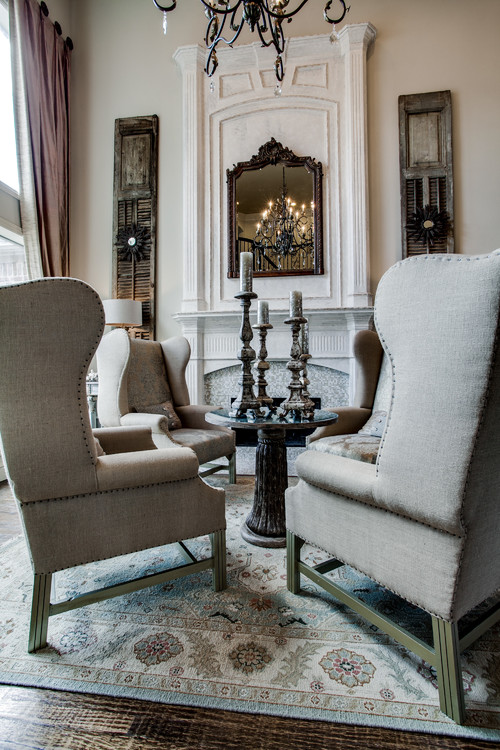
Flank a fireplace with tall rustic shutters, and layer with mirrors or art.


Have you used re-purposed shutters in your home? Do you love this trend toward adaptive re-use of architectural salvage?

Thursday, May 15, 2014

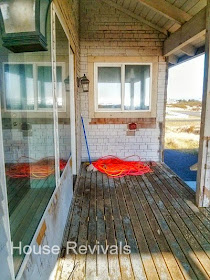
Beach House Deck Renovations!


It seems like forever since we've blogged about our beach house renovations!  After collecting many bids, and interviewing many contractors, we are ready to renovate our main ocean facing deck.


After the initial craziness of buying the partially gutted and dilapidated house, and having it raised nine feet, and having the gutted portion remodeled, we "chilled" for a while -- at first, so we could enjoy time with our daughter and new grandbaby, who were staying with us while our son-in-law was in Afghanistan.


Then there were job and life changes that made it impossible to spend as much time at the beach house as we had initially planned.... We keep plugging along, however. We made masonry repairs to our fireplace, and patched the flagstone floors. Read about our flagstone floors here.


Last year, we did an energy audit, and made lots of changes based on the report we received.  Most of the changes involved copious amount of caulk and foam, but we also added outlet gaskets and lots more insulation, and we replaced the rest of our windows.


The house is now really comfortable, and not drafty anymore -- we can even walk barefoot on the flagstone floors, and they aren't cold!  Read about our energy audit here.


Plans for this year include finally renovating the last of six decks!  The other decks were either removed, replaced, enclosed, or repaired during the first phase of the project, but this last deck was quite a bit more complicated, and got shoved to a back burner when the grandbaby came along... then winter came, then a renovation of another home, then another.... and the poor, sad neglected deck just sat there!


We've made some changes to the design, since I drew up this early concept, but it will still be a lovely place to sit and enjoy a cup of tea... or a nap... or chat... or a good book.  Here's a secret about beaches in the Pacific Northwest: they may be cold and dark and wet and windy all the long winter, but they are amazing in the summer!  Shhhhhh, don't tell, okay?


I cannot begin to tell you how I look forward to being able to spend summer weekends enjoying this deck!


Next project: Exterior priming, painting, and staining (I'm sure the neighbors will be glad)!

Have you lived through a renovation?  What tips and advice do you have for others who are contemplating going through the remodel process?


Tuesday, May 13, 2014

How to Landscape Your Yard for Free

Let's face it. Landscaping can be really expensive. On  recent visit to my daughter's new home in Alabama we went shopping for trees or shrubs for her yard and I was stunned!  I thought: there has got to be a better way.


In our old historic neighborhood, we all shared our plantings and seeds. Whether we were saving rare old tomato seeds, or thinning our iris, digging up "volunteers", or removing old sod, we always offered our plantings to our neighbors first. The problem with a new neighborhood, is that no one has any old plantings to share -- but this doesn't have to stop you from getting previously loved plants!

Thursday, May 8, 2014

How to Make Your Own Paper Bead Roller

If you love rolling paper beads -- or you just want to give it a try, here is a quick and easy way to make your own bead rolling tool using items you have around the house.


I was rolling my beads using the old school method, and it was seriously cramping my hands. I thought there had to be a better way, but didn't have the willpower to wait two days for a bead roller to come in the mail.

Make Pretty Jewelry from Fabric Scraps!

Last weekend, I quickly popped in to a little thrift shop in the beach town we were visiting. It's a great shop -- lots of new stuff every week and good prices.  I was thrilled to find a little package of vintage hexagon quilt pieces!

I have been a a bit of a jewelry kick lately, so I immediately thought it would be fun to figure out a way to transform the tiny pieces of fabric into pieces of wearable art.

Thursday, May 1, 2014

Rolled Paper Beads

I just spent the most amazing vacation in Alabama visiting my daughter's sweet little family! My daughter's husband is a drill sergeant at Fort Benning, and they moved to Alabama with their toddler last year. You may remember that my daughter and her baby lived with us while her husband was in Afghanistan a couple of years ago.


Joy of joys, I discovered that two and one-half year old Summer Rose likes to make things! We spent a lovely morning stringing wooden beads into bracelets (and rainbows and ponies)! She also spent an evening"helping" me roll paper beads.

I was having craft withdrawals one day, so I grabbed one of my daughter's old magazines and started cutting it up. The cover of an old HGTV magazine was a tri-fold, with lots of pretty yellows and pinks that I thought would make great beads.


I didn't have anything to coat the beads with, so my daughter loaned me her clear nail polish -- I think it worked great, even though it doesn't smooth the surface of the bead or add dimension and depth the way some products do. Anyway, my crafting philosophy has always been to make do with what you have available.


We used a technique that incorporates gold sharpies, to make the beads look like glass lampwork beads.

Alas, these beautiful beads met with disaster, when we put the necklace on Summer Rose, and kind of forgot about it until later, when she leaned over the tub to swish the water around when her bath was filling!

The lesson learned here is: Stay out of the tub when you're wearing paper jewelry.

Do you make paper beads? Do you have a favorite technique or tool that you use?