Monday, May 28, 2012

Singed Edge Poppy for Memorial Day


In honor of our brave lost, I am re-posting this sentiment and
 a link to a remembrance poppy tutorial.

A Poppy for Remembrance


In Flanders Fields
By: Lieutenant Colonel John McCrae, MD (1872-1918) Canadian Army
In Flanders Fields the poppies blow
Between the crosses row on row,
That mark our place; and in the sky
The larks, still bravely singing, fly
Scarce heard amid the guns below.
We are the Dead. Short days ago
We lived, felt dawn, saw sunset glow,
Loved and were loved, and now we lie
In Flanders fields.
 
Take up our quarrel with the foe:
To you from failing hands we throw
The torch; be yours to hold it high.
If ye break faith with us who die
We shall not sleep, though poppies grow
In Flanders fields.


This poppy was made from a recycled blouse.  For the complete tutorial on making this burned edge poppy, click here.

I hope you've had a lovely long weekend, and please, don't forget to remember all the men and women who have given all to preserve our way of life.


 

Monday, May 21, 2012

Ways to Repurpose and Recycle Silverware


We are still moving and unpacking boxes.

Have you ever tried to explain to your spouse why you moved (and stored for two years) several plastic totes filled to the brim with old mismatched and tarnished silverware?  And then asked sweetly if he would carry said totes up two flights of stairs to your craft storage space?  We've had several moments like this in recent weeks. My husband asked what in the world I was going to do with all those tubs of spoons, and I have to confess, I felt a bit overwhelmed by them myself!  Just what will I do with all those spoons?

Here are a few ideas. 


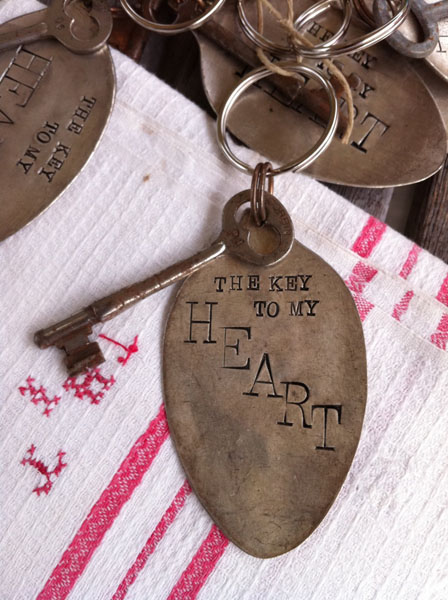
 LOVE, love, these key fobs from VintageWeave.

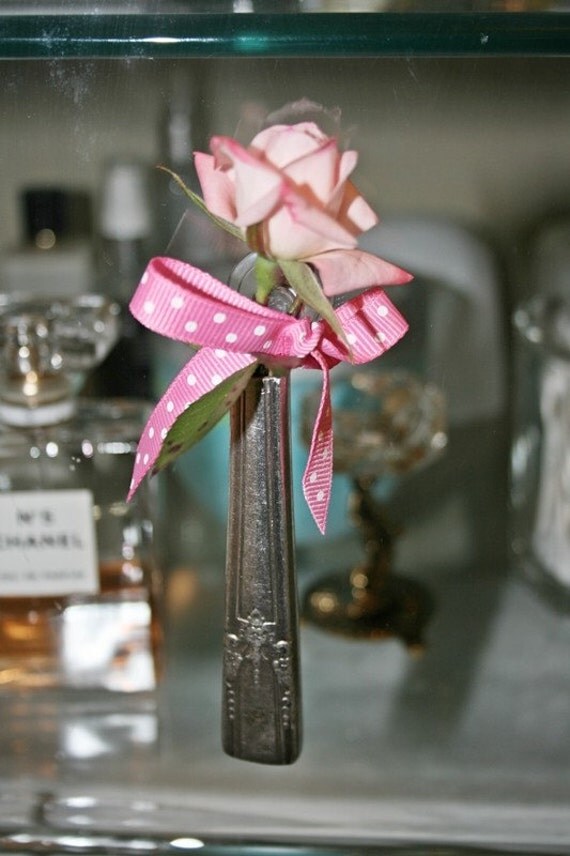
Or how about a mini-vase to tuck tiny blossoms into?

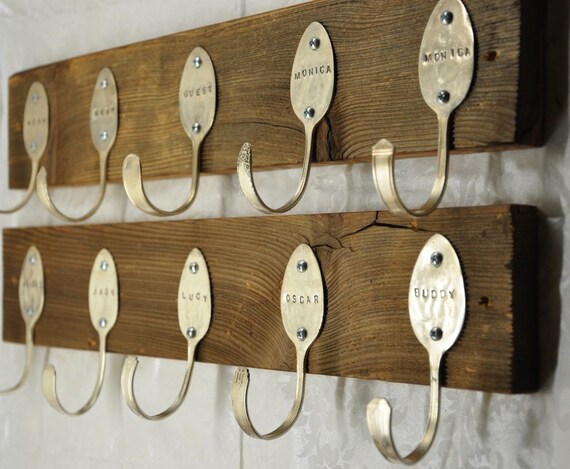
I love the idea of using vintage spoons for a coat rack.
 If you don't have any spoons to make a coat rack with, you can always order one similar to this from Etsy.

You might try making some plant markers (or place cards)!
 See the full tutorial from Christina at Intimate Weddings.


You can try your hand at creating a chandelier from vintage silverware 
-- or buy this one from  The Twiggery for $1350.


 I'm in love with these cheese markers from VintageWeave.

I hope you found some inspiration -- I know I did!

Thursday, May 10, 2012

Designing with Tulip Tables and Banquettes

Who doesn't love a classic Saarinen tulip table?   The graceful curve of the base, and the marble top are swoon worthy.  Over the years, lots of manufacturers have created Saarinen inspired tables.
 The Real Thing, complete with marble top and impossibly graceful lines.

You can still get the "real thing" from Knoll, or you can get inexpensive knock-offs from places like IKEA. 


IKEA's clunkier plastic version is not made to last forever like the Saarinen table, 
but it is an affordable option for "starting out".

You may even get lucky and find a vintage "knock-off". That's what happened to me the other day, when I was searching for a small table for a client's tiny breakfast nook.  Several frantic texts later, this set was being loaded into the back of my truck! 


My client has a really tiny eating area in his kitchen, so we decided a small table and banquette with a couple of additional chairs would be a great space-saver. 

How lucky we were to find a vintage Virtue Brothers of California tulip style table!   Although the set had four chairs, one had been damaged.  We were fine with this, since we don't need all four chairs.   Virtue Brothers is probably best known for their fifties era chrome and Formica dining sets, but they did a great job with this steel-based tulip pedestal table.


For design inspiration, I thought I would share some "banquette vignettes".  Though not strictly a banquette, this settee vignette is a lovely mix of masculine and feminine elements.

The cheery yellow banquette and Bertoia style chairs help create a youthful, modern space in the image below.  The rectangular table top on a tulip base is not as common, but it fits the space perfectly.


Here is another rectangular top, paired with Eames inspired chairs and a clean lined banquette.


The classic traditional trim work in the space below provide a perfect backdrop for the graceful table and Eames molded dining chairs.


In the space shown here, the smaller tulip table functions almost like an occasional table....


In the serene scene below, the simple round shape of the table is repeated in the light fixture, while the tufted settee back is referenced in the pattern on the window treatment.


My client is pretty stoked about his "new" table!  How about you?  Would you buy vintage? Would you buy a knock-off?  Would you buy the "real thing"?  Or would you skip the modern aesthetic altogether?  I love to hear what you think!


This post is being linked to:

Friday, May 4, 2012

How We Met our Beach House: A Plan is Formed...

I hope you are all enjoying the story of how we met our beach house.  If you missed Part One, you can find it here, and you can find Part Two here.

After thoroughly exploring the neglected old beach house, we were thrilled to find that it did have an ocean view.  The only problem was that the "million dollar view" was only visible from an upstairs deck.


There was only a tiny bit of ocean view from the main living areas of the home.  Apparently, the house originally had a spectacular view, but the sand dunes had grown to the point that only a little slice of sea was visible beyond the dune grass.


So, there we stood.  My husband, our realtor, and myself.  Our realtor wanted to show us another house.  My husband wanted to find ANY other house.  And I found something tugging at my heart in THIS house.  To be fair, we did look at many more houses, but we kept coming back to this one.   I proposed an idea.

Suppose we brought in a house moving company 
and lifted the whole house up one level?


I drew up some conceptual models...


.... and a floor plan....


... and tinkered with some 
quick kitchen concepts....


.... and played with ideas for remodeling 
the bedrooms and bathrooms working 
with existing walls, wiring, and 
plumbing as much as possible....


.... and then we met with our 
local codes official, and hired 
a structural engineer....


... and interviewed contractors 
and got some bids -- also 
known as "kissing frogs"....

Some days, okay, most days, we asked ourselves if we were out of our minds to consider buying this house and taking on this project.  Then we would look out at the incredible view of sea and sky, and decide the project was worth it.


And so, armed with bids and conceptual drawings and codes and engineering research, we made an offer on the beach house we already loved...


.... and the seller turned us down.


Tuesday, May 1, 2012

Jimmy Choo Knock Off Upcycled Handbag: Another Oldie, but Goodie


In honor of spring, I thought it would be fun to revisit the Jimmy Choo knock off handbag.  Well, it's not a complete knock off, but it's definitely inspired by a gorgeous leather Jimmy Choo bag!

It was time for a new "city purse".  I've tried lots of different bags, and have found the handbags that worked in my old suburban life, don't always work well in the city.  For instance, I need a bag with a long strap, that can be worn across my shoulder (and on the rare occasions that I drive somewhere, it's nice to be able to use the long strap to swing the purse out the window to swipe the card reader when leaving the parking garage -- so the people in the cars behind me don't get angry and start honking their horns while I'm frantically digging through my bag, removing the contents, in search of the little magnetic card.  Not that that has ever happened to me...).


The "city purse"  needs to hug close to my body when I'm digging through bins at my favorite GW Outlet, or trying on shoes at the Nordstrom Rack; and it needed to distribute weight evenly when I'm walking downtown.


So, when I found this bag at the local GW, I thought it might work.  It has tons of function, is light weight, and is comfortable to wear.  And navy handbags are definitely making a comeback in the higher end stores.

  • The Problem?  The bag is dated and not very attractive.
  • The Solution?  Draw some inspiration from favorite designers; in this case, Jimmy Choo.


  • The Resources?  These two thrifted leather purses, with broken straps --  99 cents each!

  • The Method?  Cut the extra purses apart using strong scissors (but not your fabric scissors).  Cut away all the piping, zippers, lining, etc., so that you are left with only flat pieces of leather. 
  •  The Flowers?  Cut flower petals from the leather.  I free-handed mine, but you could easily draw up a pattern.  You will want two sizes,  the larger petals will form the larger flower, and the smaller petals will form a smaller flower.  Cut two circular "bases" about two or three inches in diameter, on which to build your flowers. Use Gorilla glue to gather the base of the petals into a shape you like.  Secure with clips until the glue cures.  When all your petals are ready, they can be glued to the round bases you cut earlier, to form a nice flower shape.  You will make two flowers, and glue the smaller one right on top of the larger one.


  • The Leaves?  I cut mine free hand, but you could use a template, if you wanted.

  • The Flower Centers?  Just cut some long narrow strips and braid them, then coil them around and around until you have the desired size.  I secured this with a small amount of Gorilla Glue.
  • How about a tassel?  If you want a tassel, cut a neat rectangle from your flat leather pieces, then cut a fringe into it.  Cut one narrow strip of leather for a loop.  Begin tightly rolling the fringed rectangle, securing the loop in the center of the roll with a small amount of Gorilla Glue.  Secure the end of the roll with glue, and clip until cured.  Work carefully, as the glue dries white, so you don't want any of the glue to be visible.  The tassel can be secured to one of the zippers with a jump ring.

  • Putting it all together.  Decide how you want to arrange your elements.  When you find an arrangement you like, you can secure the whole thing to the purse with Gorilla Glue, or for more flexibility, secure the flower and leaves together onto another scrap of leather and add one or two large pin backs.  Use the pin backs to secure the flower to the bag.

And there you have it!  Three dated leather handbags, up-cycled into a new Jimmy Choo inspired bag.  Total cost for this project was around $5.00!


Thanks for stopping by House Revivals.  I hope you are all enjoying the "oldies, but goodies" series!